
Davey and I began another pinterest inspired craft the other day. Davey had fun helping me with the first step, but he wasn’t too interested after that. It’s a little tedious though for a 5 year old. I, on the other hand, am having way too much fun with photo transfers.
We followed the tutorial provided by Elsie Flannigan on her blog. She has a really fun blog. I used to follow her more when I was scrapbooking. I’d not checked it out in quite awhile, but then I found her photo transfer tutorial on pinterest. She had such a positive response that she wrote a follow up FAQ to photo transfers which you can find here.
She provides great photos and explanations of how to do a photo transfer. It’s not too hard to do; you just need a little patience. It requires only gel medium, a photocopy of a photograph, and a canvas or, as I found out, just a piece of wood.
Davey helped me apply the gel medium to our first canvas.
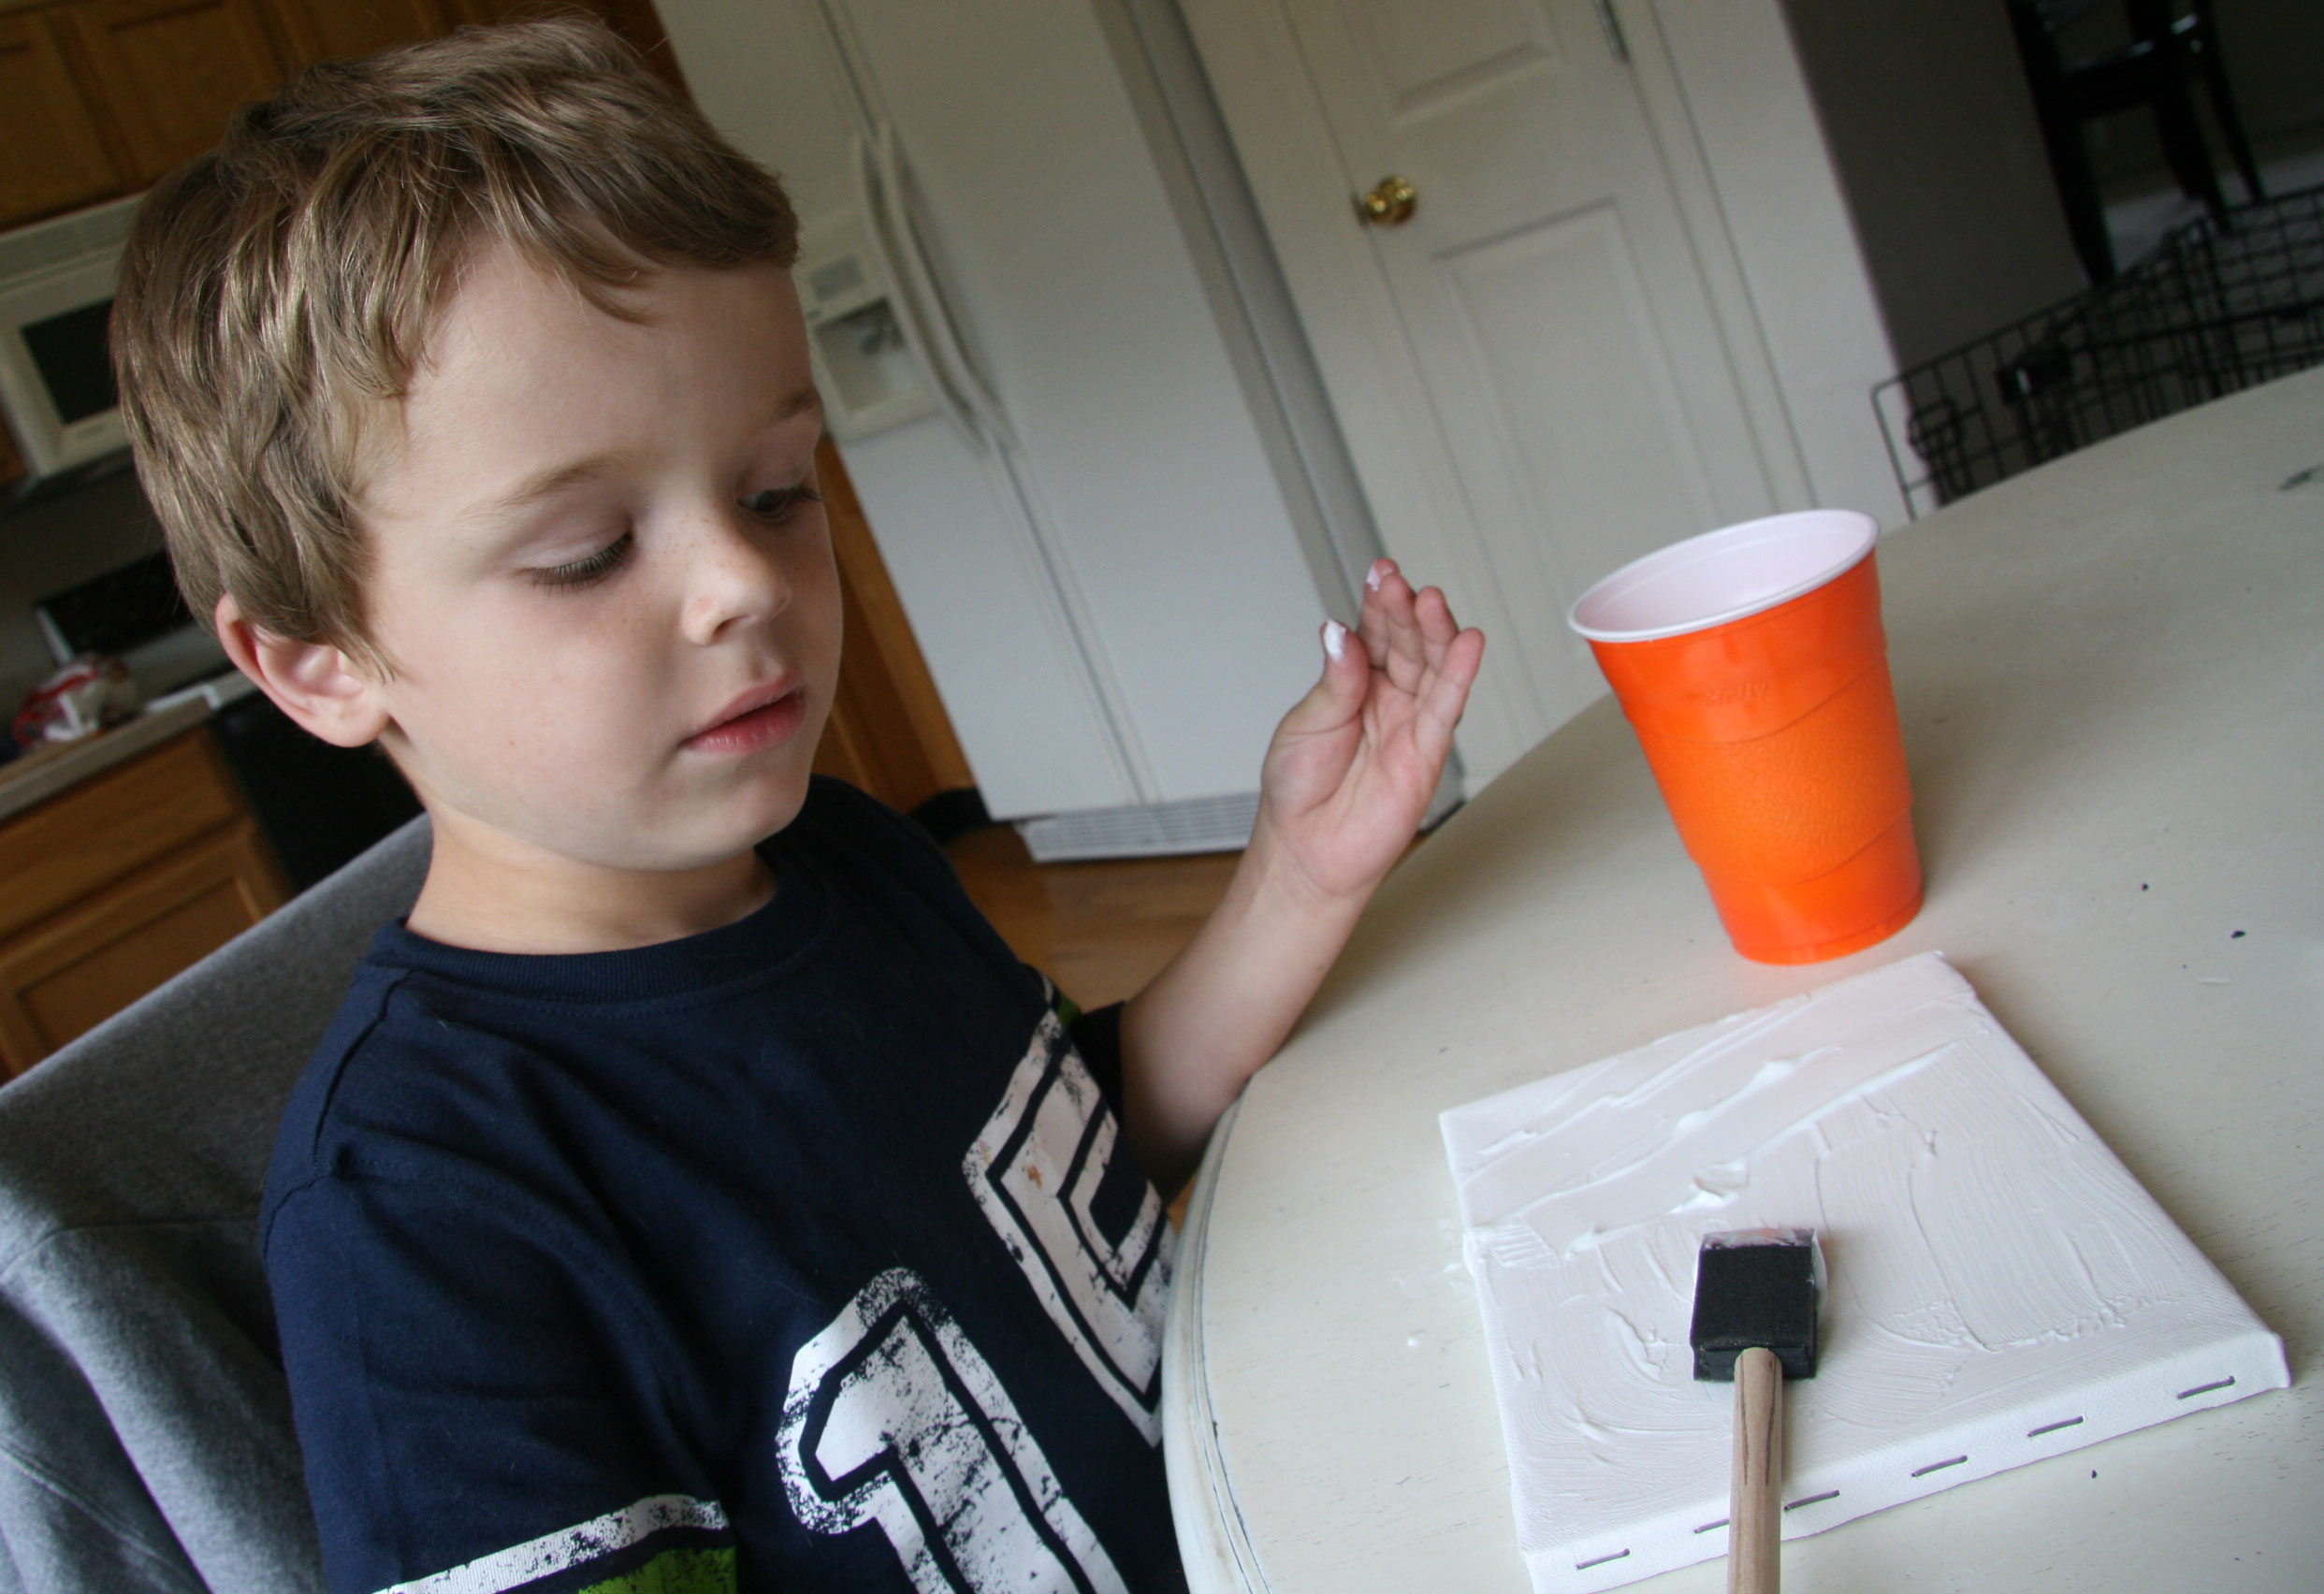
After we applied a thick coat of gel medium, we took the photocopy and placed it face down on the picture. I read that the photograph should be copied onto just cheap copy paper. I have experimented just with black and white so far. I want to try color next.
We waited several hours for the gel medium to dry. I even let a couple of them go overnight. Then I took a spray bottle and sprayed the paper. I let it soak in a little and start to loosen up. Then I carefully started peeling and rubbing the paper off. The image stays behind. I had to be careful though otherwise, I’d pull off some of the photo. I did this a few times, but it just gives it a kind of aged look – I like it. This is the tedious part that takes awhile. I had to keep respraying to get off all the small bits of remaining paper.
I was pretty happy with my first transfer.
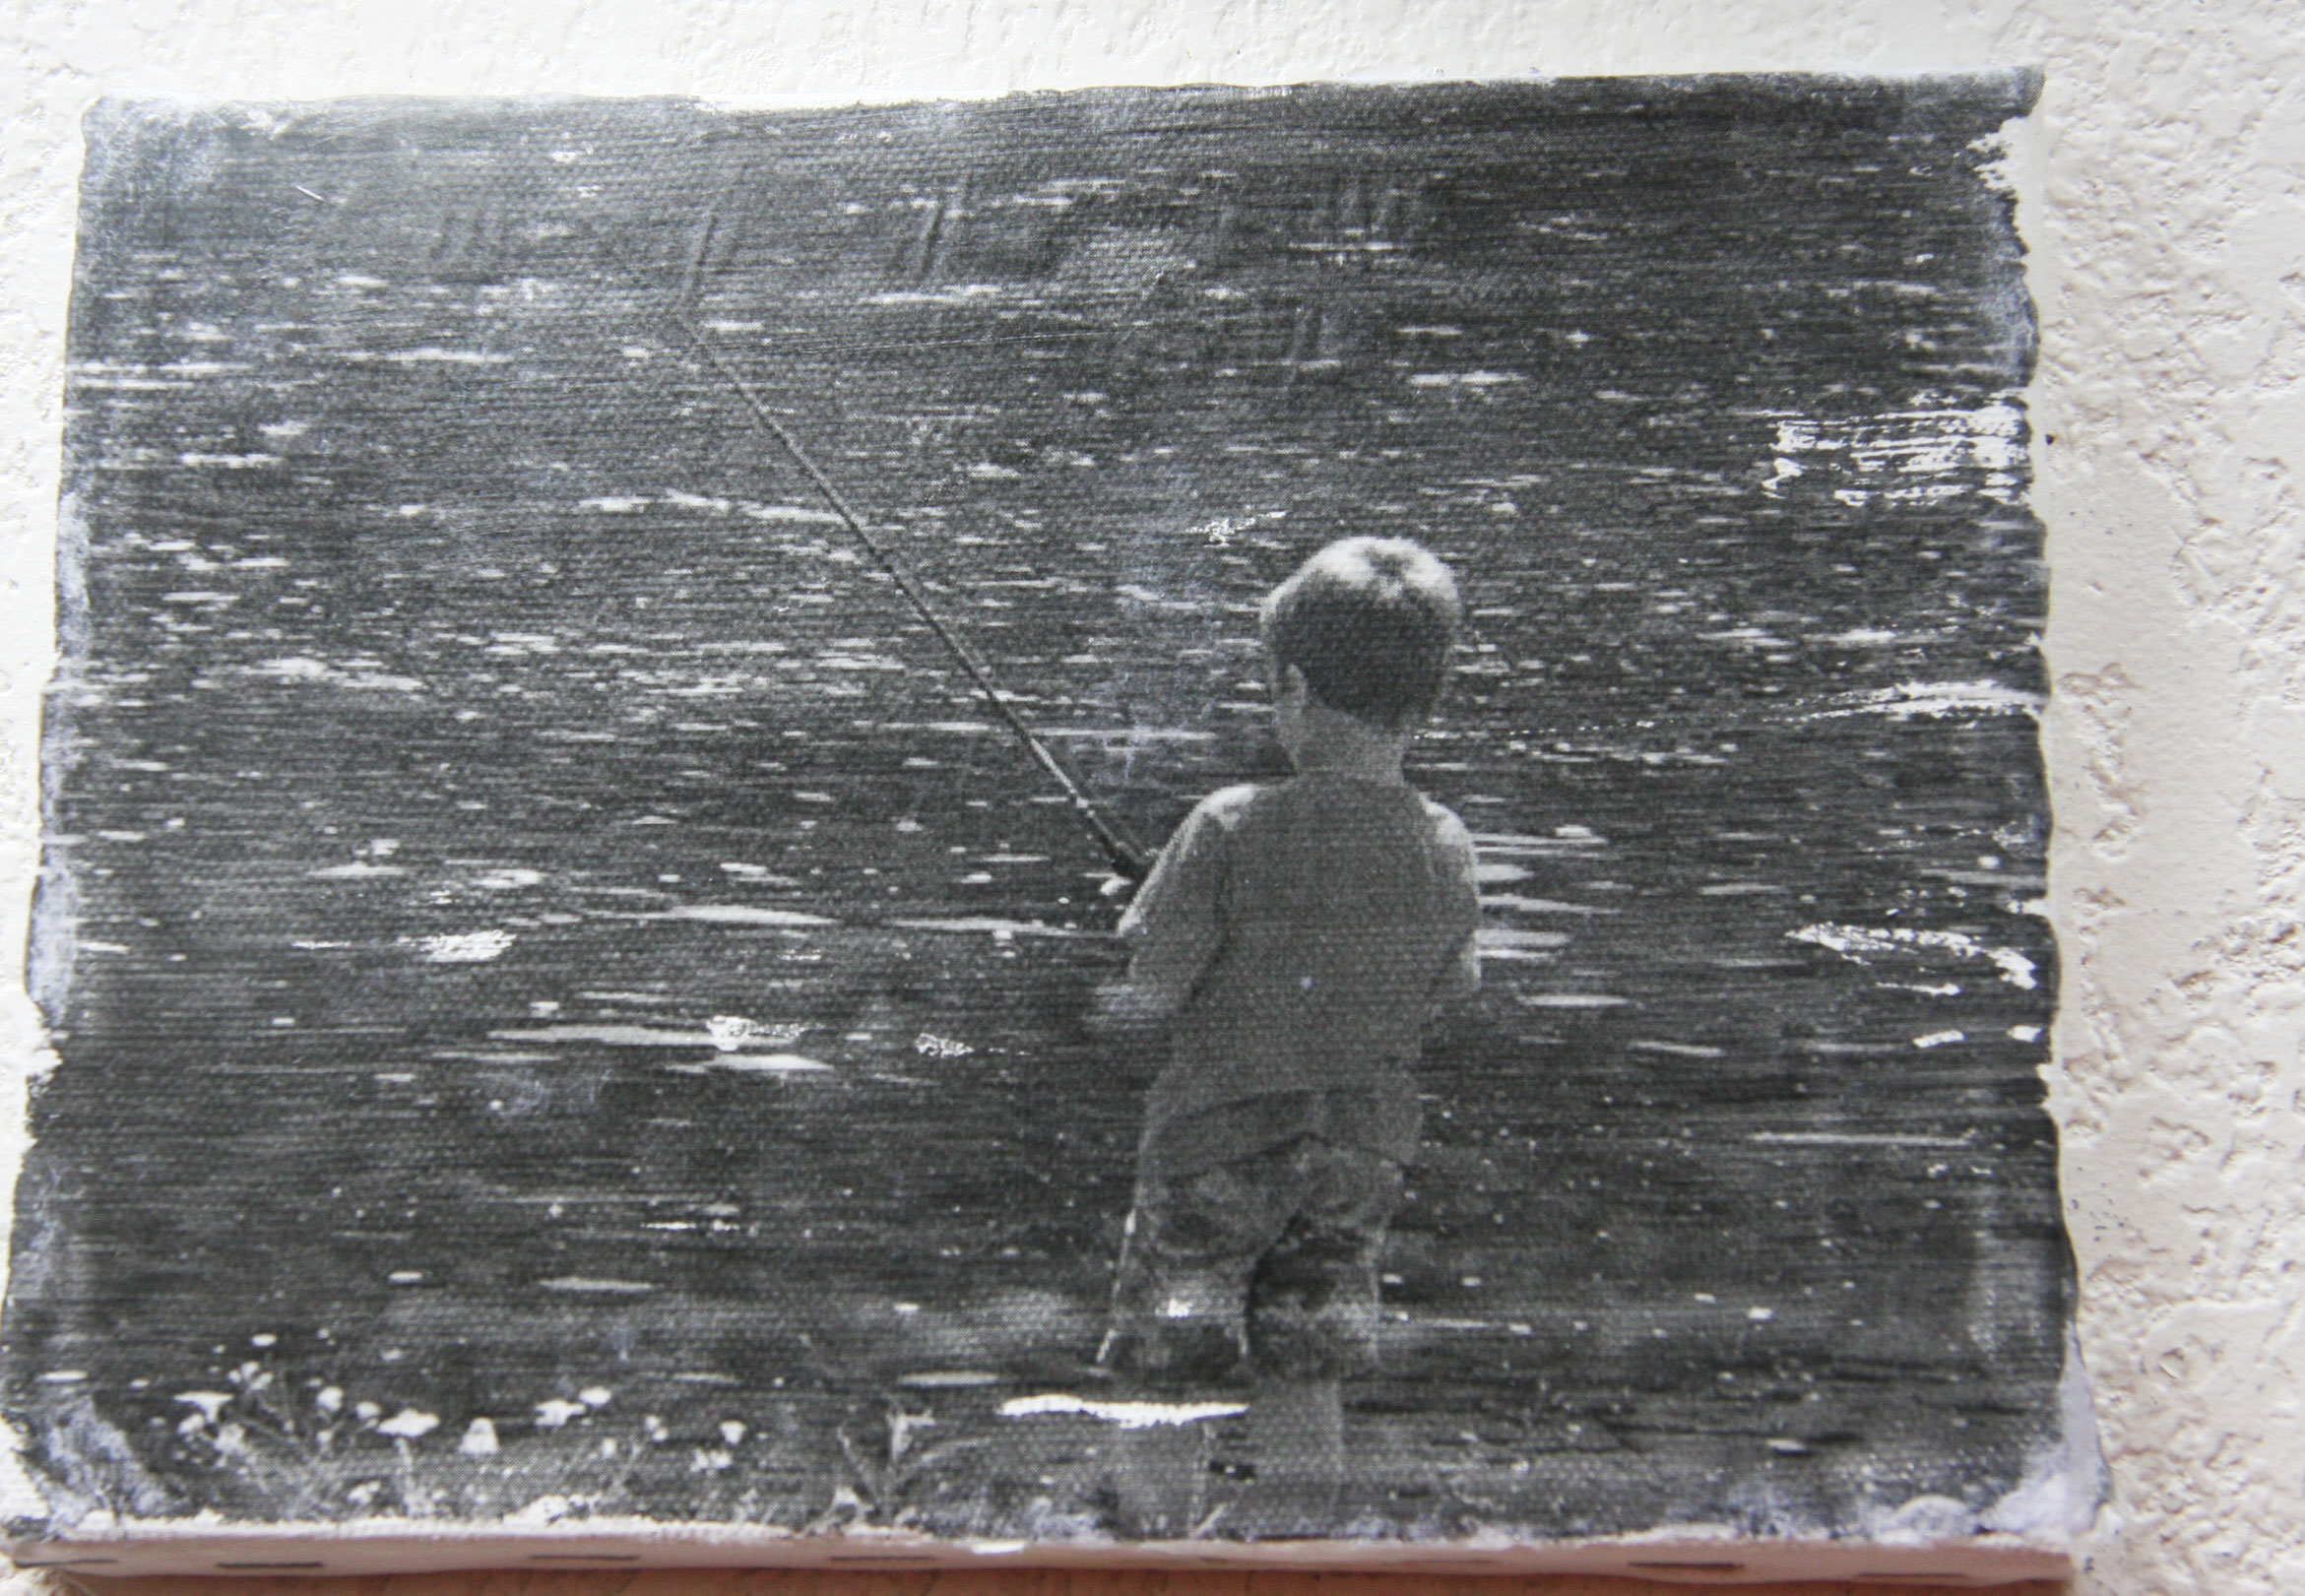
It’s kinda wrinkled at the top and it’s a little messy still around the edges. When the photo is wet, it’s hard to know what it will look like dry, and so I missed a few spots. While it was still damp, I finished it off with another coat of gel medium.
At this point, this became my fun project for me. Davey wasn’t too interested in the delicate process of pulling the paper off. It’s not too easy. He’d rather be goofy.

Next I tried another favorite photo. This is my current header photo for my blog page. I love my little heart shaped tree. I took this picture in Boulder at Chautauqua Park last summer.

I like the beat up edges. It’s still kinda wrinkly. I need to make sure and smooth the photo even better.
So for my last transfer, I tried a little 97 cent wooden plaque. I think it might be my favorite so far. The wood gives the picture a little bit of a warmer hue, and I liked that. I just plain love this picture anyway, so it was fun to see how it would transfer. It was not anymore difficult to transfer to wood. I think it might have even been a little easier.

This transfer is a little bit beat up around the edges, which I like, but it’s not too wrinkly – came out pretty smooth.
I’m just having a lot of fun with this! I’m looking forward to hanging them up in my craft area once we move.

Those pictures are great! What a neat idea.
Pretty cool. AND, you’ll have some permanent proof that Davey really was that little. (Sometimes when they get big, it’s hard to remember. LOL)