Broomstick Lace Infinity Cowl: A little “how-to”

A few weeks ago, I discovered Broomstick Lace.

broomstick-lace-shed

I had never heard of it before so I had to try it.  It involves these two tools:

broomstick-tools

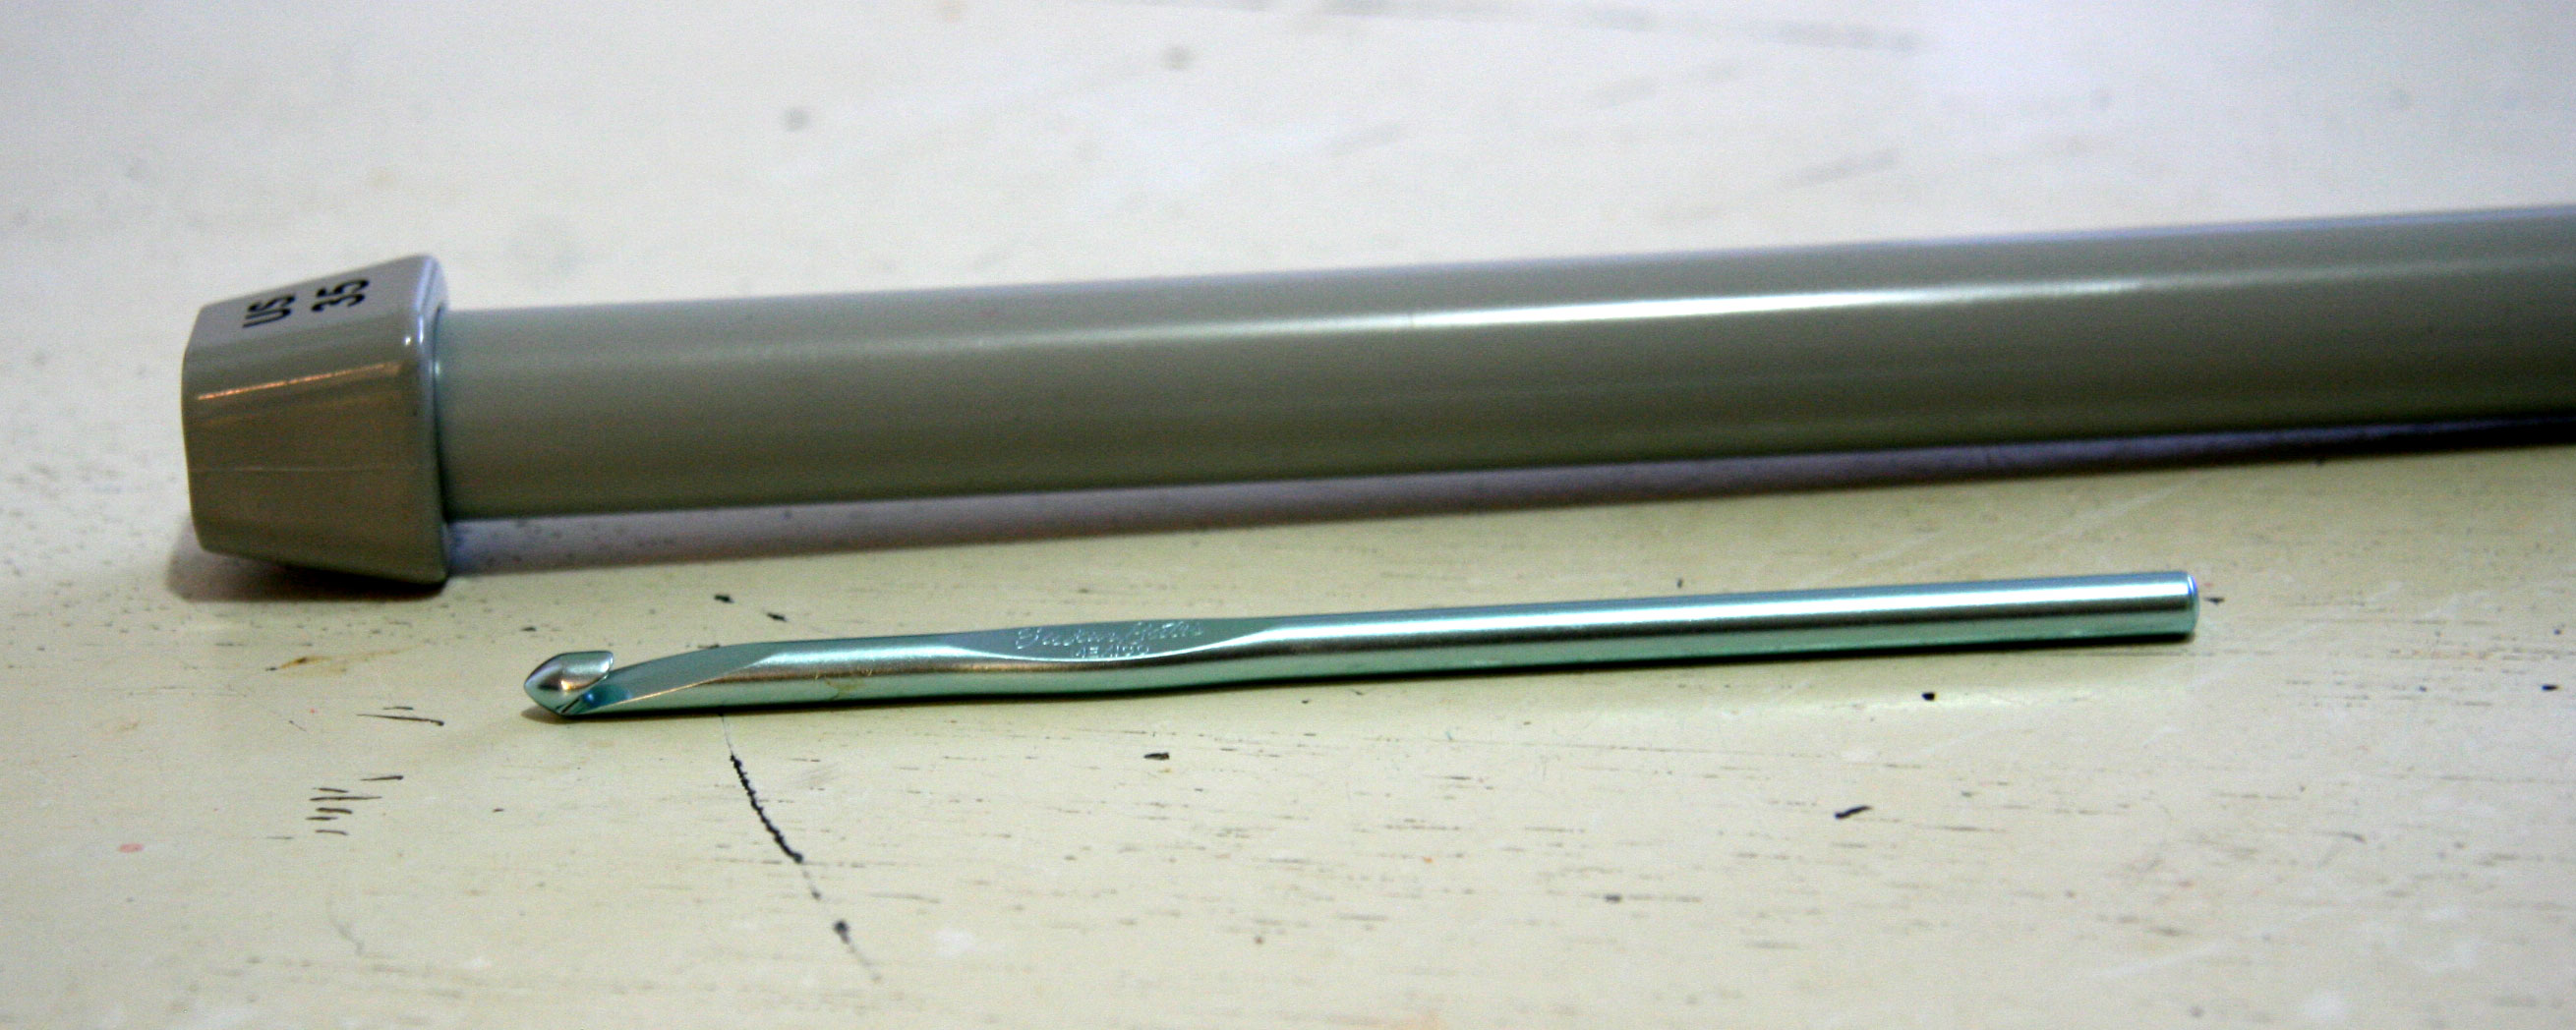
My “broomstick” was the 35 mm knitting needle, and I used a size I crochet hook. Next, I followed a great free tutorial from craftsy.com:  How to Crochet Broomstick Lace.  After I played with the stitch a little, I decided it might be a great stitch for infinity cowl.

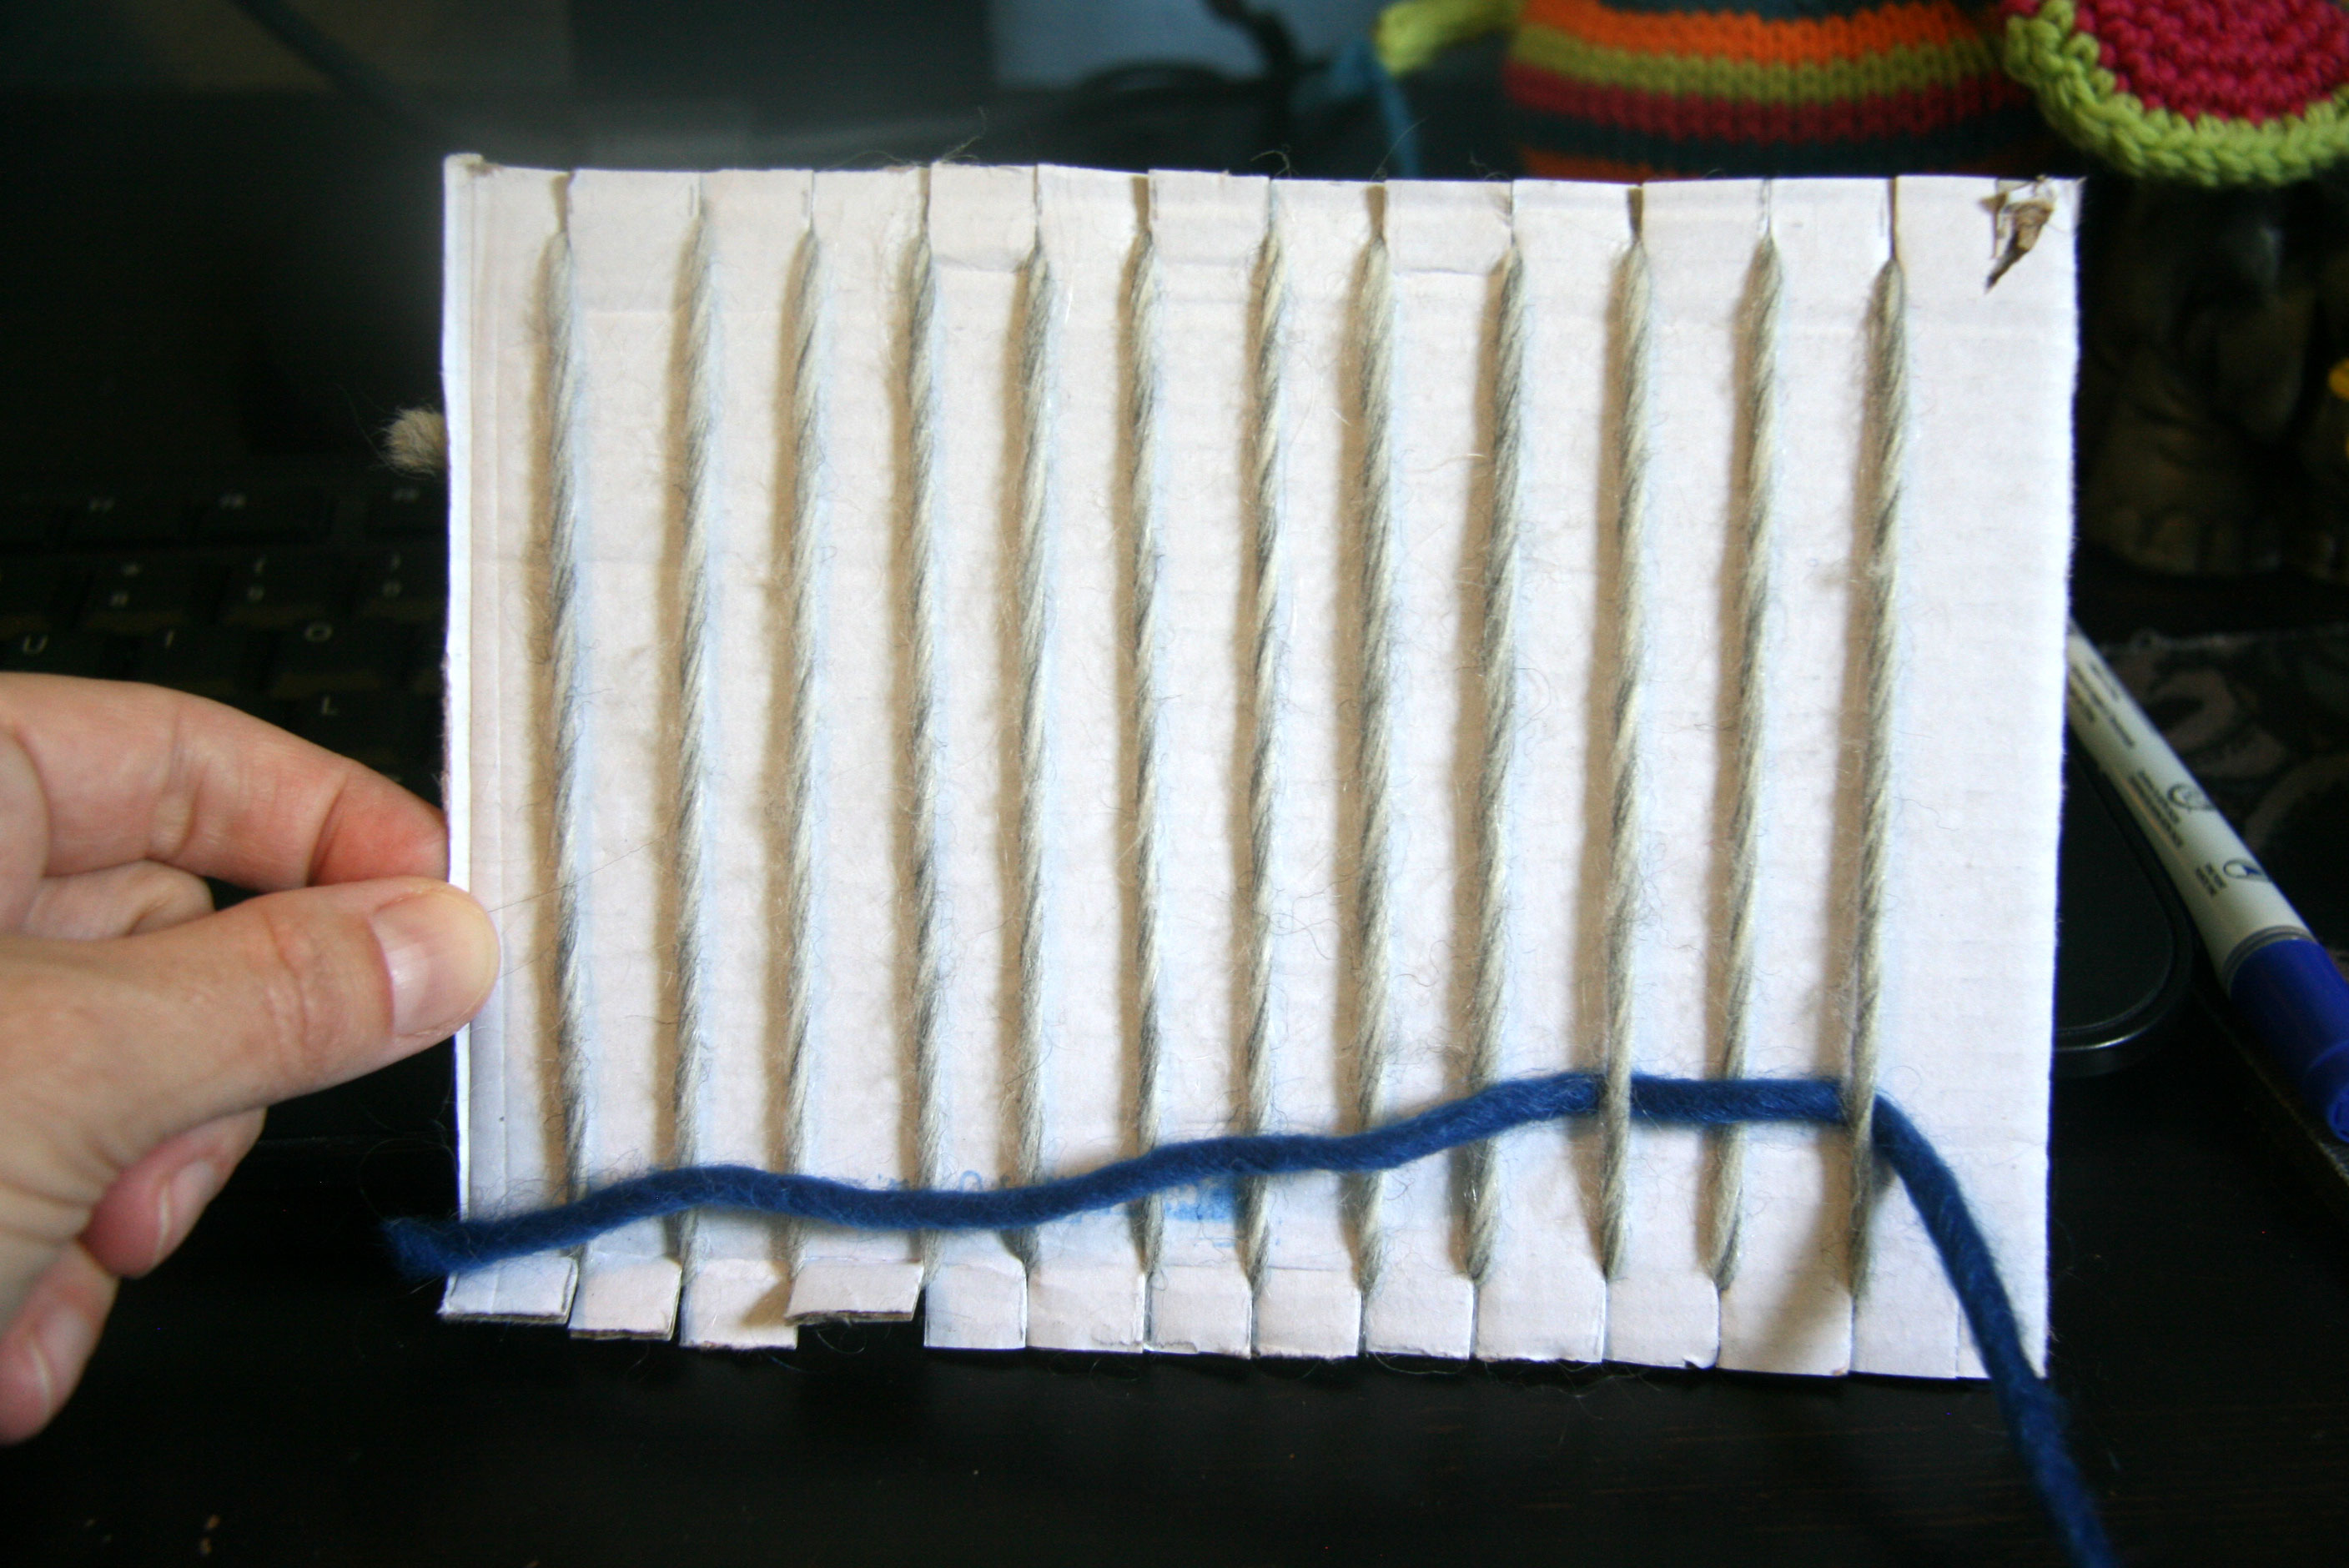
The tutorial provides very clear instructions, but here’s just a brief introduction: I made a chain and then single crocheted across.  Next I pulled up stitches onto the “broomstick”.  This is a little awkward and unwieldy at first.  I wasn’t sure how to hold the giant knitting needle and the hook, but with some practice I got it.  The tutorial has great photos which explain in detail how to do this.

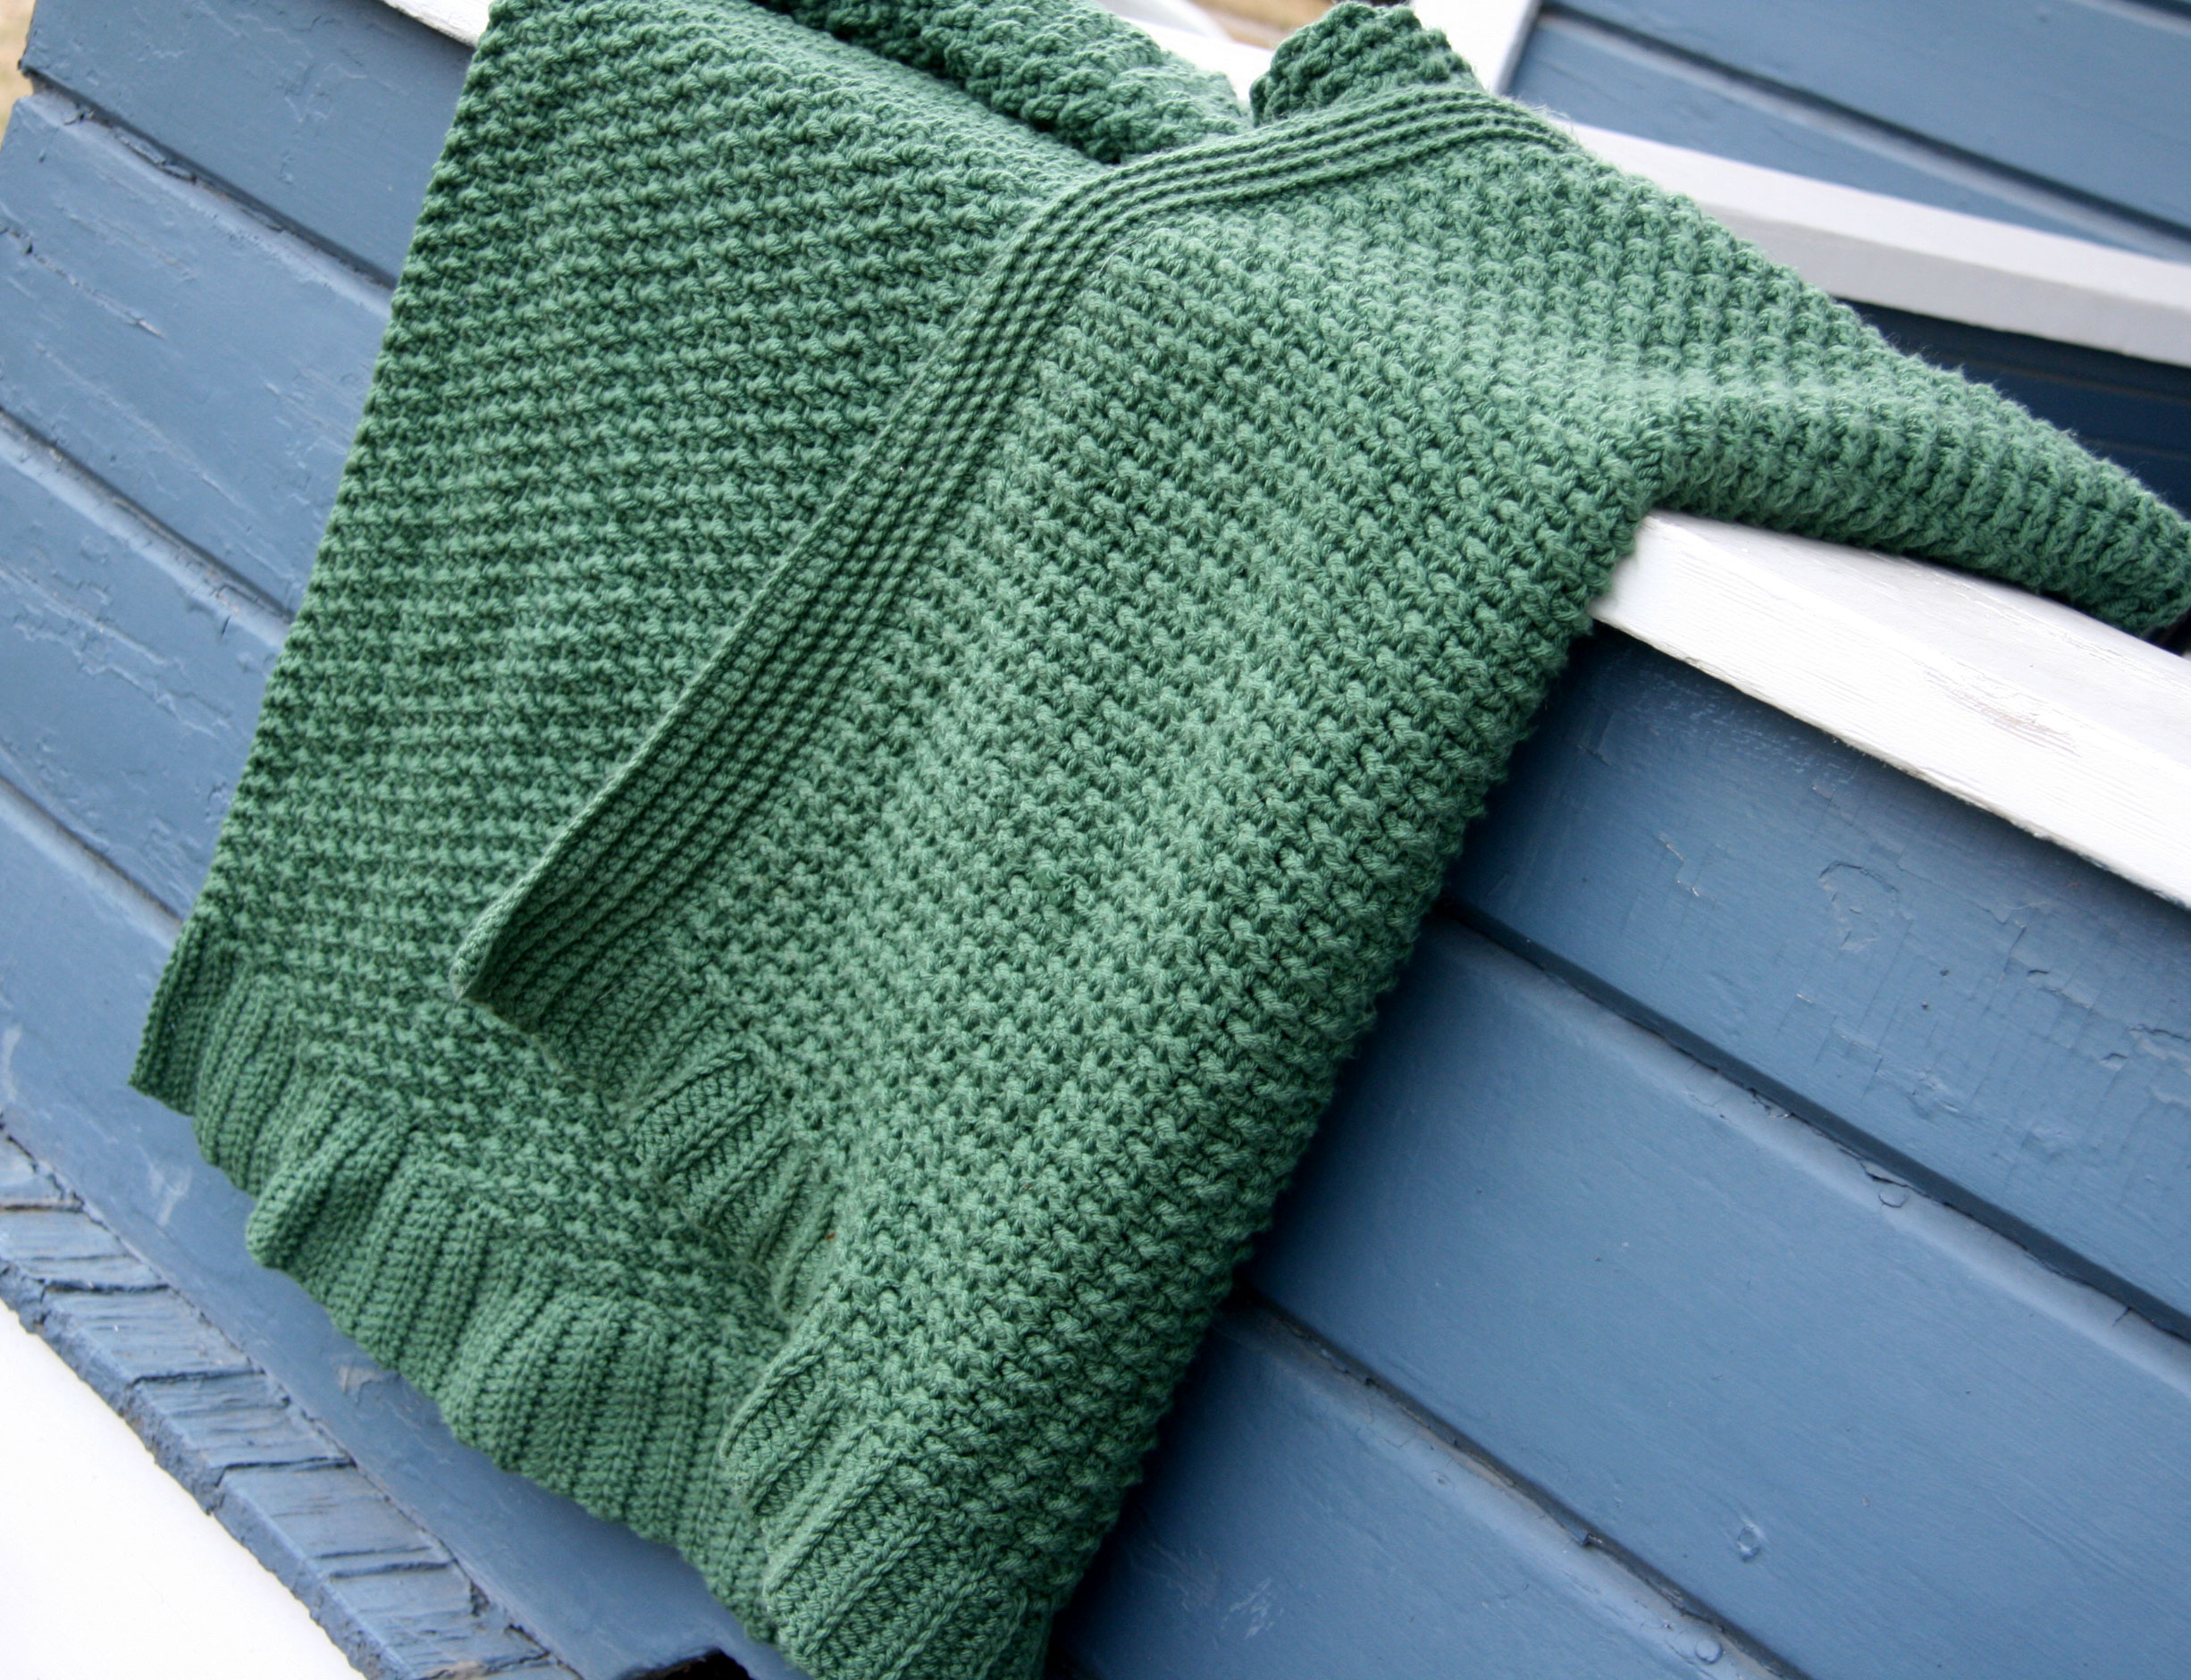
After I put all the loops onto the needle, I got to slide them all off!  Then I crocheted them in groups of 5 (at least this is what I did for my pattern).  The end result looks like this:

broomstick-close-2

I didn’t have an exact pattern to make a cowl in this stitch, so I had to play with width.  I made a chain of 40 stitches for the black cowl, and this made a width of 8 “clusters” (about 9 inches wide).  I wanted to try a more narrow cowl, so I made the red one by making a chain of 30 stitches, and this cowl was 6 “clusters” wide (about 7 inches).

I love the way this stitch looks.  It made for a very squishy and warm cowl.

I made the cowls about 64 inches long.  I used mattress stitch to sew the ends together, but I think whip stitch would work fine as well.

So the basic pattern is:

Supplies:  35mm Knitting needle. Size I Crochet hook.  Worsted Weight yarn.  I used some Lion’s Brand Heartland that I had in my stash.  (You could of course play with different weights too.)

Follow Craftsy.com Broomstick Lace tutorial to learn the stitch.

Wide cowl:  Begin with a 40 stitch chain.  There will be 8 clusters of 5 stitches.  Repeat the row to desired length.  I made mine 64 inches long.  Sew ends together.

Not Quite as Wide Cowl:  Begin with a 30 stitch chain.  There will be 6 clusters of 5 stitches.  Repeat the row to desired length.  I made the red one 64 inches long as well.  Sew ends together.

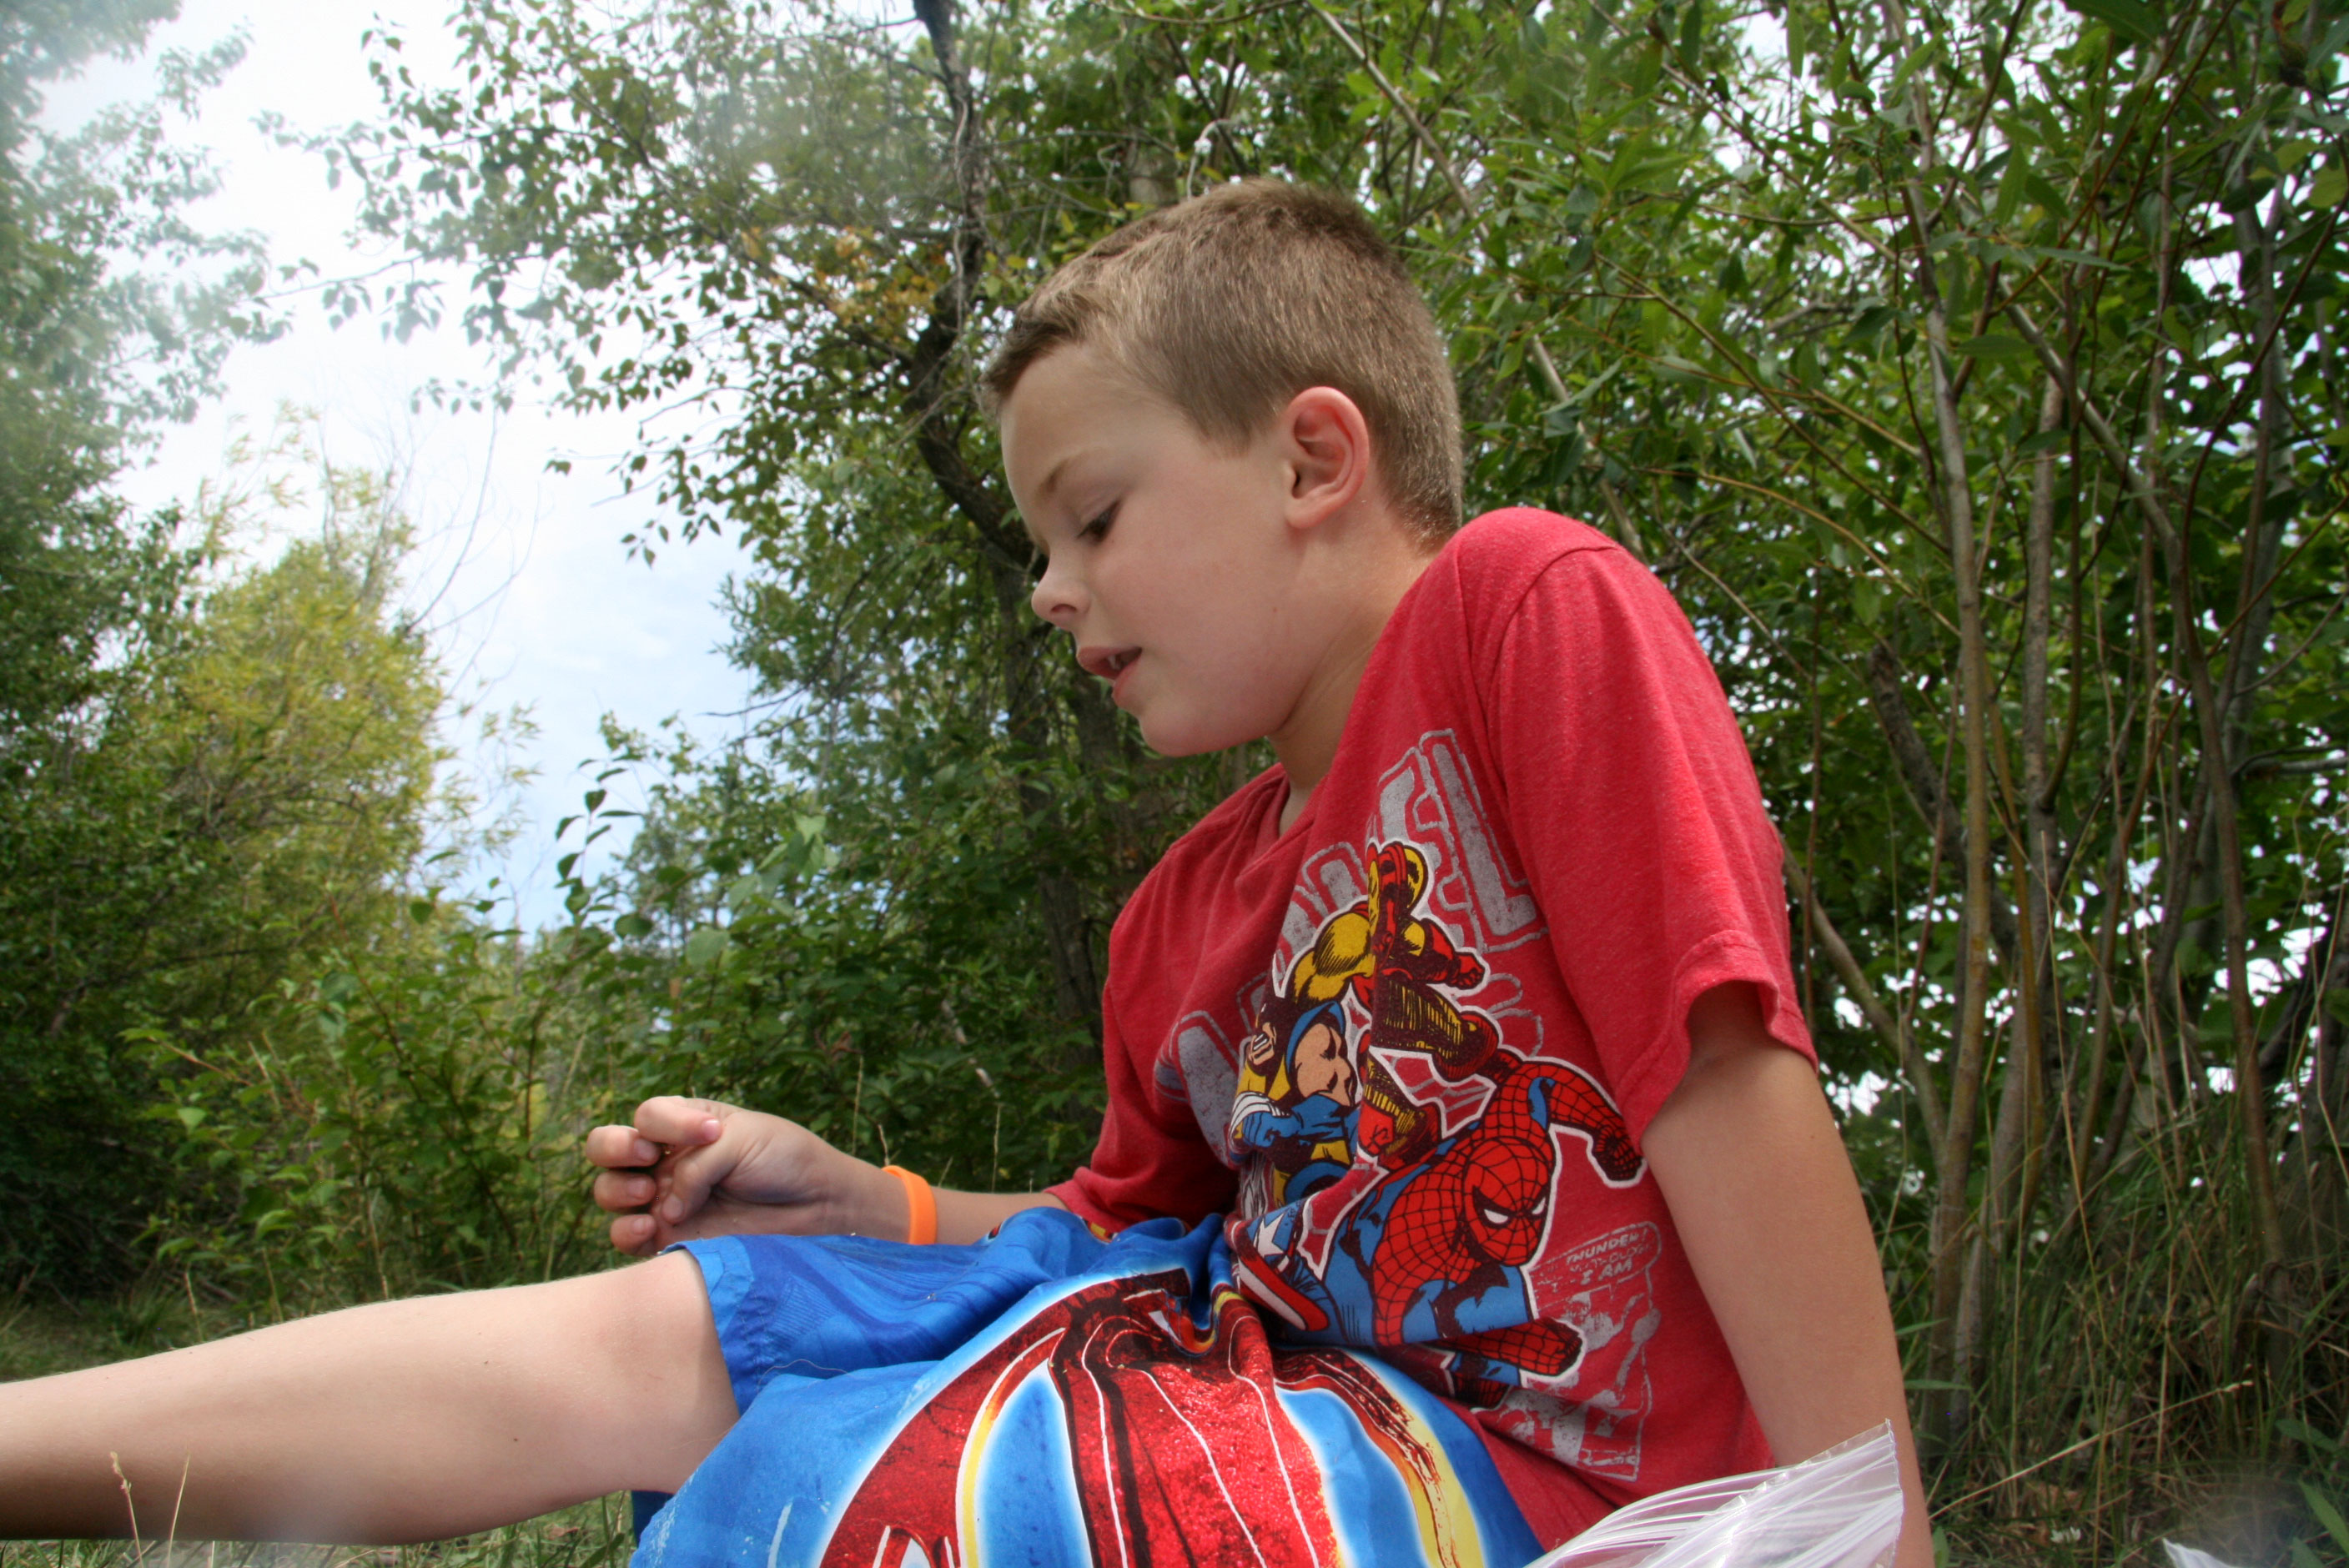
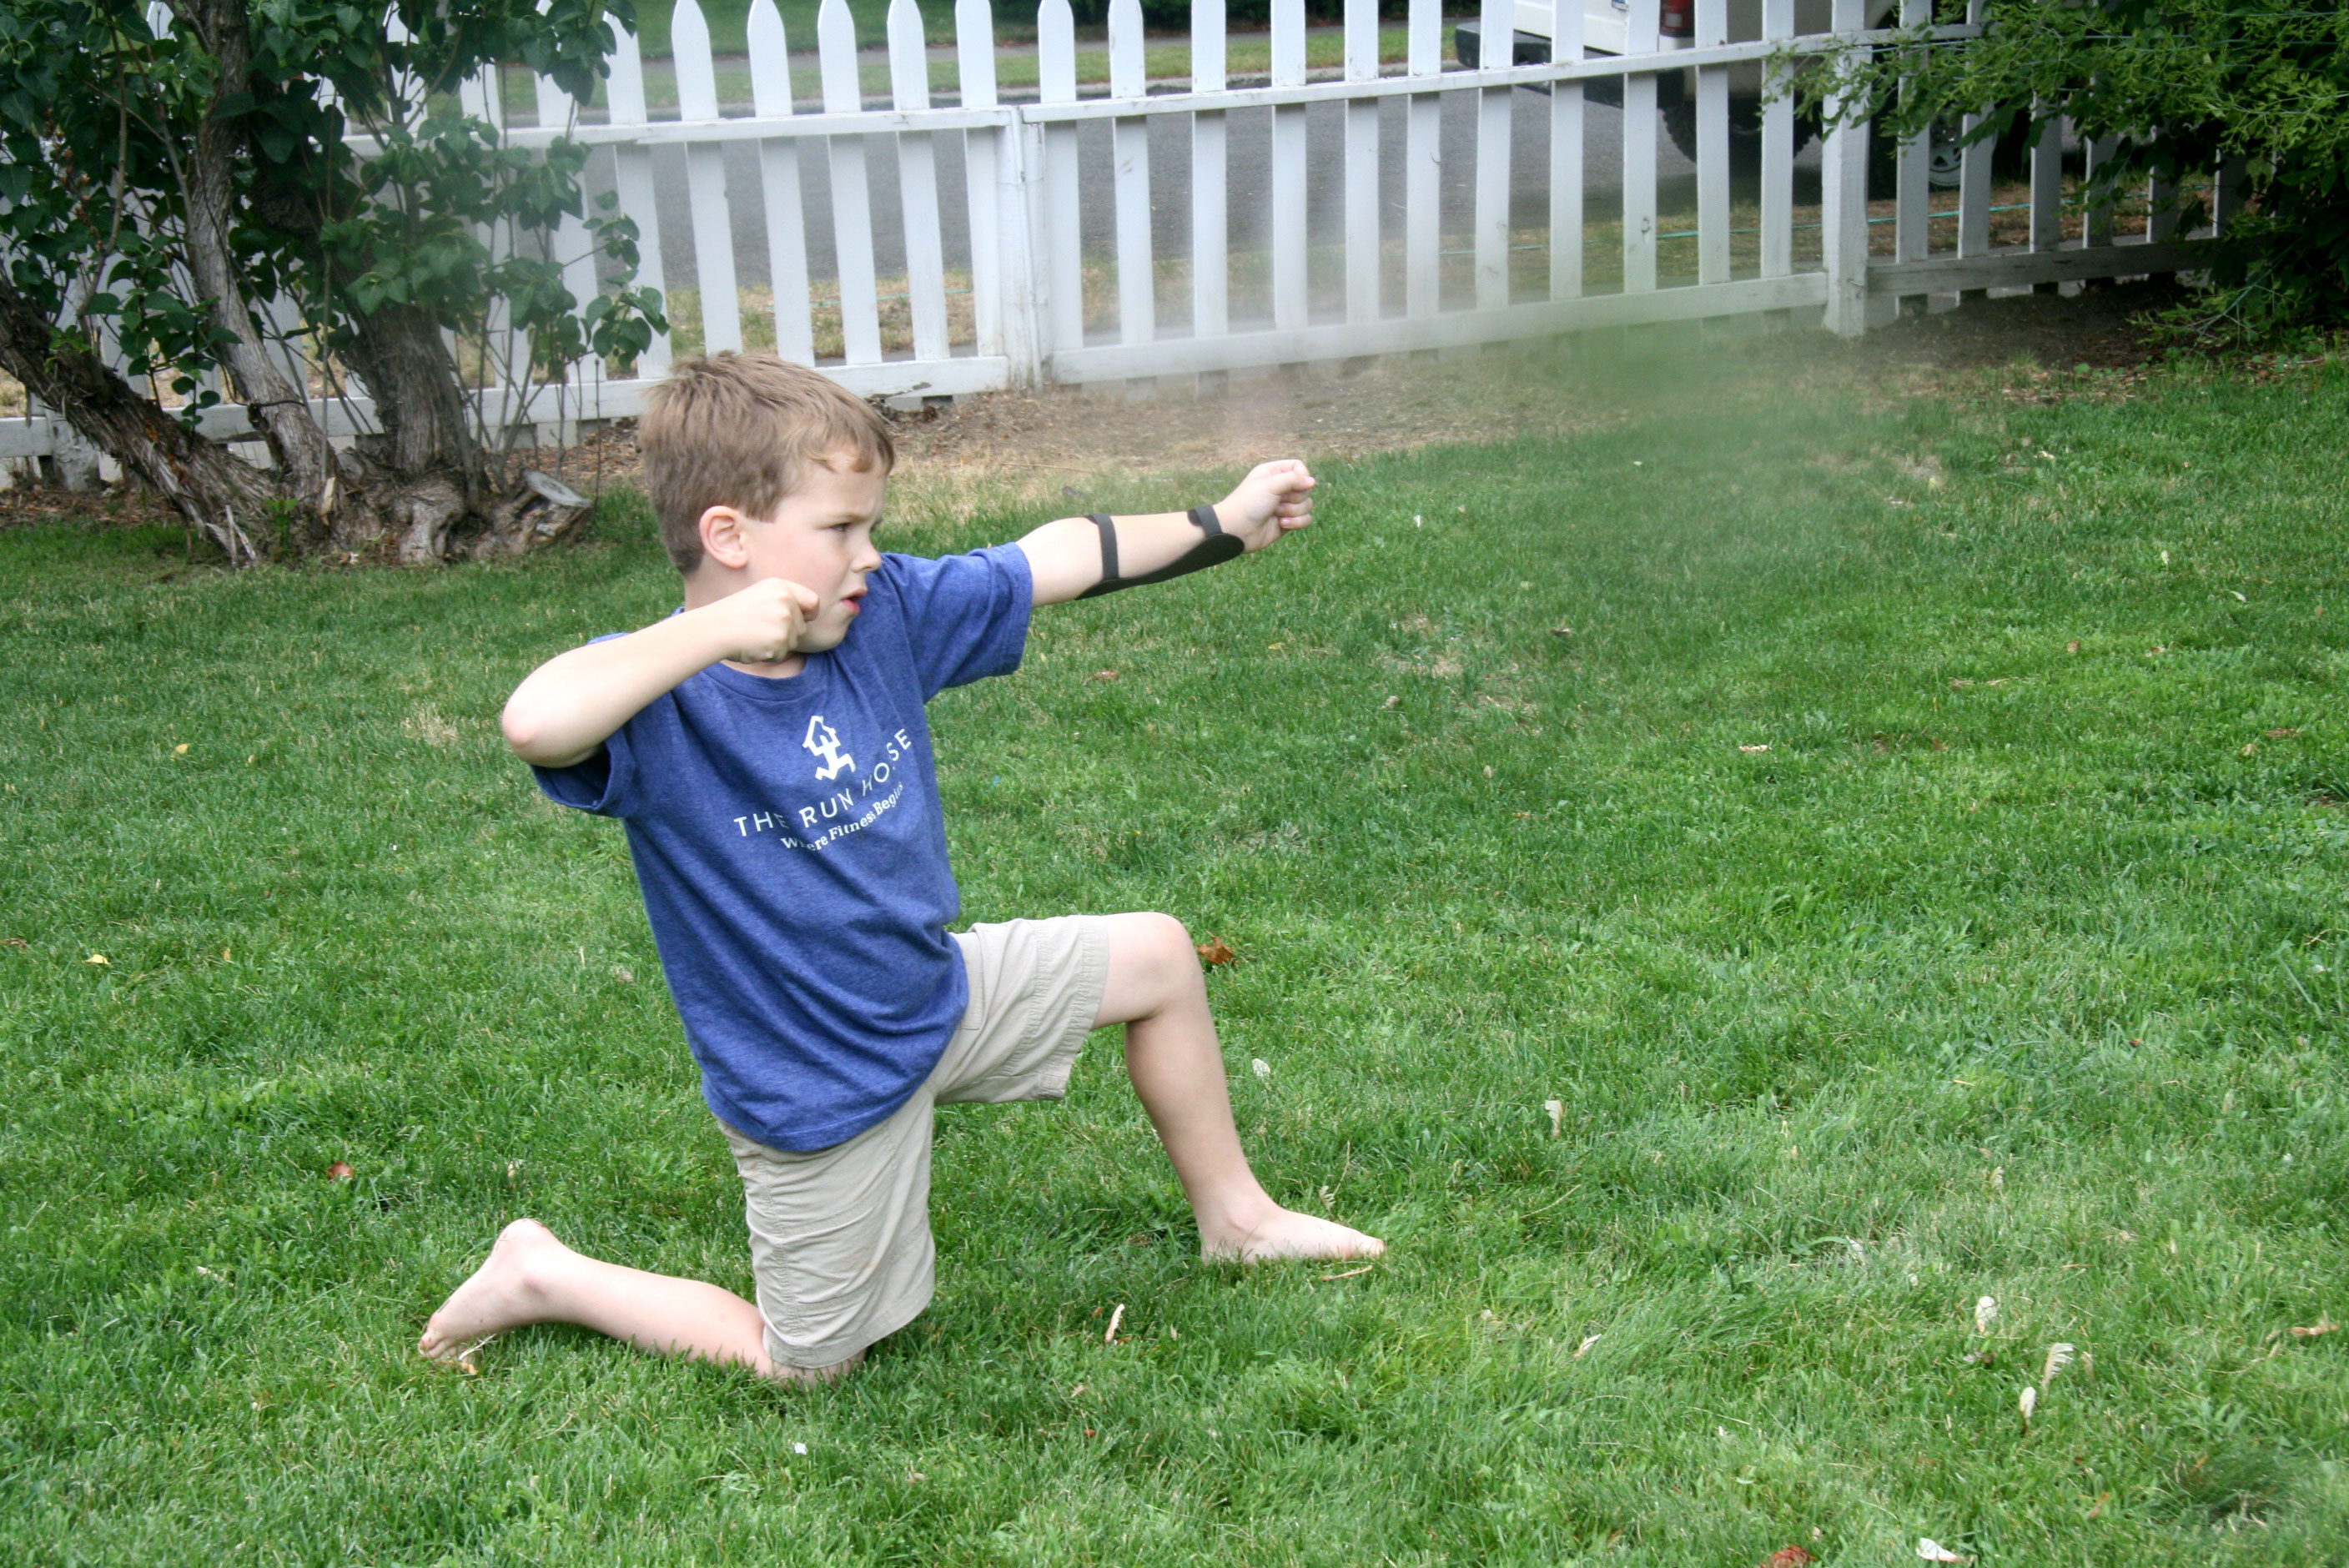
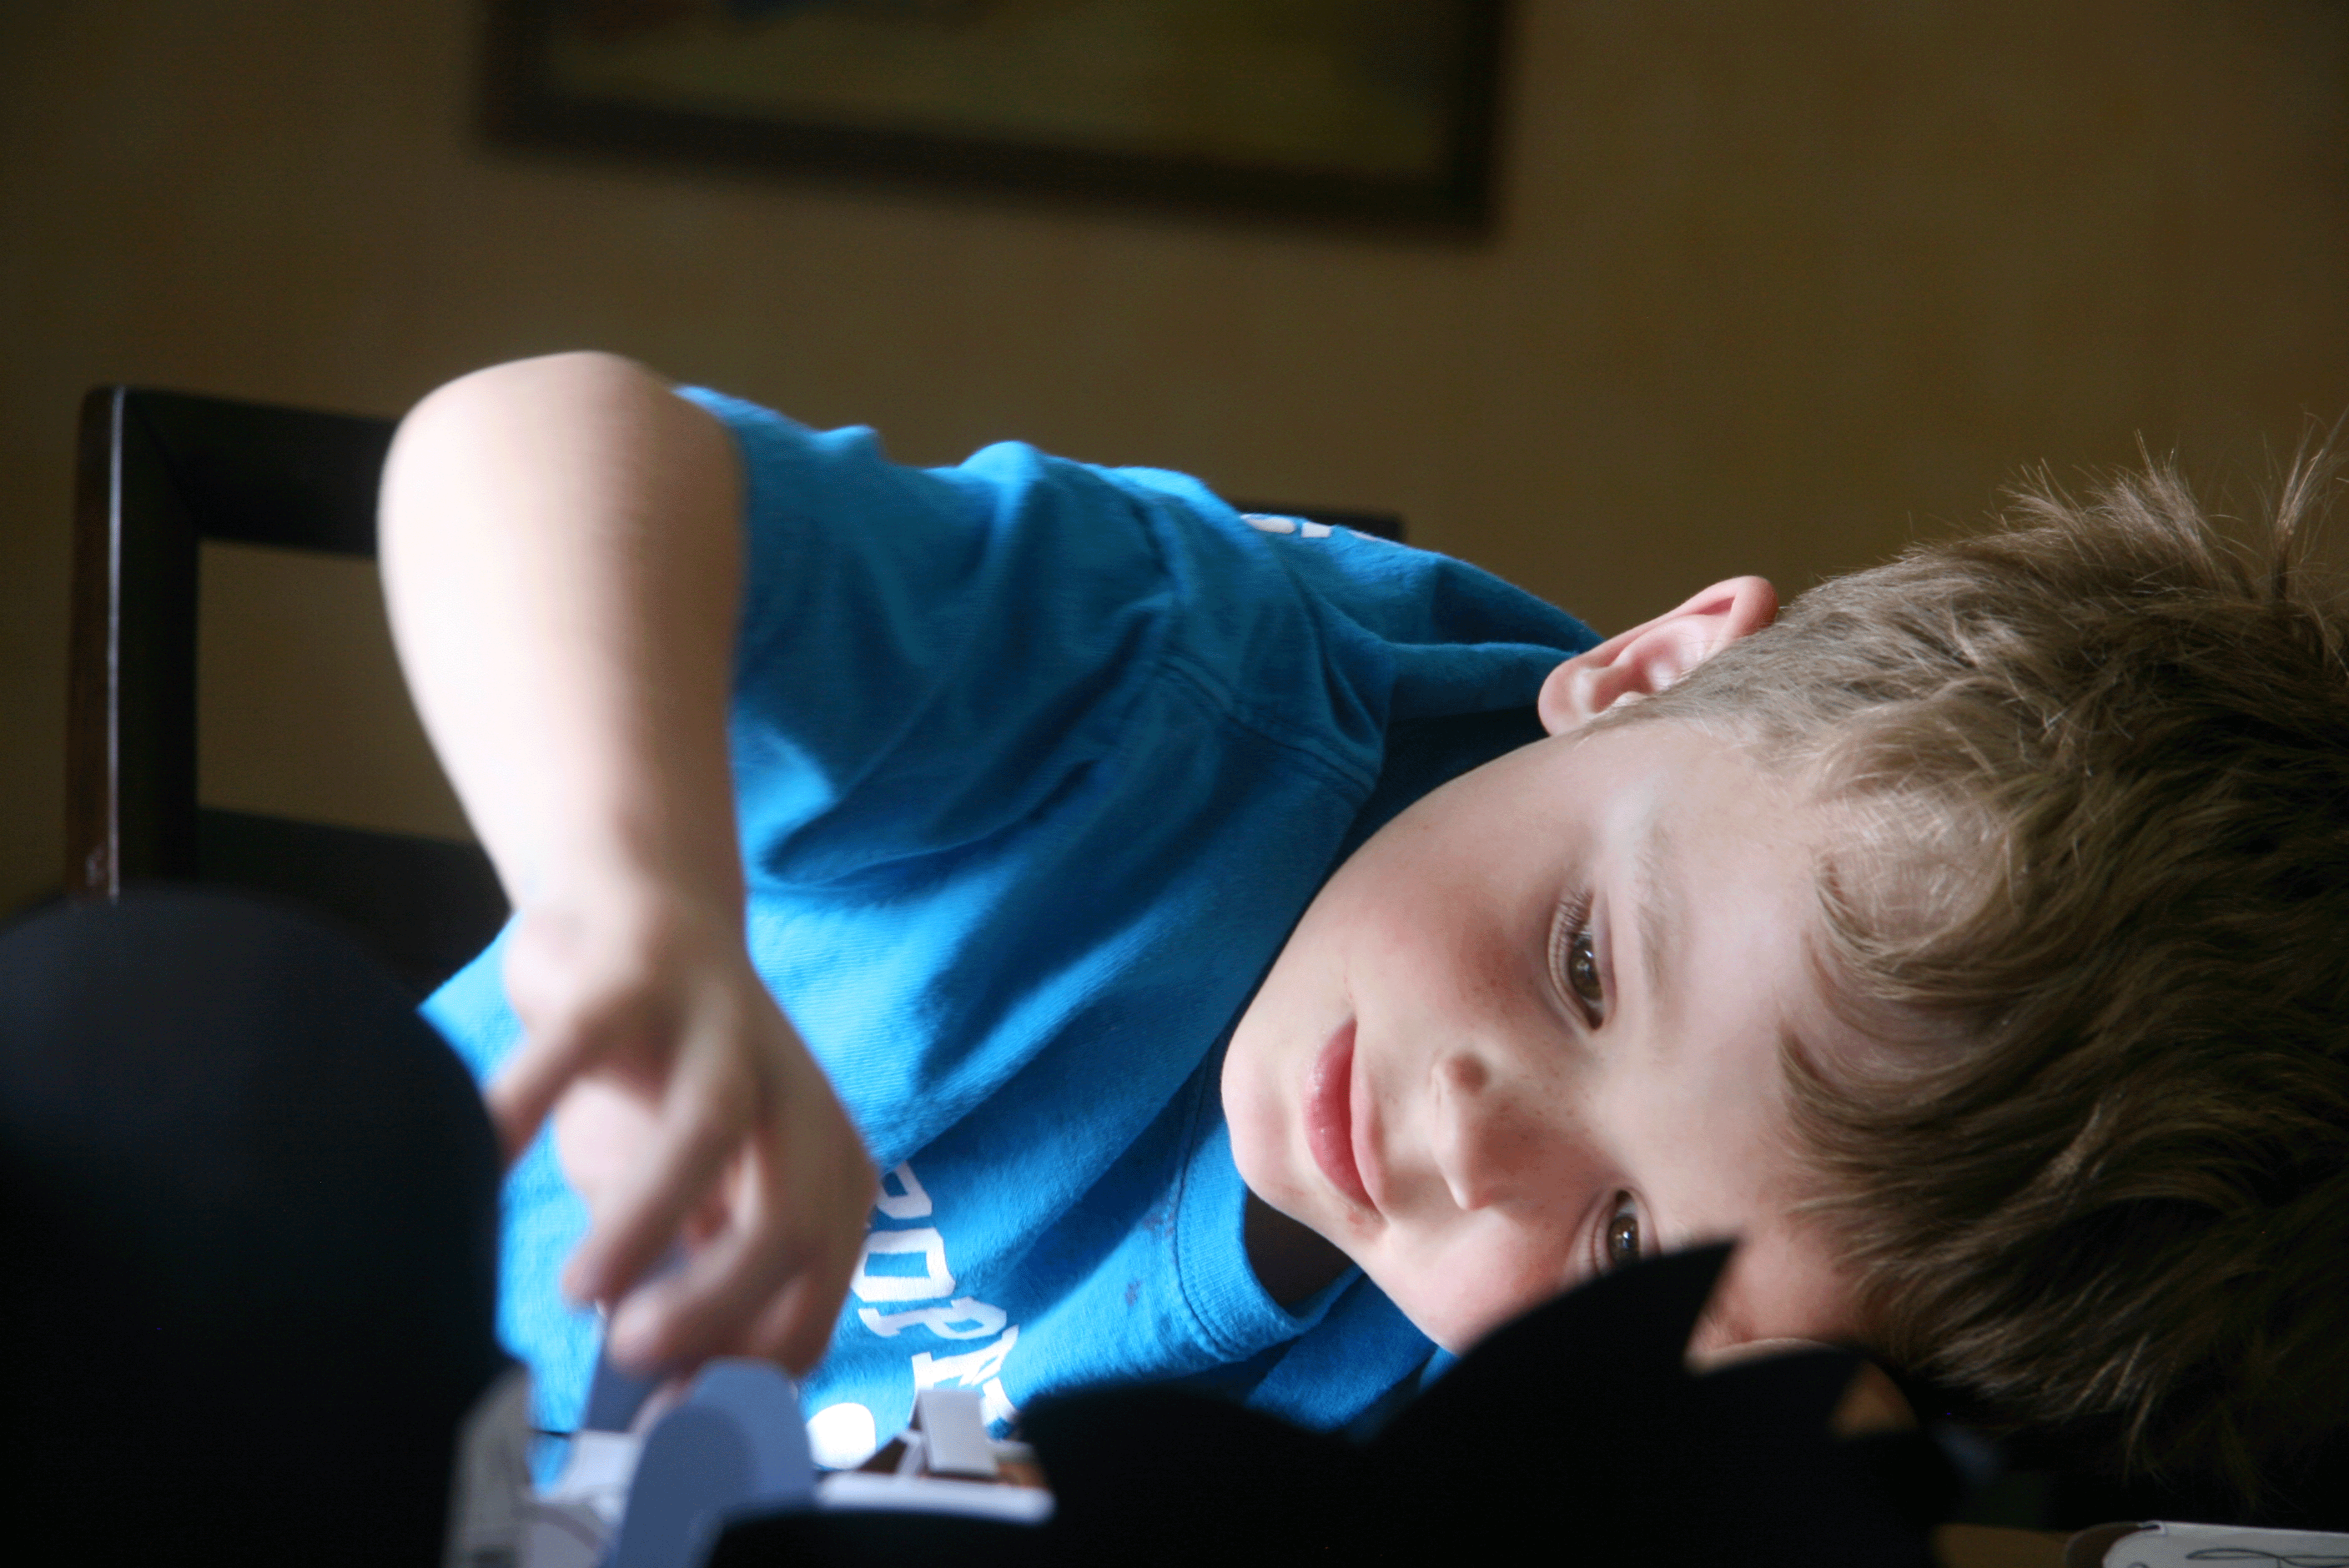
I couldn’t get any great pictures of me modeling the cowl so I asked Davey to help me. He was being silly because I asked him for a big grin.  I got it.

photo (7)

I highly recommend trying out broomstick lace.  It’s a fun variation of crochet, and I really love the look of the stitch.  It works great for an infinity cowl as well!

Crochet Mystery

A couple of weeks ago I was going through some of my totes of craft things.  I confess to having accumulated many abandoned projects throughout the years.  I found partially completed counted cross-stitch, embroidery, quilting and crochet.  I always think that one of these days I will return to these projects.  Maybe I will.

So as I was digging through my totes, I came across this crocheted afghan that was nearly finished.

crochet-blanket


It is a beautiful stitch that has resulted in a really warm afghan.  Here’s the problem.  I have no idea when I made it.  I don’t know why I stopped.  I don’t know where the pattern came from (maybe one of the Vanna White crochet books I had in the ’90s).  I don’t know where the rest of the yarn is. Maybe I ran out?  Is that why I stopped in the middle of a row?

crochet-blanket-2


I put it away and never looked back.  I wish I could remember why.

I am so happy to have it now though. Yesterday, I weaved in the ends and put it to use.  It is missing the border on one side, but that’s ok.  It is really warm, and I have been really cold so it’s perfect.

I took advantage of the fact that Davey was willing to model the blanket for me this morning, and I got some fun pictures of him.

crochet-blanket-3

He is King Crazy Hair right now.  I’ve got to take him to get a haircut.

crochet-blanket-davey


He was laughing at Buster who gets all crazy when he gets into the yard.  He doesn’t look particularly crazy here, but he’d paused for a moment.

crochet-blanket-buster


Davey found him to be quite the clown.

crochet-blanket-davey-2


I’m glad to have found this mystery blanket.  I want to research a little to see if I can figure what the stitch is.  I have no idea how I did it.  I am trying to estimate when it was that I made it as well.  It was definitely before Davey was born.  I am thinking I made it when we were in Texas (and we were there 15 years), but I am just not sure.

Regardless, I think I can look at these unfinished projects in two ways.  Either I have trouble sticking with something and just abandon projects when the whim hits me, OR I am all about the process, and when the creating process is not making me happy, then I move on. I choose the second. 🙂

Upcyling: worn out t-shirts to rug

I’ve been seeing all sorts of posts on pinterest about making t-shirt yarn (also known as “tarn”).  I’m always up for new yarn, and I wanted to see how this worked.

What I wanted to learn was how to make a continuous length of yarn from a t-shirt. There are numerous tutorials that describe how to do this. I looked at a few including this one:  Making t-shirt yarn.

I went through our t-shirts and found about six that were getting pretty ragged.  David said, “you are going to do what?  This is another project?  Don’t you have some other projects you are working on?”  But then he helped me find some t-shirts as he also loves to clear out stuff.  He is the opposite of hoarder.  I watched the video, followed the instructions, and cut up my t-shirts. It was really an easy process.

Here’s the result.  Most of the t-shirts are pretty neutral in color since they came from David’s closet.  I added the red one for some variety.

t-shirt-rug-1


Cutting the t-shirts up and making the yarn was interesting, but a little tedious and not my favorite activity in the world.  However, it was worth it (and worth it to do again) because I had so much fun crocheting with it.  I used a big ole 15 mm crochet hook.

crochet-hook


There are lots of patterns out there.  I am using this one: Free Rug Crochet Pattern.  It’s great fun, but next time I will try this one from Purl Bee.  It’s just written a little more simply, and I think the results would be similar.

Unfortunately, I am out of t-shirts and have an unfinished rug.  I may check out some yard sales and pick up some more.  So far I have this little rug.  I can stand on it – it’s about 16 inches wide.

It’s going to be the gradual build rug.  I don’t want it to be huge, but it needs a little more work.

t-shirt-rug-2


I really like it although I kinda wish the center color wasn’t so big.  I wasn’t sure how much of each tarn I had, and I wasn’t sure how it was going to look crocheted.  It’s an experiment, and a very fun one.

Sunday Lake Outlaws

Today Davey, Buster and I headed over to our little local lake.

sunday-lake-2

Buster did some serious “busting” through the water.  He got me soaking wet with his jumping around.   Davey tried leading him around in the water.  No easy feat for a little guy.

Sunday-Lake


We had a little picnic of Nilla Wafers and strawberries, and we chatted.  Davey has become very very into Pokemon, and he enjoys explaining how it all works.

Sunday-Lake-3


Buster learned about Pokemon as well.

Sunday-Lake-4


I had brought some acrylic paint along because I thought Davey might want to paint some rocks.  He told me that we could not do that.  “Mama, you are an outlaw!”  (I’ve discussed the possibility of yarn bombing with him as well, and I get the same response.)

He watched me paint a rock first.  I get very intricate and fancy in my painting.

Sunday-Lake-5


He decided it might not be too “illegal”, and he decided to paint too.

Sunday-Lake-6


We went to work on several rocks.

Sunday-Lake-7


I enjoyed it. I think Davey liked it too.  He particularly enjoyed the placement of the rocks.  We wanted to leave them for someone to just happen to find. I placed them like this.

Sunday-Lake-8


Davey was not satisfied with my arrangement.  He went to work.

Sunday-Lake-9


He thought this was much better.

We splashed around with Buster, painted rocks, and experimented with what floats and what doesn’t float.  He also enjoyed watching another dog swim out and fetch stick after stick.

I took several pictures.  He told me several times that I should not put them on facebook. My blog is ok though, he said.  I am not sure that I mentioned to him that I have the blog set up to share the link with facebook.  I think he’s ok with it though.  For now.


Lavender and Wool

I’ve been fascinated by weaving lately.  The other day I came across a picture where fiber had been woven into stems of lavender.  I kept going back to this picture, and I felt the need to give this a try.  We just happen to have lavender growing in our flower beds. Turns out I also just happen to have some yarn as well.

lav-weave-1


I had to think a little about the best way to approach this.  I decided to line up several stems of lavender on a piece of cardboard.  Taping down the stems somewhat messed up the aesthetic for me, but it was the most practical way that I could think of to begin.

lav-weave-3


I have quite abit of Knit Picks Palette yarn from awhile back.  It’s basic wool and I have some colors I thought would work really well with the lavender. So after I got the lavender taped down, I started weaving.  I used a tapestry needle which worked really well.

lav-weave-4


I find knitting relaxing, but I think I find weaving equally relaxing.  It is very repetitive, but since I was working with the lavender, I had to pay attention as well.  I worried that I might break the stems, but they were very sturdy.  I had to pay attention to avoid catching the wool on rough spots as well.

I just changed colors whenever I felt the urge.

lav-weave-5


Not only was the weaving relaxing, but the scent of the lavender was nice too.  So I had the weaving combined with aromatherapy.  I’ve learned that lavender promotes calming and stress relief.  It may help cognitive performance as well.  I am all for that.

lav-weave-7


A lot of the fun for me is also to take pictures of my progress.

lav-weave-8


I wove until I decided I was done.

lav-weave-9

I took more pictures and more pictures.

lav-weave-10


I decided that I needed to add one more color so I wove a little more.

lav-weave-11


I kinda think I didn’t need the extra color, but I decided to leave it.

I will try to recruit Davey and David to join me next time.  I’d love to see what design they’d come up with.  It would be great for building fine motor skills and we’d all feel very calm, content and cognitively boosted as well!

The USA as created by Davey (with some help)

Davey really likes maps.  When we go to the zoo, he likes the animals, but he really prefers to look at the zoo map.  Before we moved to Ellensburg, David picked him up a fun map of the town, and he loved studying it until we moved here.  It’s now hanging on his wall.

So I thought he might enjoying making a topographic map.  I’d been searching for map activities on pinterest, and I came across a website with a recipe for salt dough and some guidelines for making a 3d map.  This included a link to yourchildlearns.com.  This is a cool website where you can print out maps in any size you want using 8.5 x 11 paper, and then you can tape them together to create your map.

I printed out a USA map, taped it down to some posterboard, and we mixed up the dough. Then we started forming our map by following the outline of the taped down map.

salt-map

Davey had great fun making the mountains.  He got very tickled.  Let’s just say they are Davey mountains and not necessarily topographically accurate.

salt-map-2


He identified the following mountain as Mt. Shasta (in Northern California).  It’s a little massive.

salt-map-3


He ended up decreasing Mt Shasta’s size as we decided it would probably break when it dried.

Next we had to let the map dry so we could paint it.  I am glad I got a picture of Davey’s sculpted letters as they fell apart when they dried!

salt-map-4


We kept it pretty simple when we painted it and limited our colors to blue, green and brown.  Davey was once again in charge of the mountains.

salt-map-5


He strategically left parts of the mountains white for the snow.  He had fun painting.  So much so that he enthusiastically got a lot of paint all over him (thankfully, I’d had the sense to take off his shirt and have him put on old shorts before he started).  I tried to get pictures of him with the paint all over him, but he was being resistant.

salt-map-7


Our USA is very green.  My Great Lakes are very small (I am missing a couple as well), and the Salt Lake may be overly large.  It was still great for helping Davey learn more about the US.  He identified where we live.  He pointed clear across the country to his Oma and Opa’s, and he found the almost center where his Nanny and Pa are.

salt-map-6


Now we need to decide what country to try next!

Sidewalk Painting = Great Fun

I found this recipe for sidewalk paint the other day.  Of course I found it on pinterest.  The recipe was very simple so I decided to give it a try.

I am so glad I did.  We had so much fun with this!  The recipe is just one part water to one part cornstarch.  I used 4 tablespoons of water with 4 tablespoons of cornstarch for each color.  I just used some gel food coloring and made green, red and blue (I didn’t have enough cornstarch for more colors).  This made plenty of paint for the three of us though.

We all had a great time with this.  Davey immediately began painting a rainbow.

cornstarch-1


The paint has such a neat look on the pavement.  My painting was limited to flowers, hearts, and dots.  But it was so fun applying the paint to see what it would do.  cornstarch-9


David joined us too.

cornstarch-2


Davey finished his rainbow.

cornstarch-10


And then he decided for his next painting he would go for a more splattery approach.

cornstarch-4We called this the Jackson Pollock painting.  Davey’s approach (which may have also been Pollock’s) included splattering himself as well!

cornstarch-5


We liked his final result very much.

cornstarch-6

David painted a goblin at each end of the sidewalk.   Great goblins.

cornstarch-7


Our final result was quite colorful.  When the paint dried, it was very matte and bright.

cornstarch-8


In case you are wondering, it washes off very easily.  We were sad to see that all of our work had disappeared this morning due to the sprinklers.

But!  That’s more reason for us to do this again soon.  Very fun!

A Stick House and 2 Archers

I was looking around on pinterest yesterday and found a link to what I thought were the cutest little houses.

stick house


I had just picked up some popsicle sticks at Dollar Tree, and so Davey and I began gathering some sticks from the yard.  We had fun creating our own little house.

stick-house-ladder


It’s a great craft because anything goes.  There’s no real plan, and we got to be creative although we did also have the to figure out logistics like how to make the walls attach to the floors etc.  This was challenging for my brain but fun, and it was a good challenge for Davey as well.  We haven’t tried to put our house up on stilts yet so that we can attach the ladder, but I liked our final result.

stick-house


Davey sat down with me for quite awhile and worked on this little house.  He even made a “sun on a stick” which I forgot to attach.

BUT – while building stick houses with Mama is fine and dandy, it ain’t got nothin’ on archery with Daddy.

Davey has had so much fun playing with his little plastic bow with suction cup arrows, that David decided to get him an upgraded more sturdy bow.

archery

They both had a good time shooting it.

archery-daddy

Notice the dramatic fingers follow through demonstrated by both Davids.

Davey enjoyed showing me variations on his form as well.

archery-demo


Today they are creating new targets to shoot at!


Davey and I: Weavers

I am kinda fascinated by weaving.  I think it would be fun to have a loom someday and weave fabric.  But in the meantime, I found a weaving activity on pinterest.  It’s from Made By Joel where I discovered the fun Paper City.  This is an easy easy way to begin weaving, and he provided a great pictorial tutorial.

I used the lid of a shoebox for our cardboard.  I actually cut the lid in half.  We each had one half as our “loom”. weaving1


The tutorial provides good pictures on how to set this up.  Here’s how the back of the loom looks.

weaving2

I set up the looms for us and then showed Davey how to weave. It’s very easy. Any yarn would work fine.  I had some leftover bulky wool yarn that I thought would be easy for Davey to grab and maneuver.

weavingyarn

We just took a length of yarn and went over and under the yarn on the loom.  I did wind a little bit of scotch tape at the end so that the yarn wouldn’t fray as much.  It gave him something to grab onto as well.

weaving3


Davey did great for awhile.

weavingdavey

I loved watching his little hands work.  I think it’s a great activity to build fine motor skills.

weavingfingersHe started to get a little weary of it though after not too long.  So I told him that the yarn was “breaching” and going back in the water, and coming up and “breaching” again.  He loves whales so this inspired him to weave on for awhile longer.

weavingdavey2

So that’s about as far as he got.  He did really well, and I could see how it could become kind of repetitious for him.  I found it calming and fun – kinda like knitting a row so I kept on going.

weavingcp

At the end you just carefully take the end loops off and you can adjust the weaving so that those loops work in smoothly.  I did have to weave in the ends where I did the color changes, but that was ok too. Being a fiber fiend, I enjoyed the whole process.

The ending result was a somewhat primitive square that could be used as a coaster maybe?  A person could get inspired and make a larger loom to make placemats or hot pads.

weaving-coaster

I think with a little practice, I would have a smoother result.

I thought it was a lot of fun.  Davey thought so too – for a little while anyway!


Paper City

Pinterest is a bottomless well of creative possibilities (now there’s a sentence!).  It’s especially perfect for the summer days as I try to find creative activities to do with Davey.

This weekend, I made him a Paper City.  I discovered a website (through pinterest) called Made by Joel.  He has all kinds of free paper crafts on his site, and specifically I found templates for a Paper City.  I had more fun making Davey’s little city.

There are several templates.   I made a mini Paris with a little Eiffel tower.  I cut out the Sydney Opera House.  There’s a neighborhood with people and cars.

paper-city-vehicles

paper-city


All I had to do was print out the templates.  I glued them to cardstock so they would be sturdier and then cut them out.  It would be cool to laminate them I think, but we are also slowly adding colored pencil to several of them.  We means me actually.  I am having fun doing that.  Davey’s not much for coloring.  He’d rather get right to the pretending part.

paper-city-Davey


I made him a circus.

circus


I even made the Taj Majal!

taj-mahal-paper-city

The circus has a hot air balloon.  I attached yarn and a button at the end of the yarn, so he could fly the hot air balloon around.  I did the same thing with one of the helicopters for the helipad.

helipad


The circus is his favorite of these, and he likes flying his hot air balloon and helicopter around.

We could add more guys to it.  I am thinking it could use a few superheroes.  Davey would really enjoy that.

I had a lot of fun cutting them out and getting his city ready.  It’s such a simple fun imaginative activity!