I finished Regrowth a few weeks ago, and I finally mailed it to my friend the other day. I’ll miss it!

But now the shawl has arrived at its new home. I am so happy that Debbie loves it!


I finished Regrowth a few weeks ago, and I finally mailed it to my friend the other day. I’ll miss it!
But now the shawl has arrived at its new home. I am so happy that Debbie loves it!
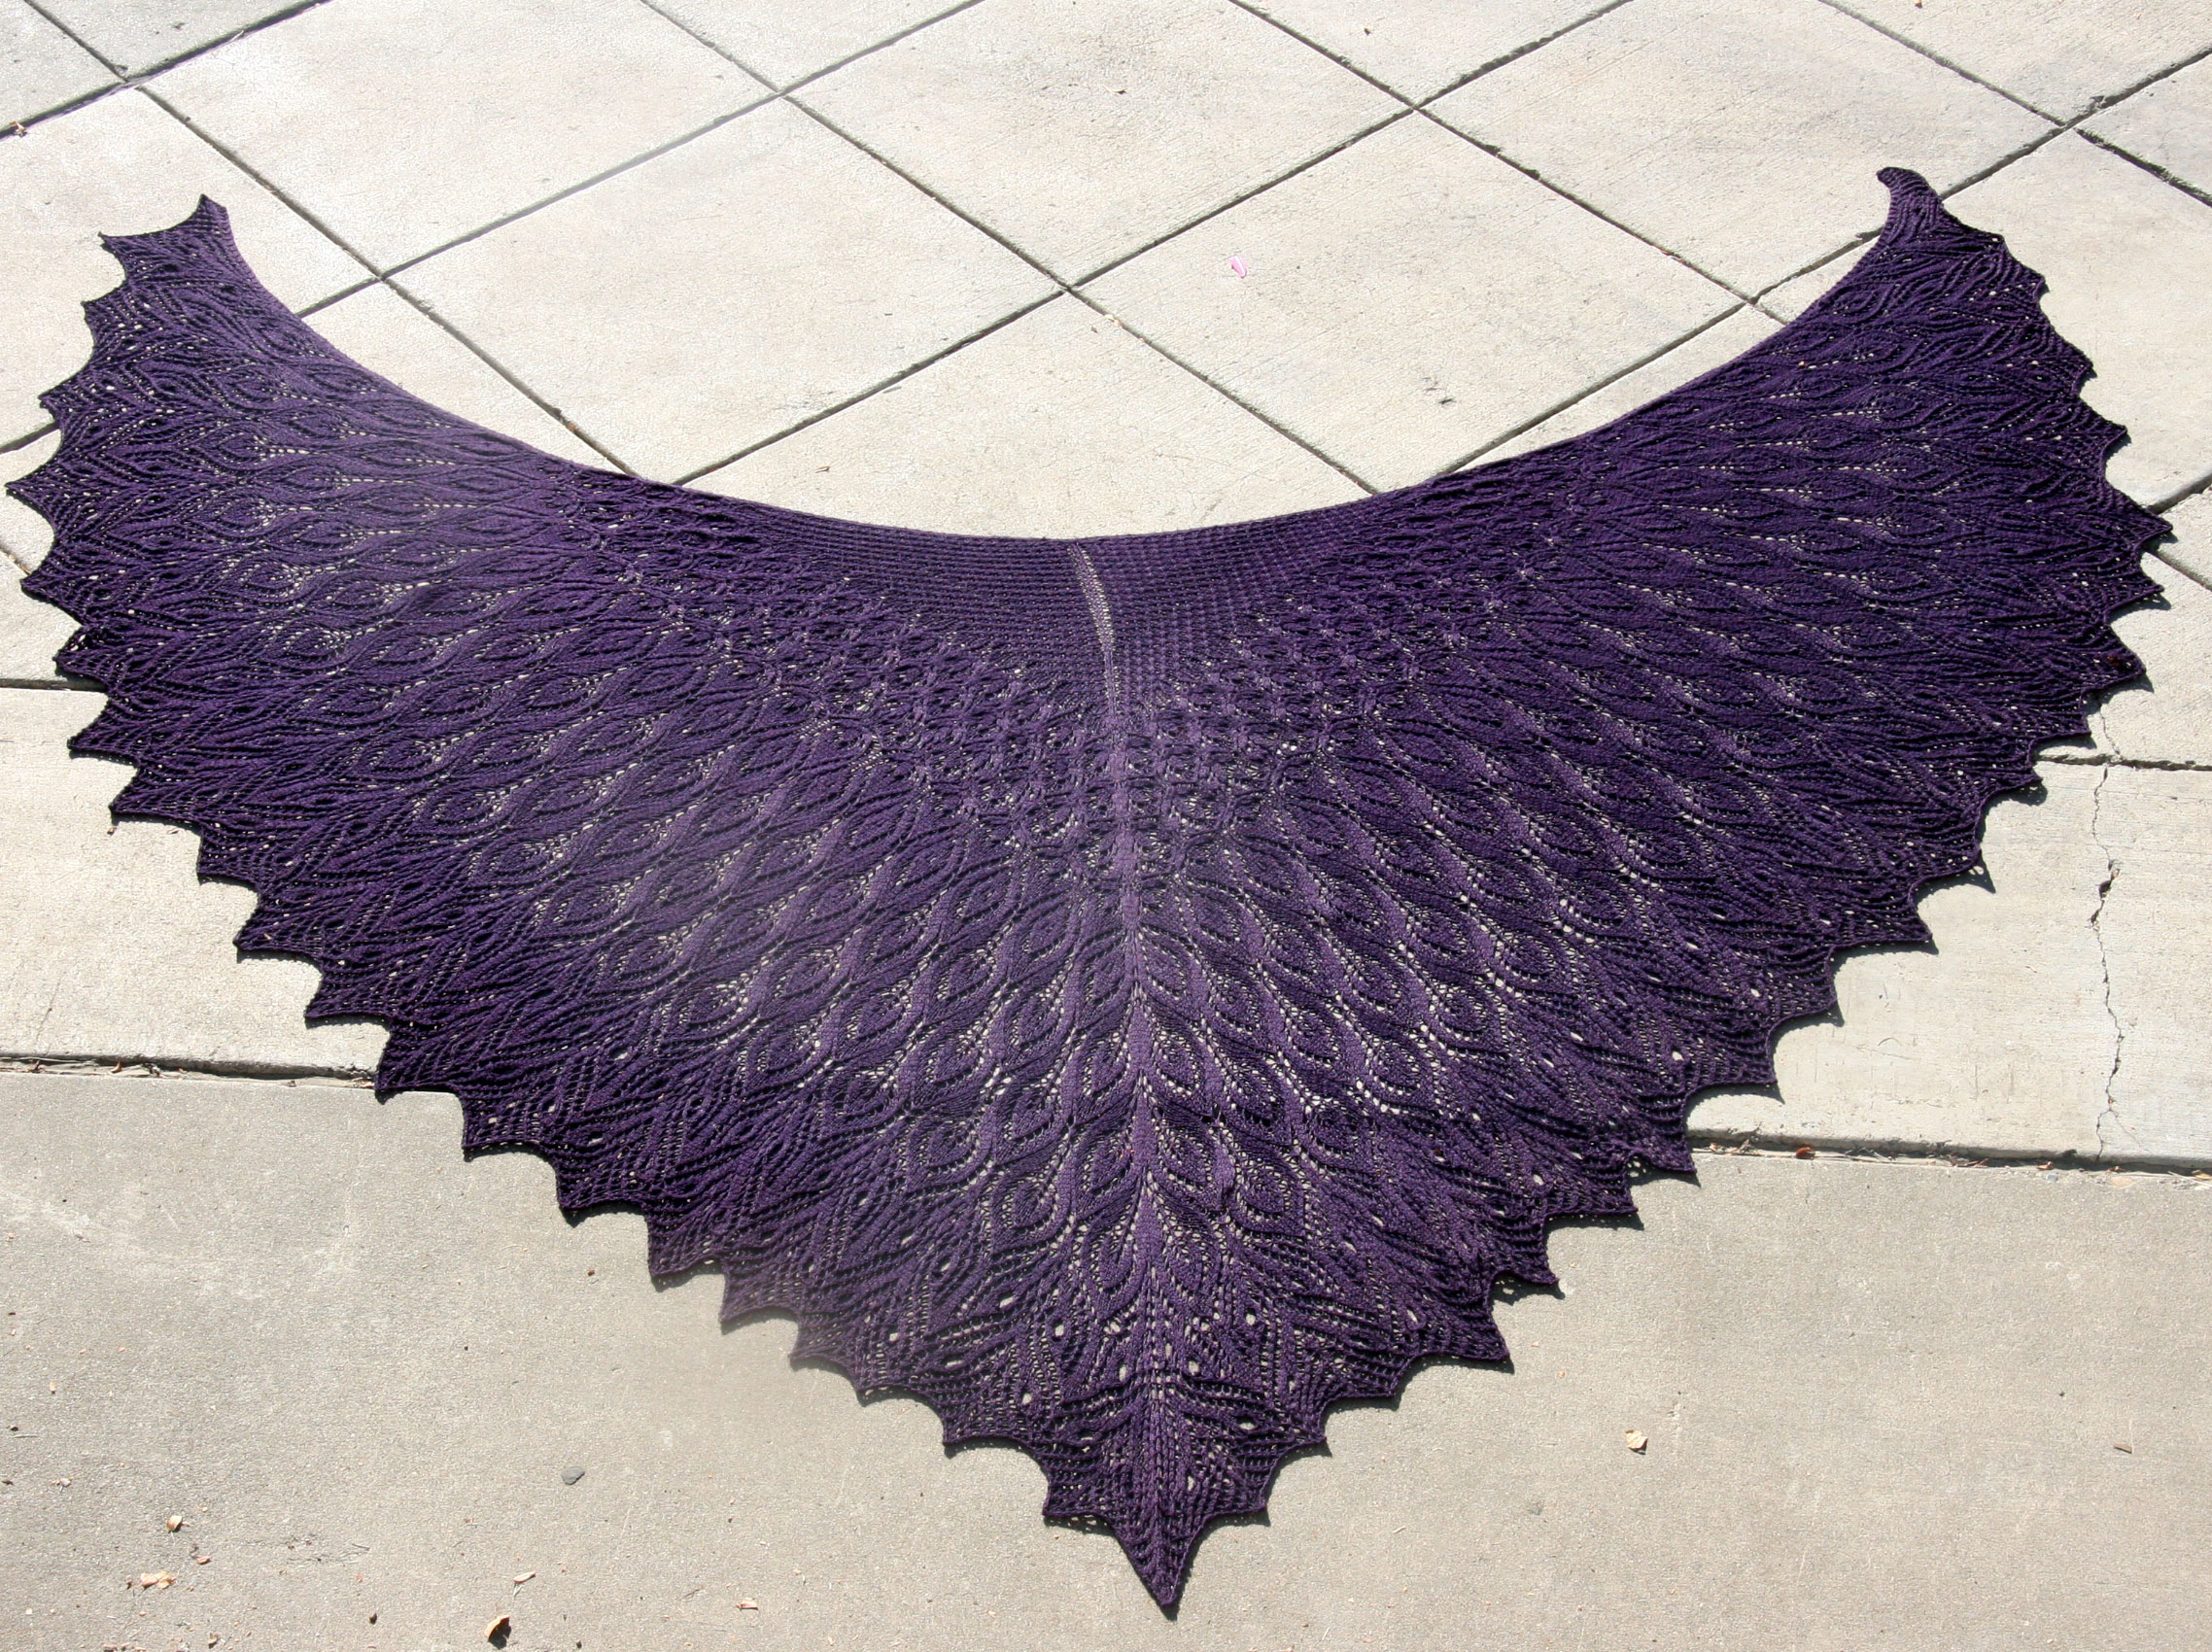
“Regrowth” the behemoth shawl is done! I think it is the largest thing I have ever knitted.
I began it back in April. I knitted it through 6 seasons of “How I Met Your Mother”, a couple of seasons of “Justified”, couple of seasons of “Hell on Wheels”, couple of seasons of “Longmire”, a season of “Homeland”, and then just lots more evening knitting. I took some breaks from it to make some baby things and a couple of other projects, but they were mostly pretty quick, and then I was back to this shawl.
It’s beautiful. Our mission today was to try to figure out how the heck to get a photograph that might somewhat do it justice. I made it for a friend and will be sending it to her soon, so I wanted to get lots of pictures before I sent it off. We are going to miss it around here!
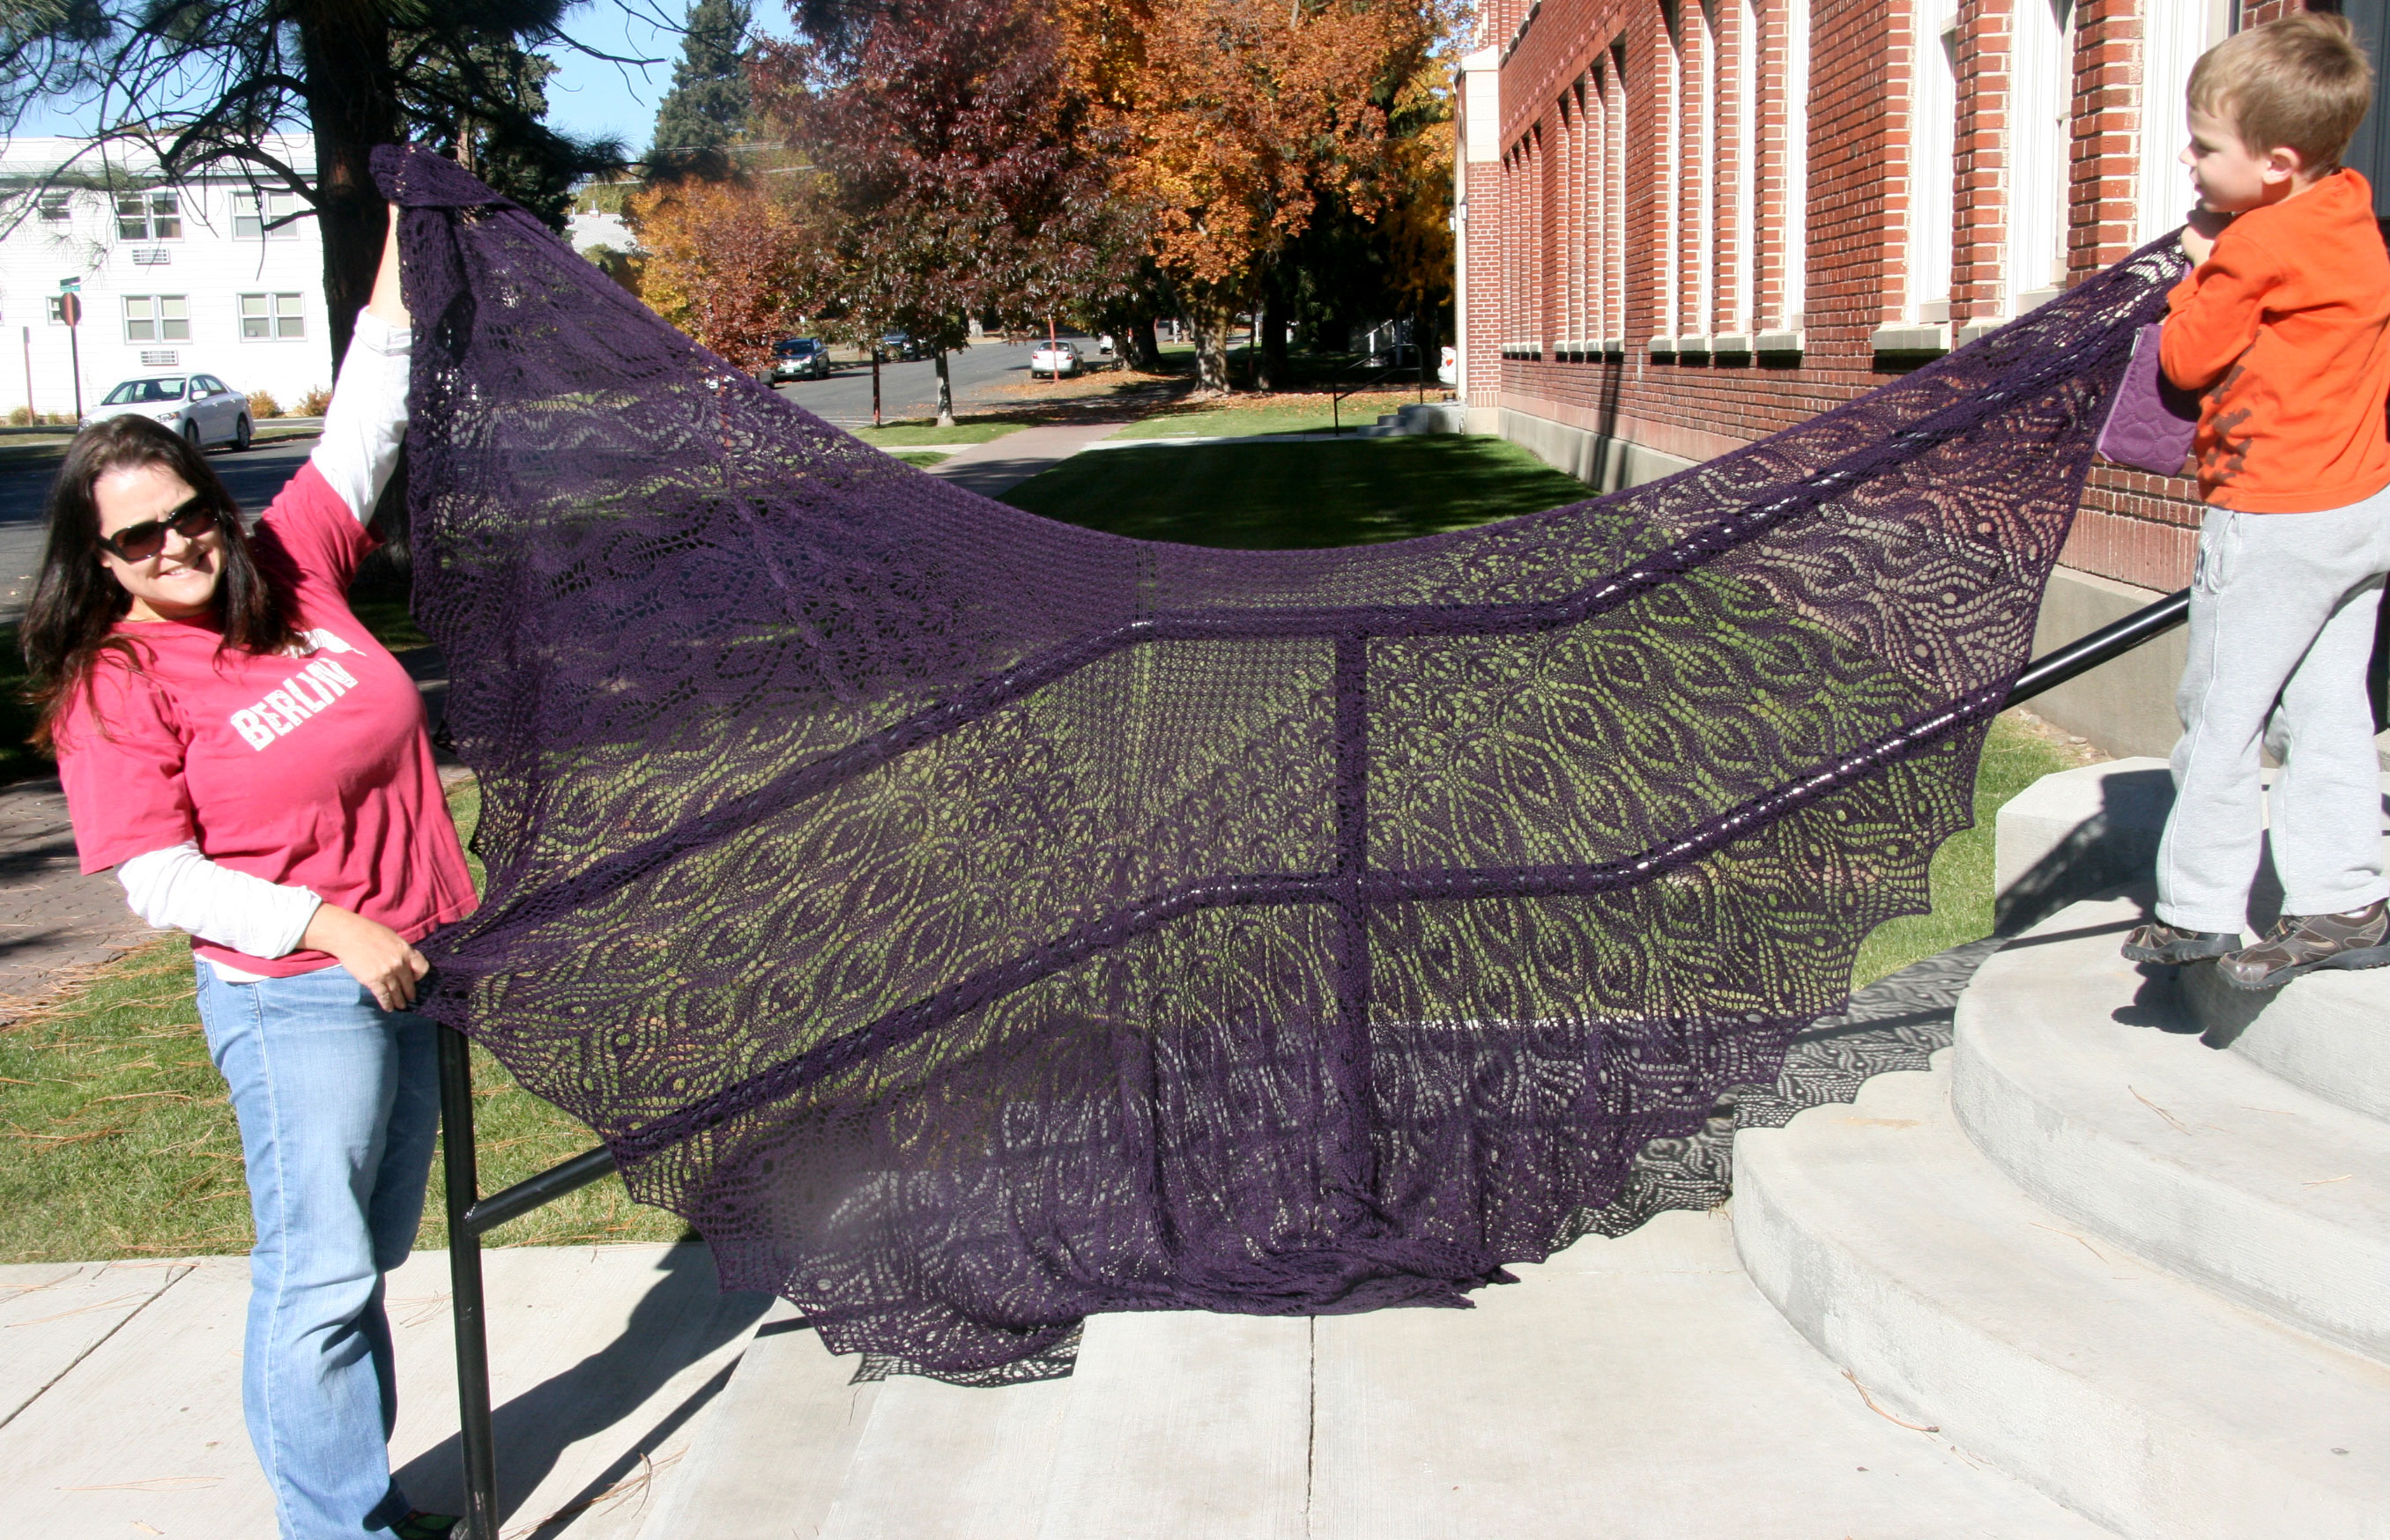
David and Davey tried to hold it up for me so that the beautiful patterns could be seen.

David had fun with this.

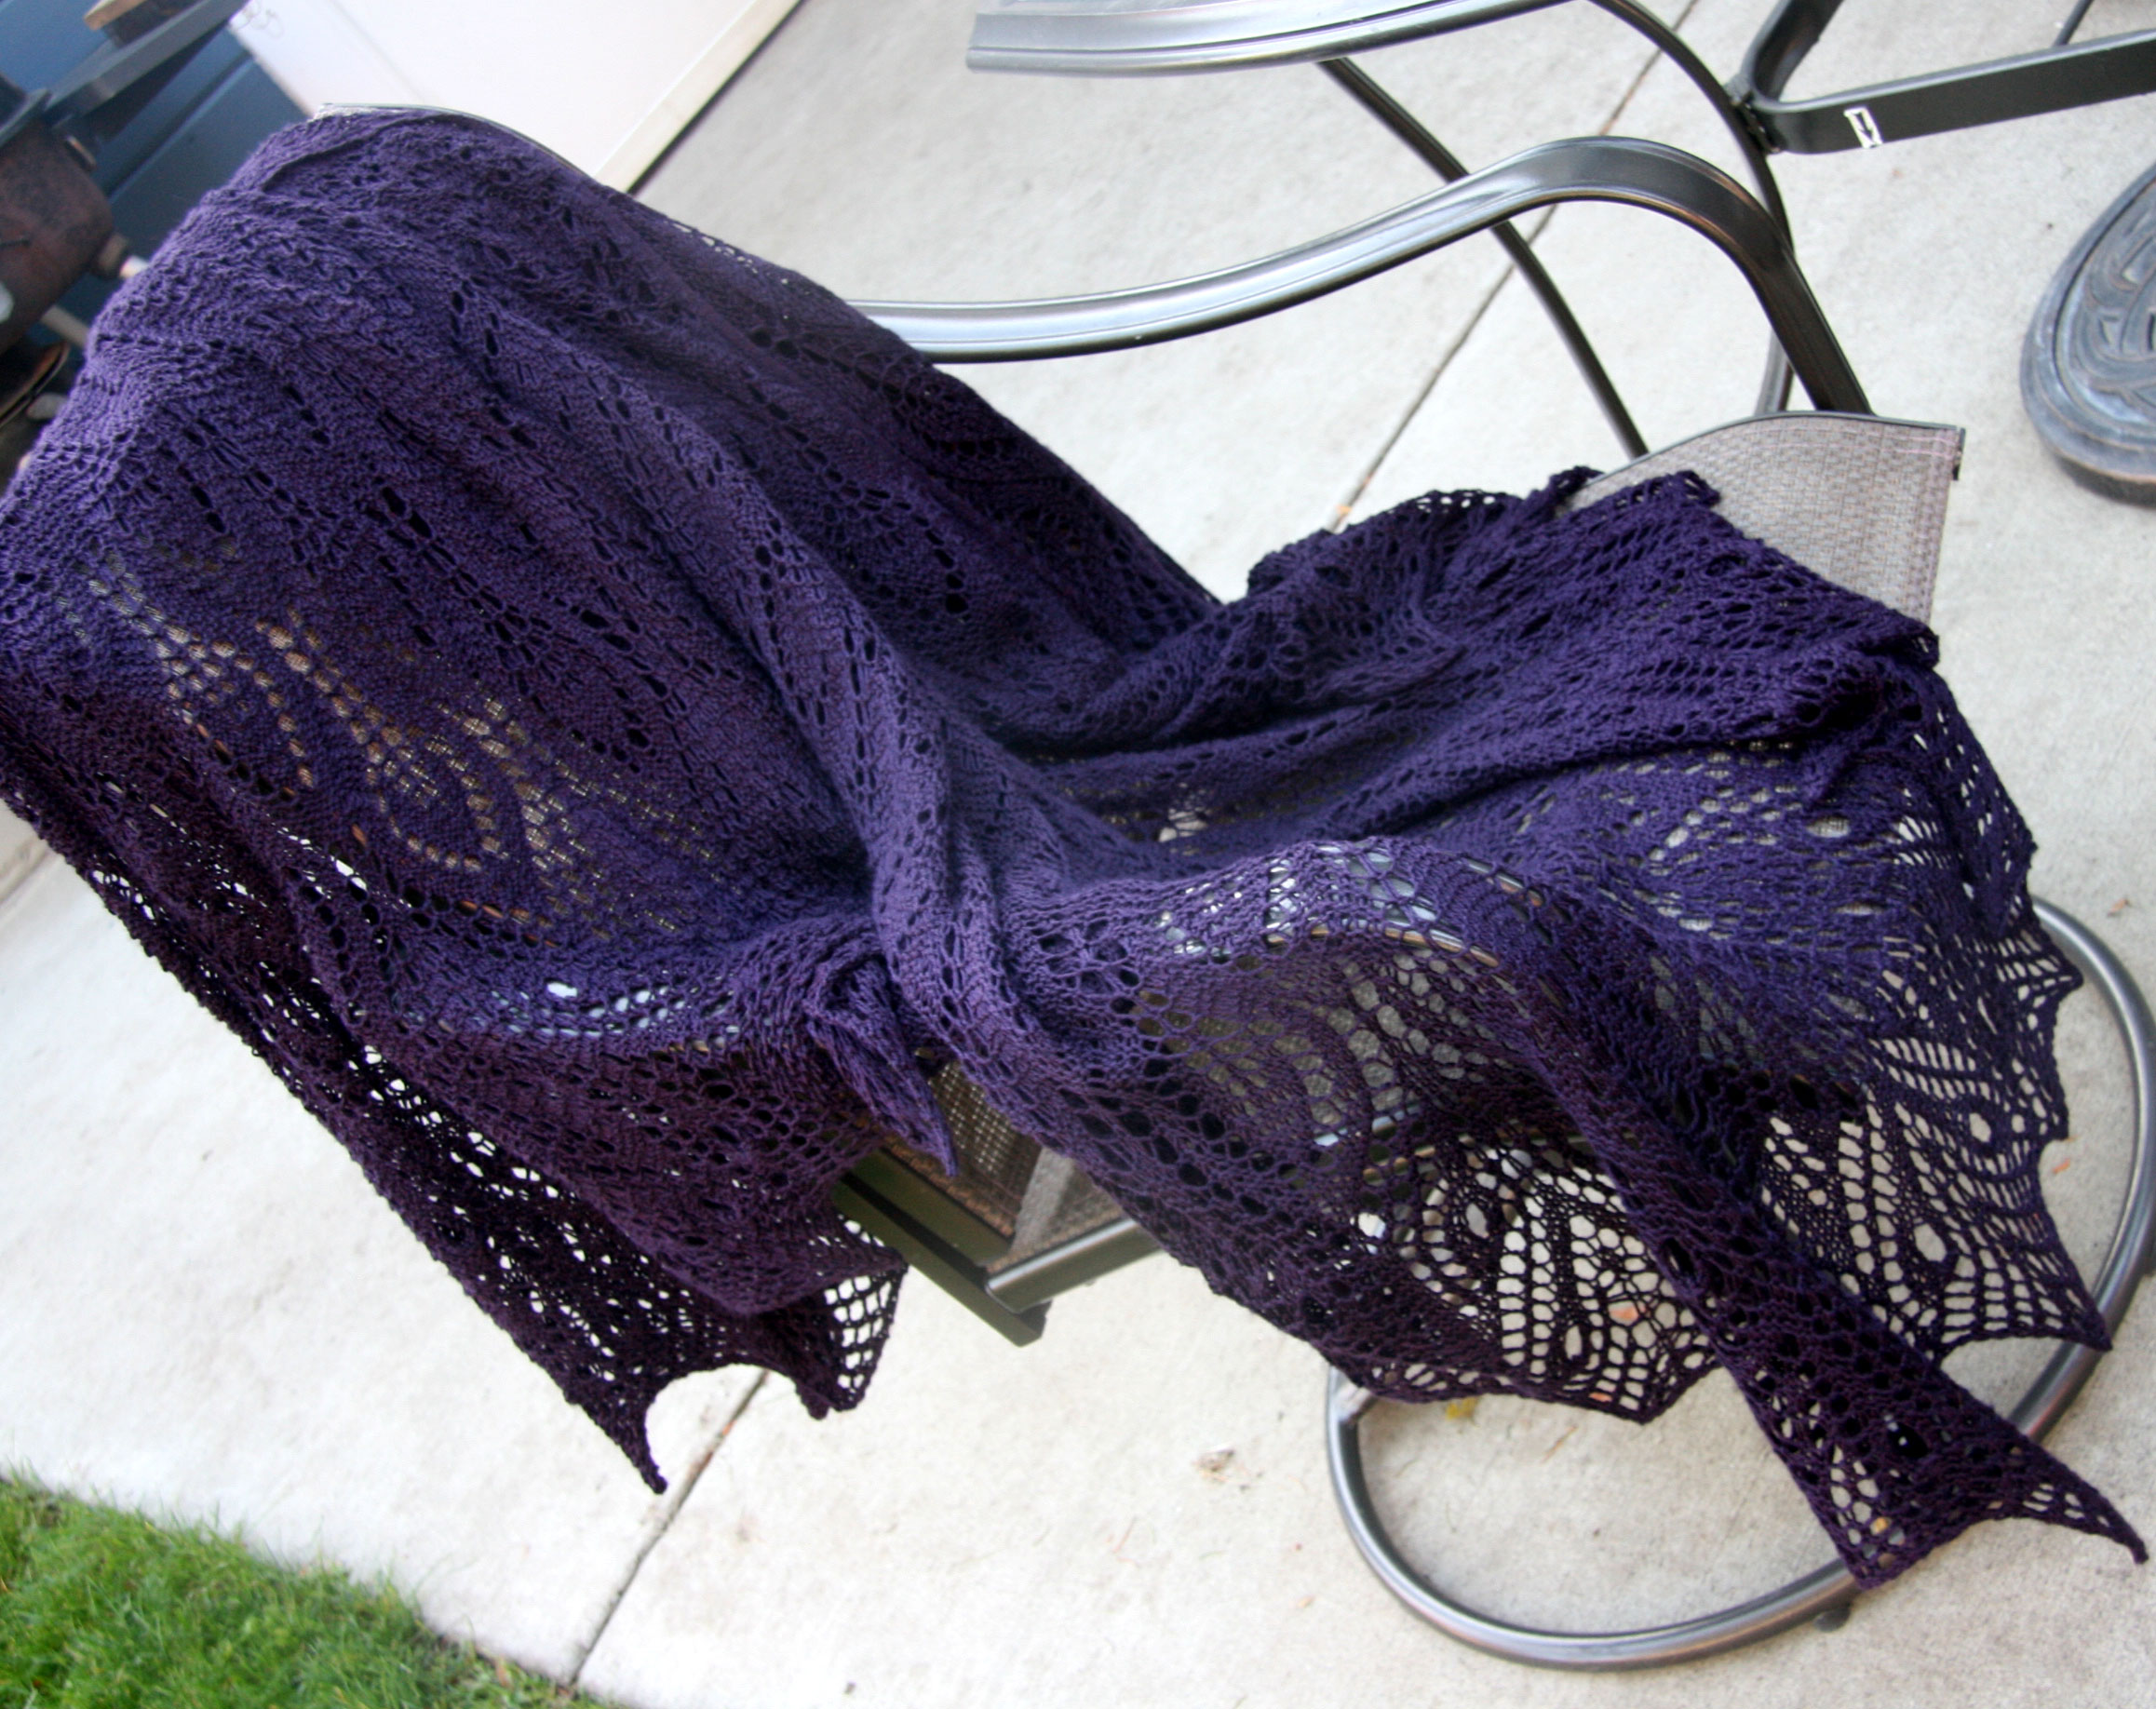
I tried draping it gracefully over a chair.
Then we decided to go walk over to have some frozen yogurt and to look for possible photo op places on the way.
We tried some steps behind city hall (this was to give Davey some added height by getting up the steps).
Then we just enjoyed our walk because it is just so darn pretty out today!

Lot of pretty colors in town.

We decided to walk around campus to see what we could figure out for picture possibilities.
There’s lots of concrete around, so we found a clean spot, swept the leaves off and tried again.
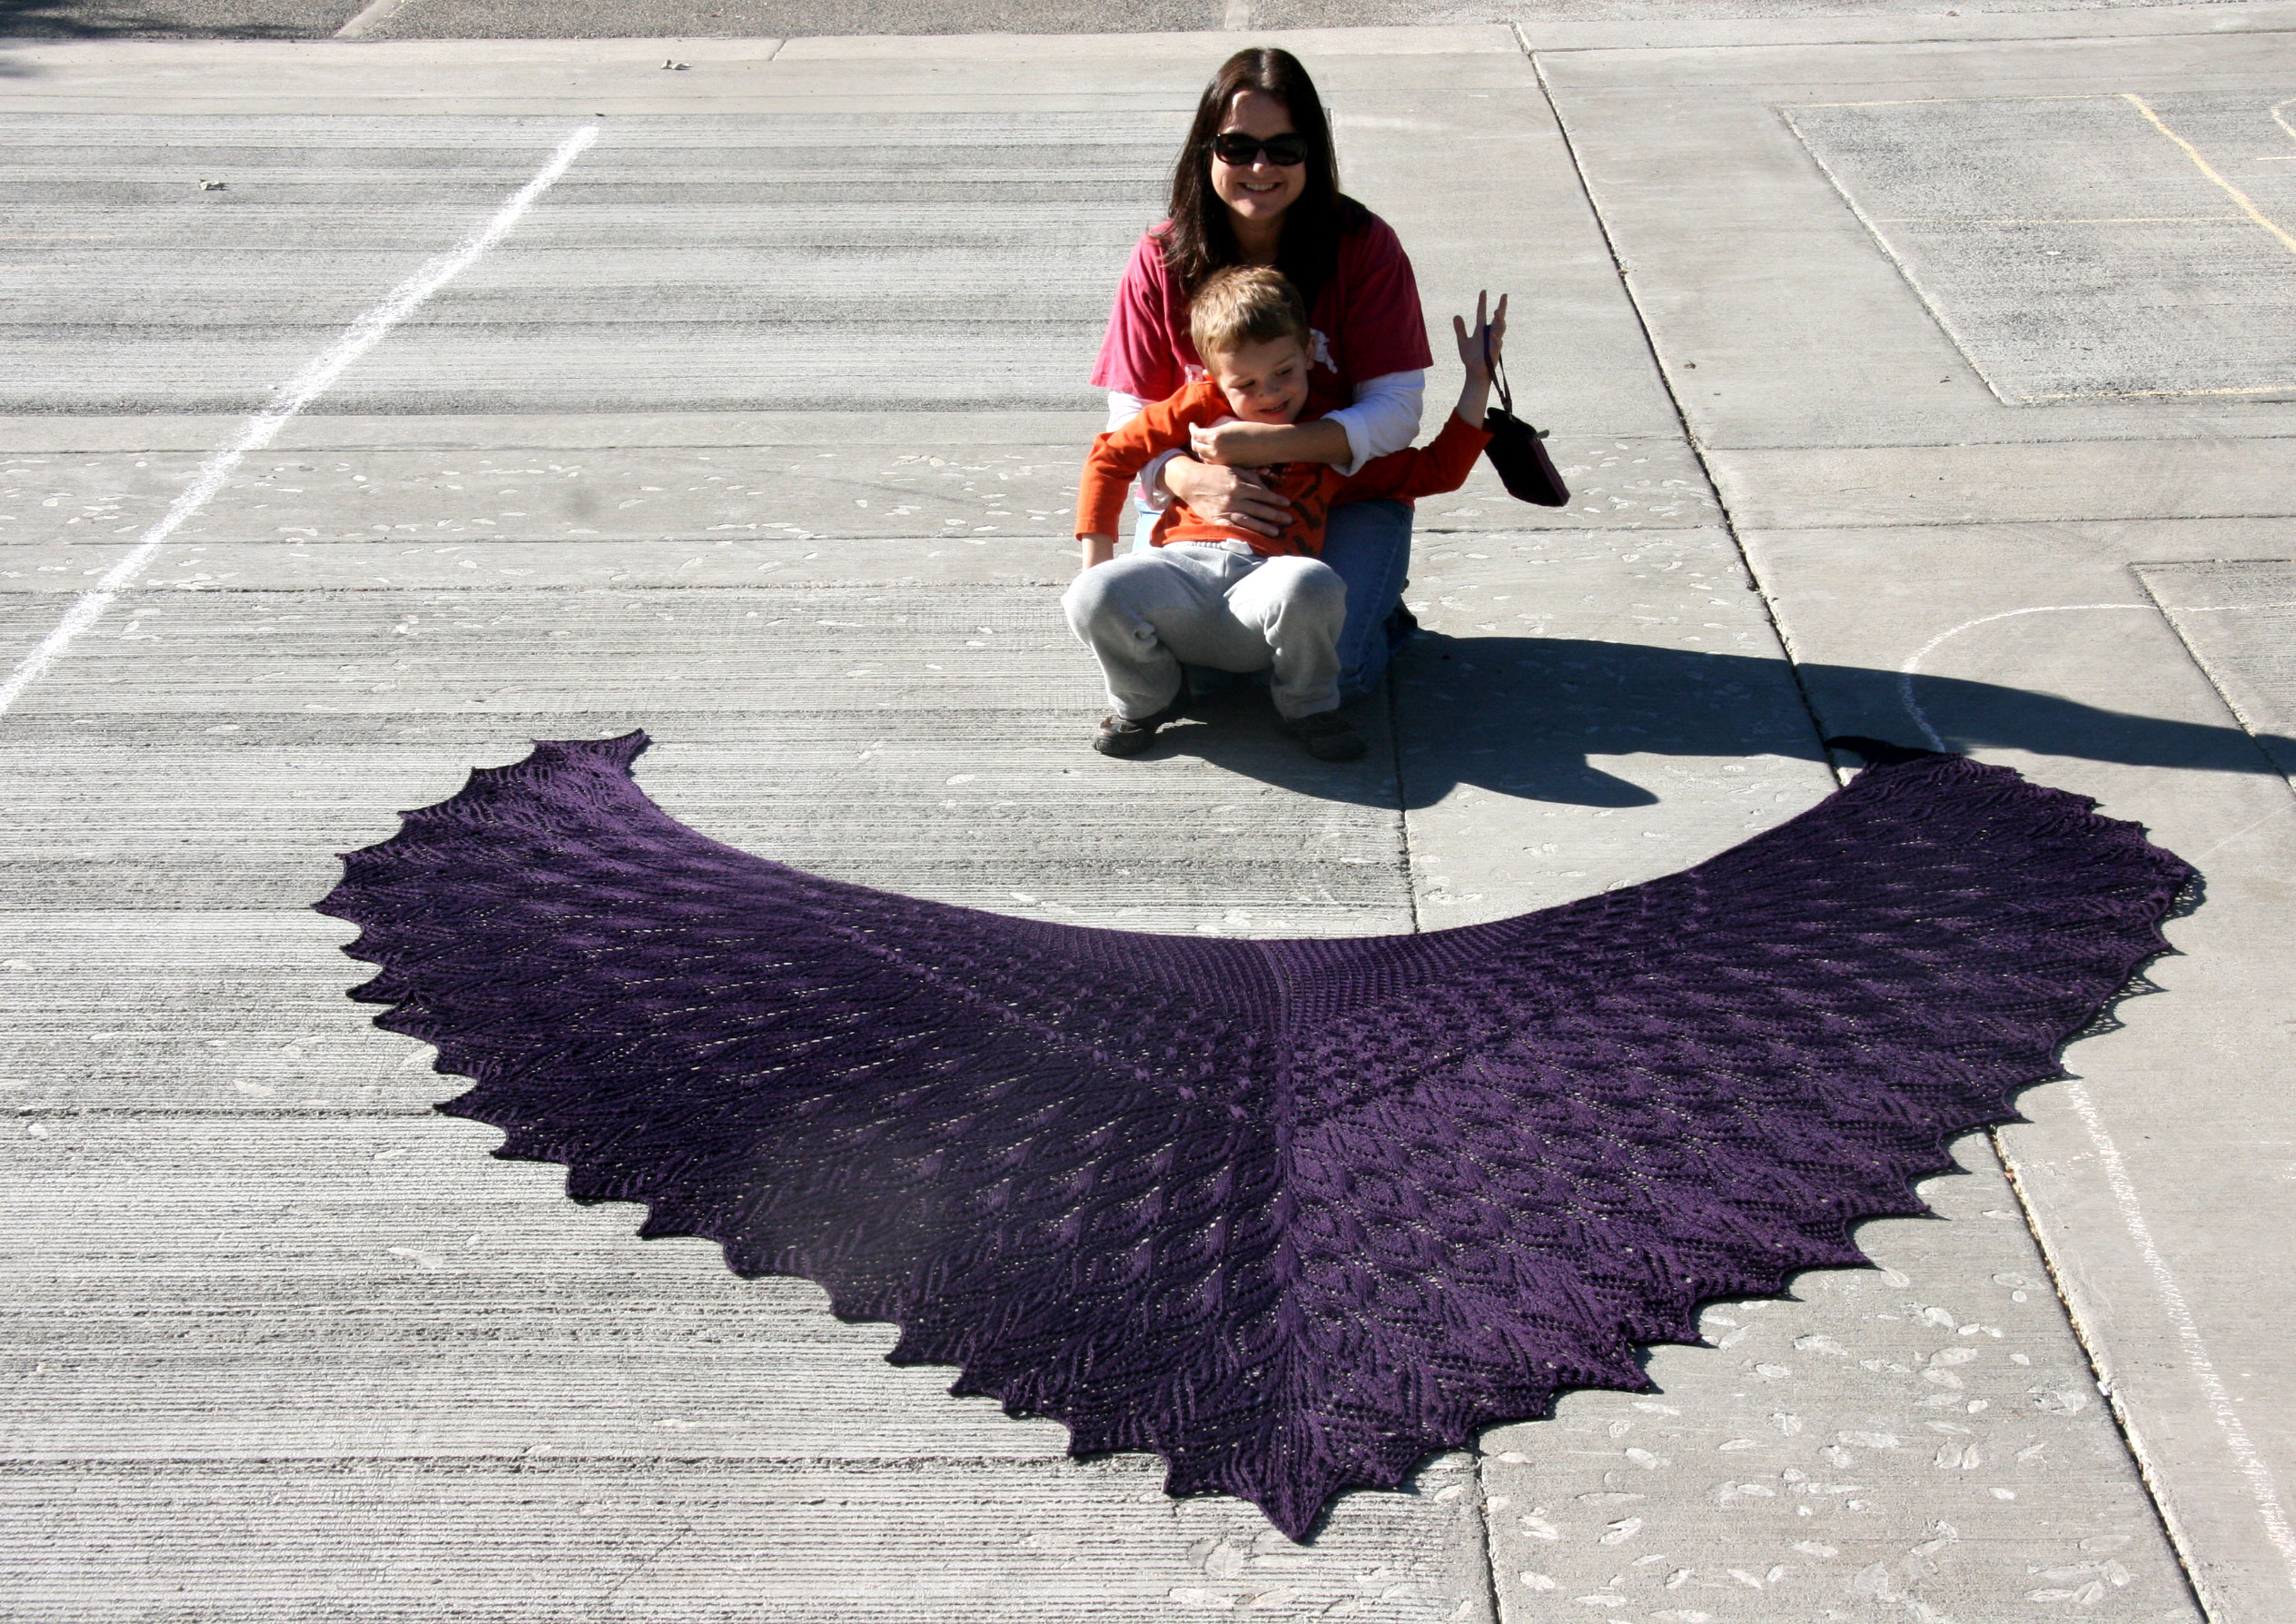
We decided that we needed a little more angle on the picture.
Davey may have been getting a little weary of the pictures at this point.

We took one final picture of the shadows cast by the shawl. We thought this was pretty cool!

This is really a nicely written pattern which was actually a combination of several different motifs that the designer liked. I had a lot of fun knitting it. I never grew weary of it except maybe when I had about 1700 stitches of purling to make my way across the row! I’d love to make this again though sometime!
I just finished up some fingerless gloves last night. My friend Ann at our local LYS told me about the pattern. I made them with some bulky or heavy worsted (not sure) Ella Rae wool. They were a great knit. See the owls? Well they are upside down in this picture.
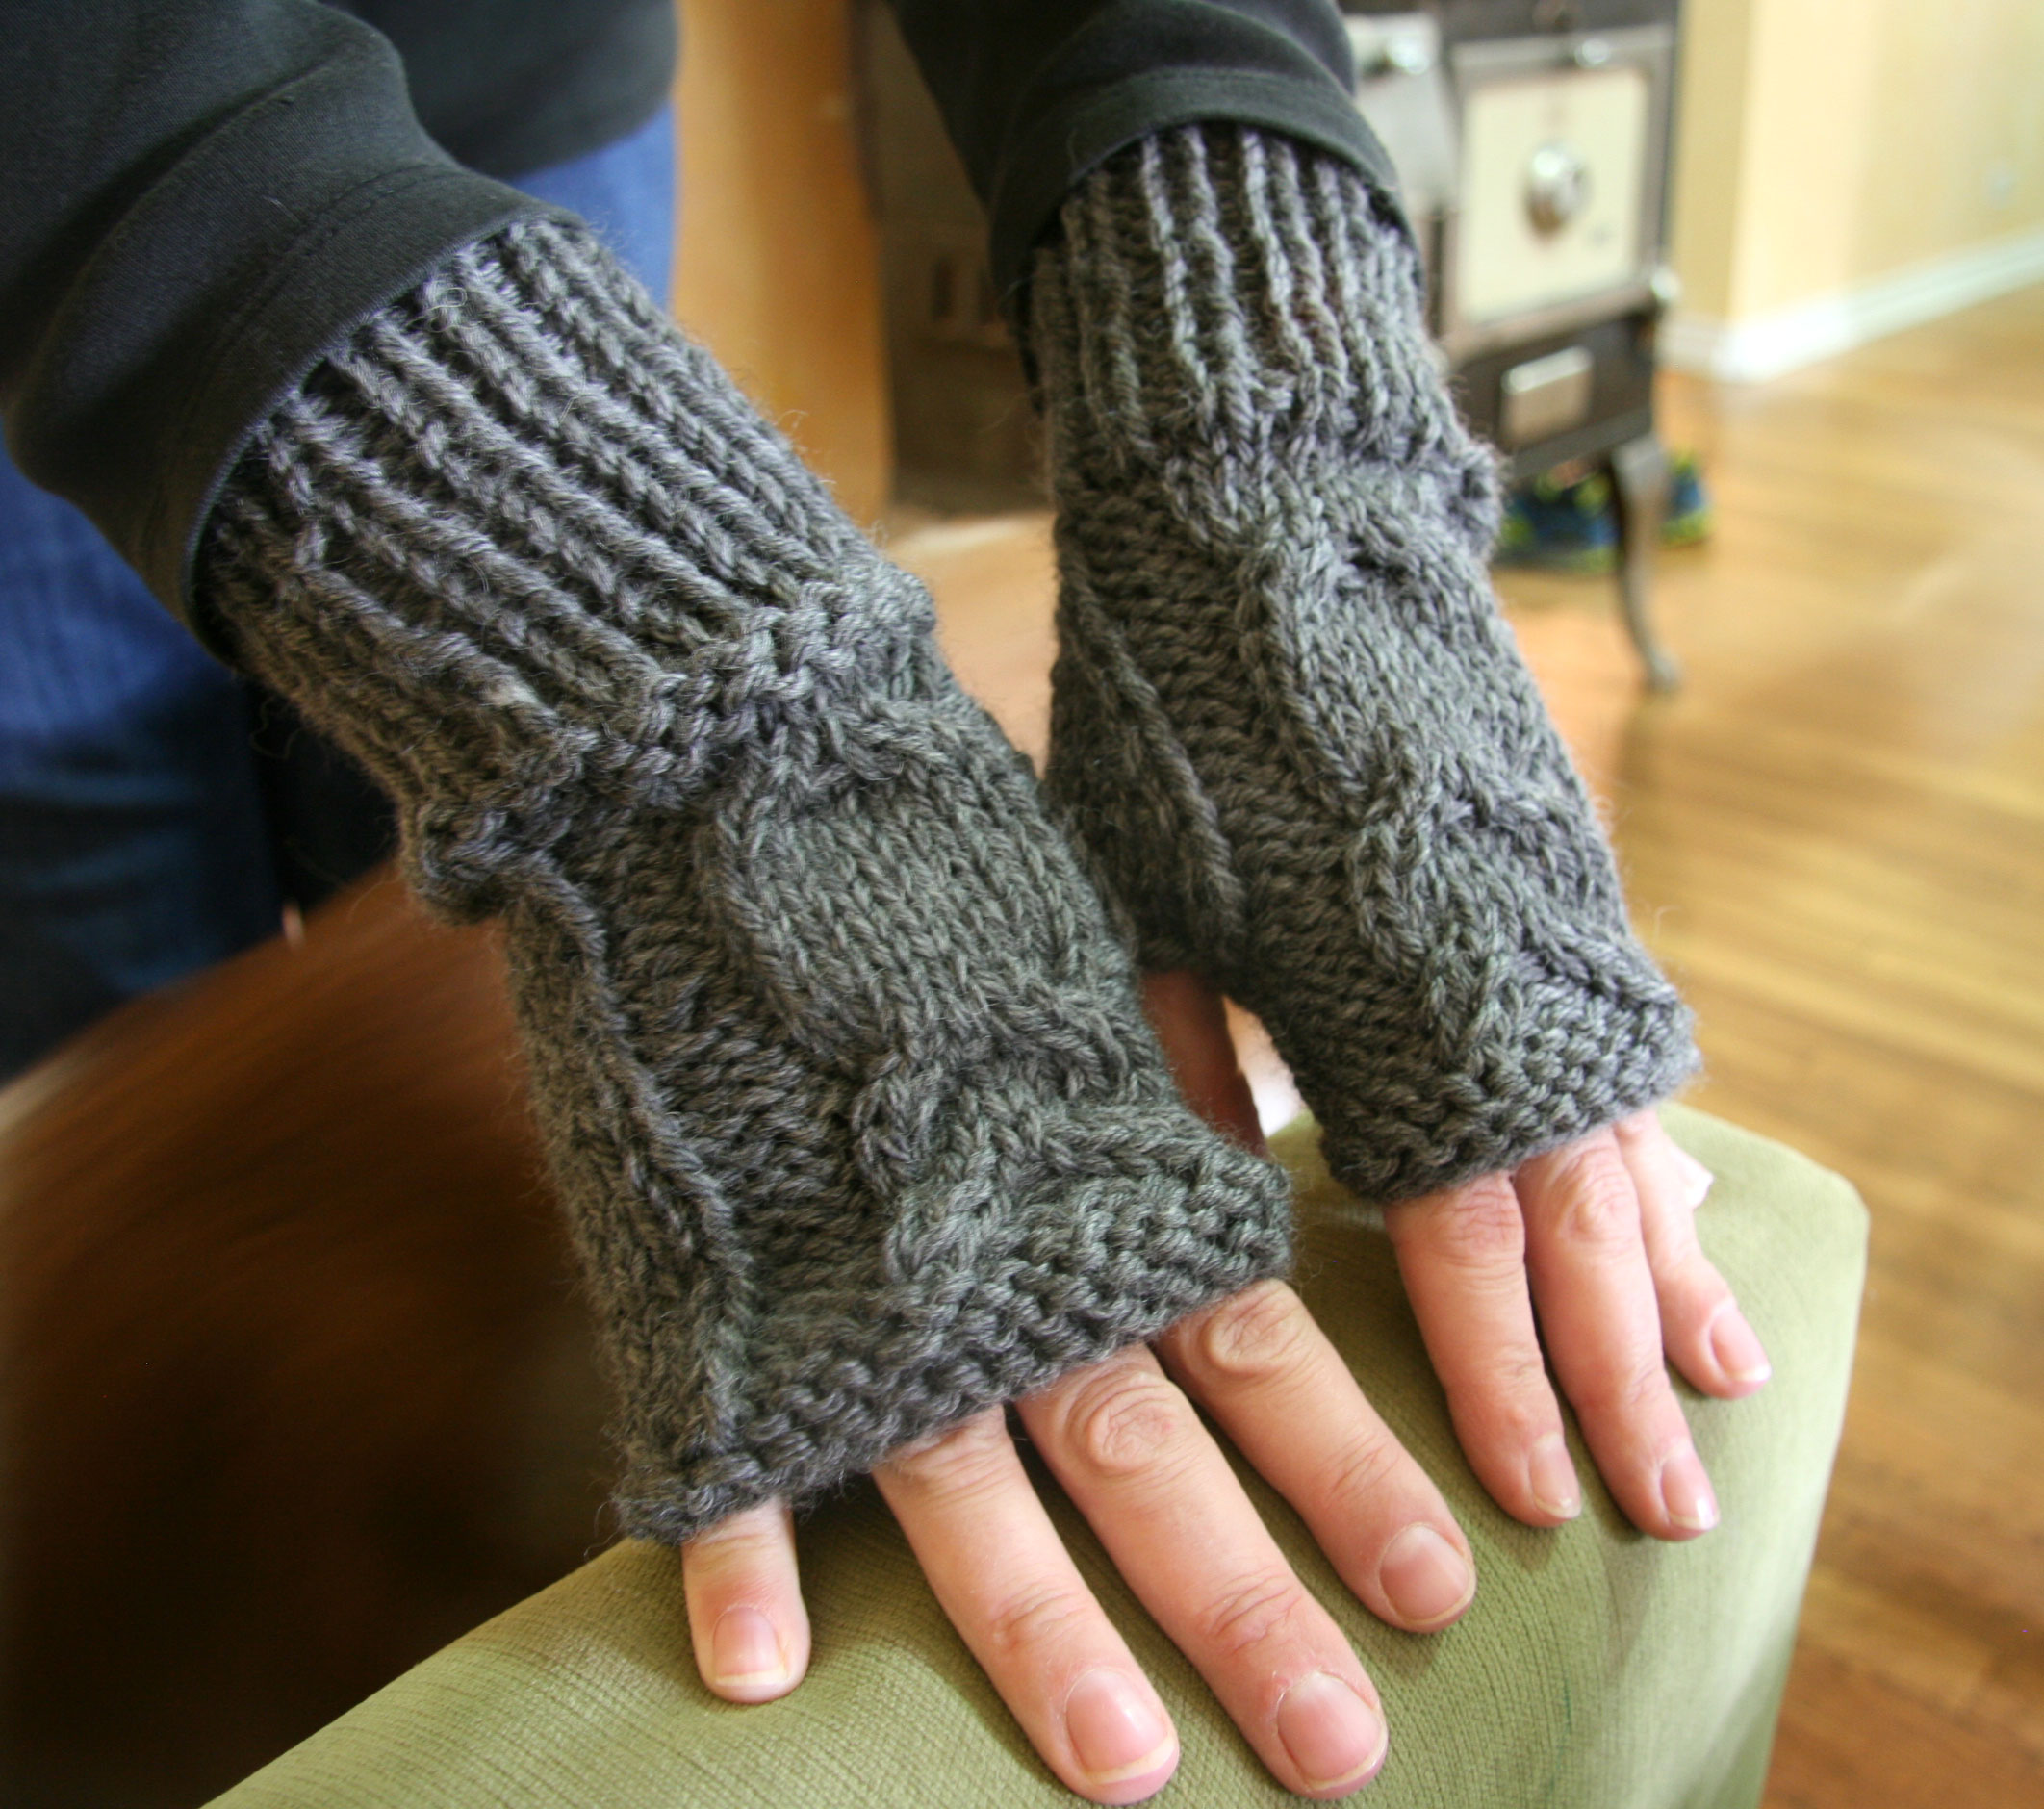
These mitts have a long warm cuff. One of my favorite things about this pattern though is the thumb construction.

I usually make thumbs where you put stitches on waste yarn and come back to the thumb at the end. There are always some small holes and you pick up stitches to try to fix this. But these gloves? You make the thumb as you go! You increase two stitches in the gusset every other round. When you get a big enough thumb, you bind this part off. It makes for such a beautiful solid thumb. I want to always make thumbs this way from now on. I will say that the thumb was a little large and I might not increase so much next time. I am a pretty loose knitter though, so that may be where the problem came from for me.
There are also a couple of increases toward the top of the hand. I did them at first, then I realized it made my glove way too big at the top, so I ripped back and did it without the decreases. Again, this might have been my loose knitting.
I should probably loosely block these, but I’ve not done that. I already wore them to school this morning (it was raw out and a little rainy!).
I also used magic loop to make them. This would be a great pattern to learn that technique – although it’s not difficult. Great first cabling pattern as well because there are only three rows where you have cabling (if I remember correctly.)
Love this pattern! I’d like to make another pair and make them into mittens.
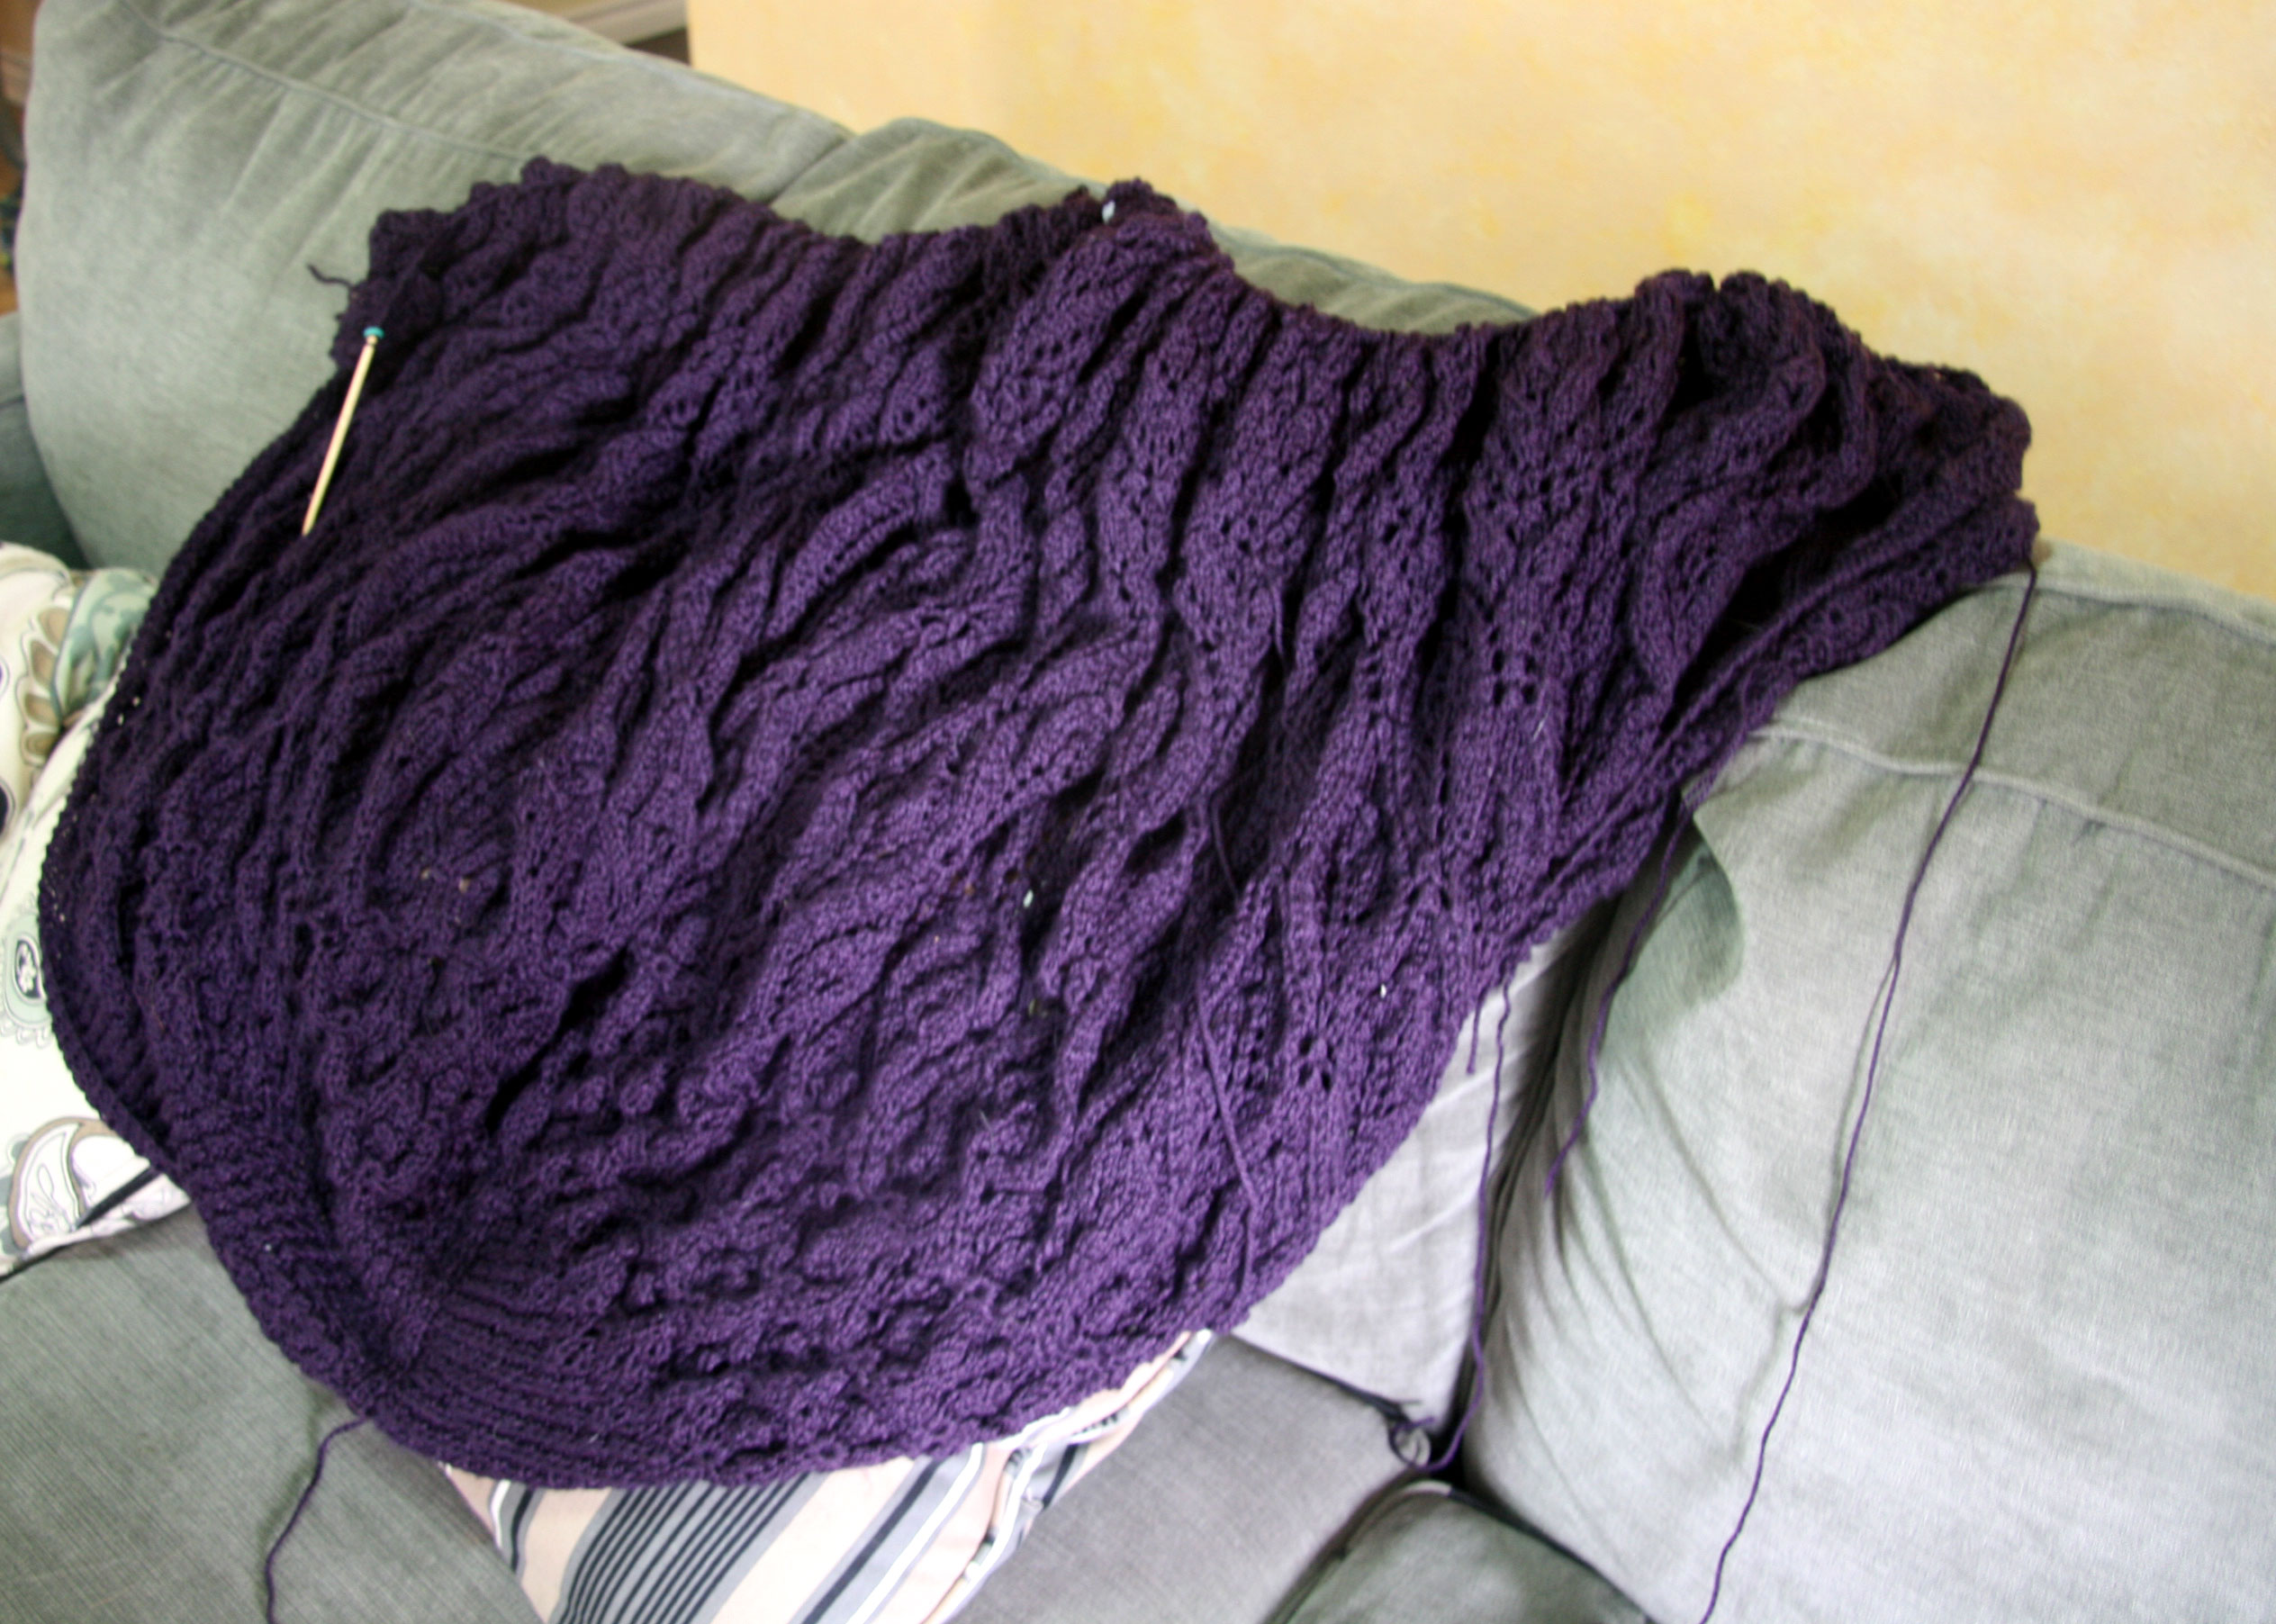
My Regrowth Shawl is slowly approaching bind-off. I have now begun referring to it as “the behemoth”. It’s enormous. It’s been a great pattern, and I have loved knitting it. I have 8 rows to go, and I ran out of yarn again. It’s so large at this point, that I ordered 4 balls of yarn. It might take that to finish those 8 rows. Maybe it will just take 2 or 3, but I didn’t want to have to order it again. I wish I could take a good picture, but lace in progress just doesn’t photograph well (at least in any way that I know how to do it).
There are at least 1500 stitches on a row now. I don’t really want to count that much, so I haven’t checked for sure. I think there are actually more. It’s large – I think it’s the largest thing I have ever knitted. I can’t wait to block it, although I am still not sure where this is going to happen!
I like to look for ways to add embroidery to my knitting. I’ve done a few things, but I’ve not been really happy with the techniques. The main thing I’d tried was basting a paper pattern to the knitting, embroidering the pattern over the paper, and then I tore the paper away. It was kinda neat, but it didn’t much feel like embroidery to me.
So I subscribe to the Knitting Daily emails, and the other day I received an email about embroidery. They provided a video to explain an Estonian embroidery technique that I had not heard of. It is called Roositud. I have no idea how to say it out loud. In my head, I call it many different things with the result being that I can never remember the actual word. Maybe I will remember better now that I have written about it.
There is a great video on the Knitting Daily website which very clearly explains the technique: Roositud. It was very easy to follow. The result looks like this:

You use a double strand of yarn for the embroidery. I made mine about 12 inches long. When you get to the stitch you want to embroider, you lay the yarn down with a tail in the back and then the longer part hanging in the front. Knit a stitch or two or three (whatever the pattern calls for in the embroidery), with the regular color you are using – so that would be brown above – and then pull the colored yarn to the back. It will lay across the front of the stitch(es).
When you come back on the second row, it’s a little different because your yarn is on the left. They explain how to take care of this really well on the video. But it looks kinda like this:
You pull the colored yarn forward and make what they called a “hanging flap”. Then you knit the stitch or two and just pull that yarn to the back. The part that covers the front stitch stays in the front. That doesn’t make a heck of a lot of sense. The video explains it better.
I really enjoyed this technique, and I can’t wait to try it again. I am trying to figure out kind of my own design of the front of a fingerless mitt or mitten, and I’d like to include a row of lateral braid across the bottom.
Cool Estonian technique!
It’s also Buster’s first birthday today. Davey is really excited and has been insistent that we have a “surprise” party for him. So that will be later today.

I’ve not blogged about knitting in awhile. I’ve not been knitting a ton since we moved, but I have been working on my Regrowth Shawl. Holy mackerel, it’s growing. I am approaching the last two charts, one of which is the edging chart. I am starting to see the light at the end of the tunnel. I’m not completely sure though that I am going to have enough yarn either, but I can order some more if need be. At this point, each row takes me almost an hour to knit. It’s getting pretty enormous.
I finished my baby sweaters before we left home. The Little Ancolie was the one I had so much trouble with, but I did learn a ton from knitting it. I ended up making short i-cords for the button loops, and I liked that a lot.

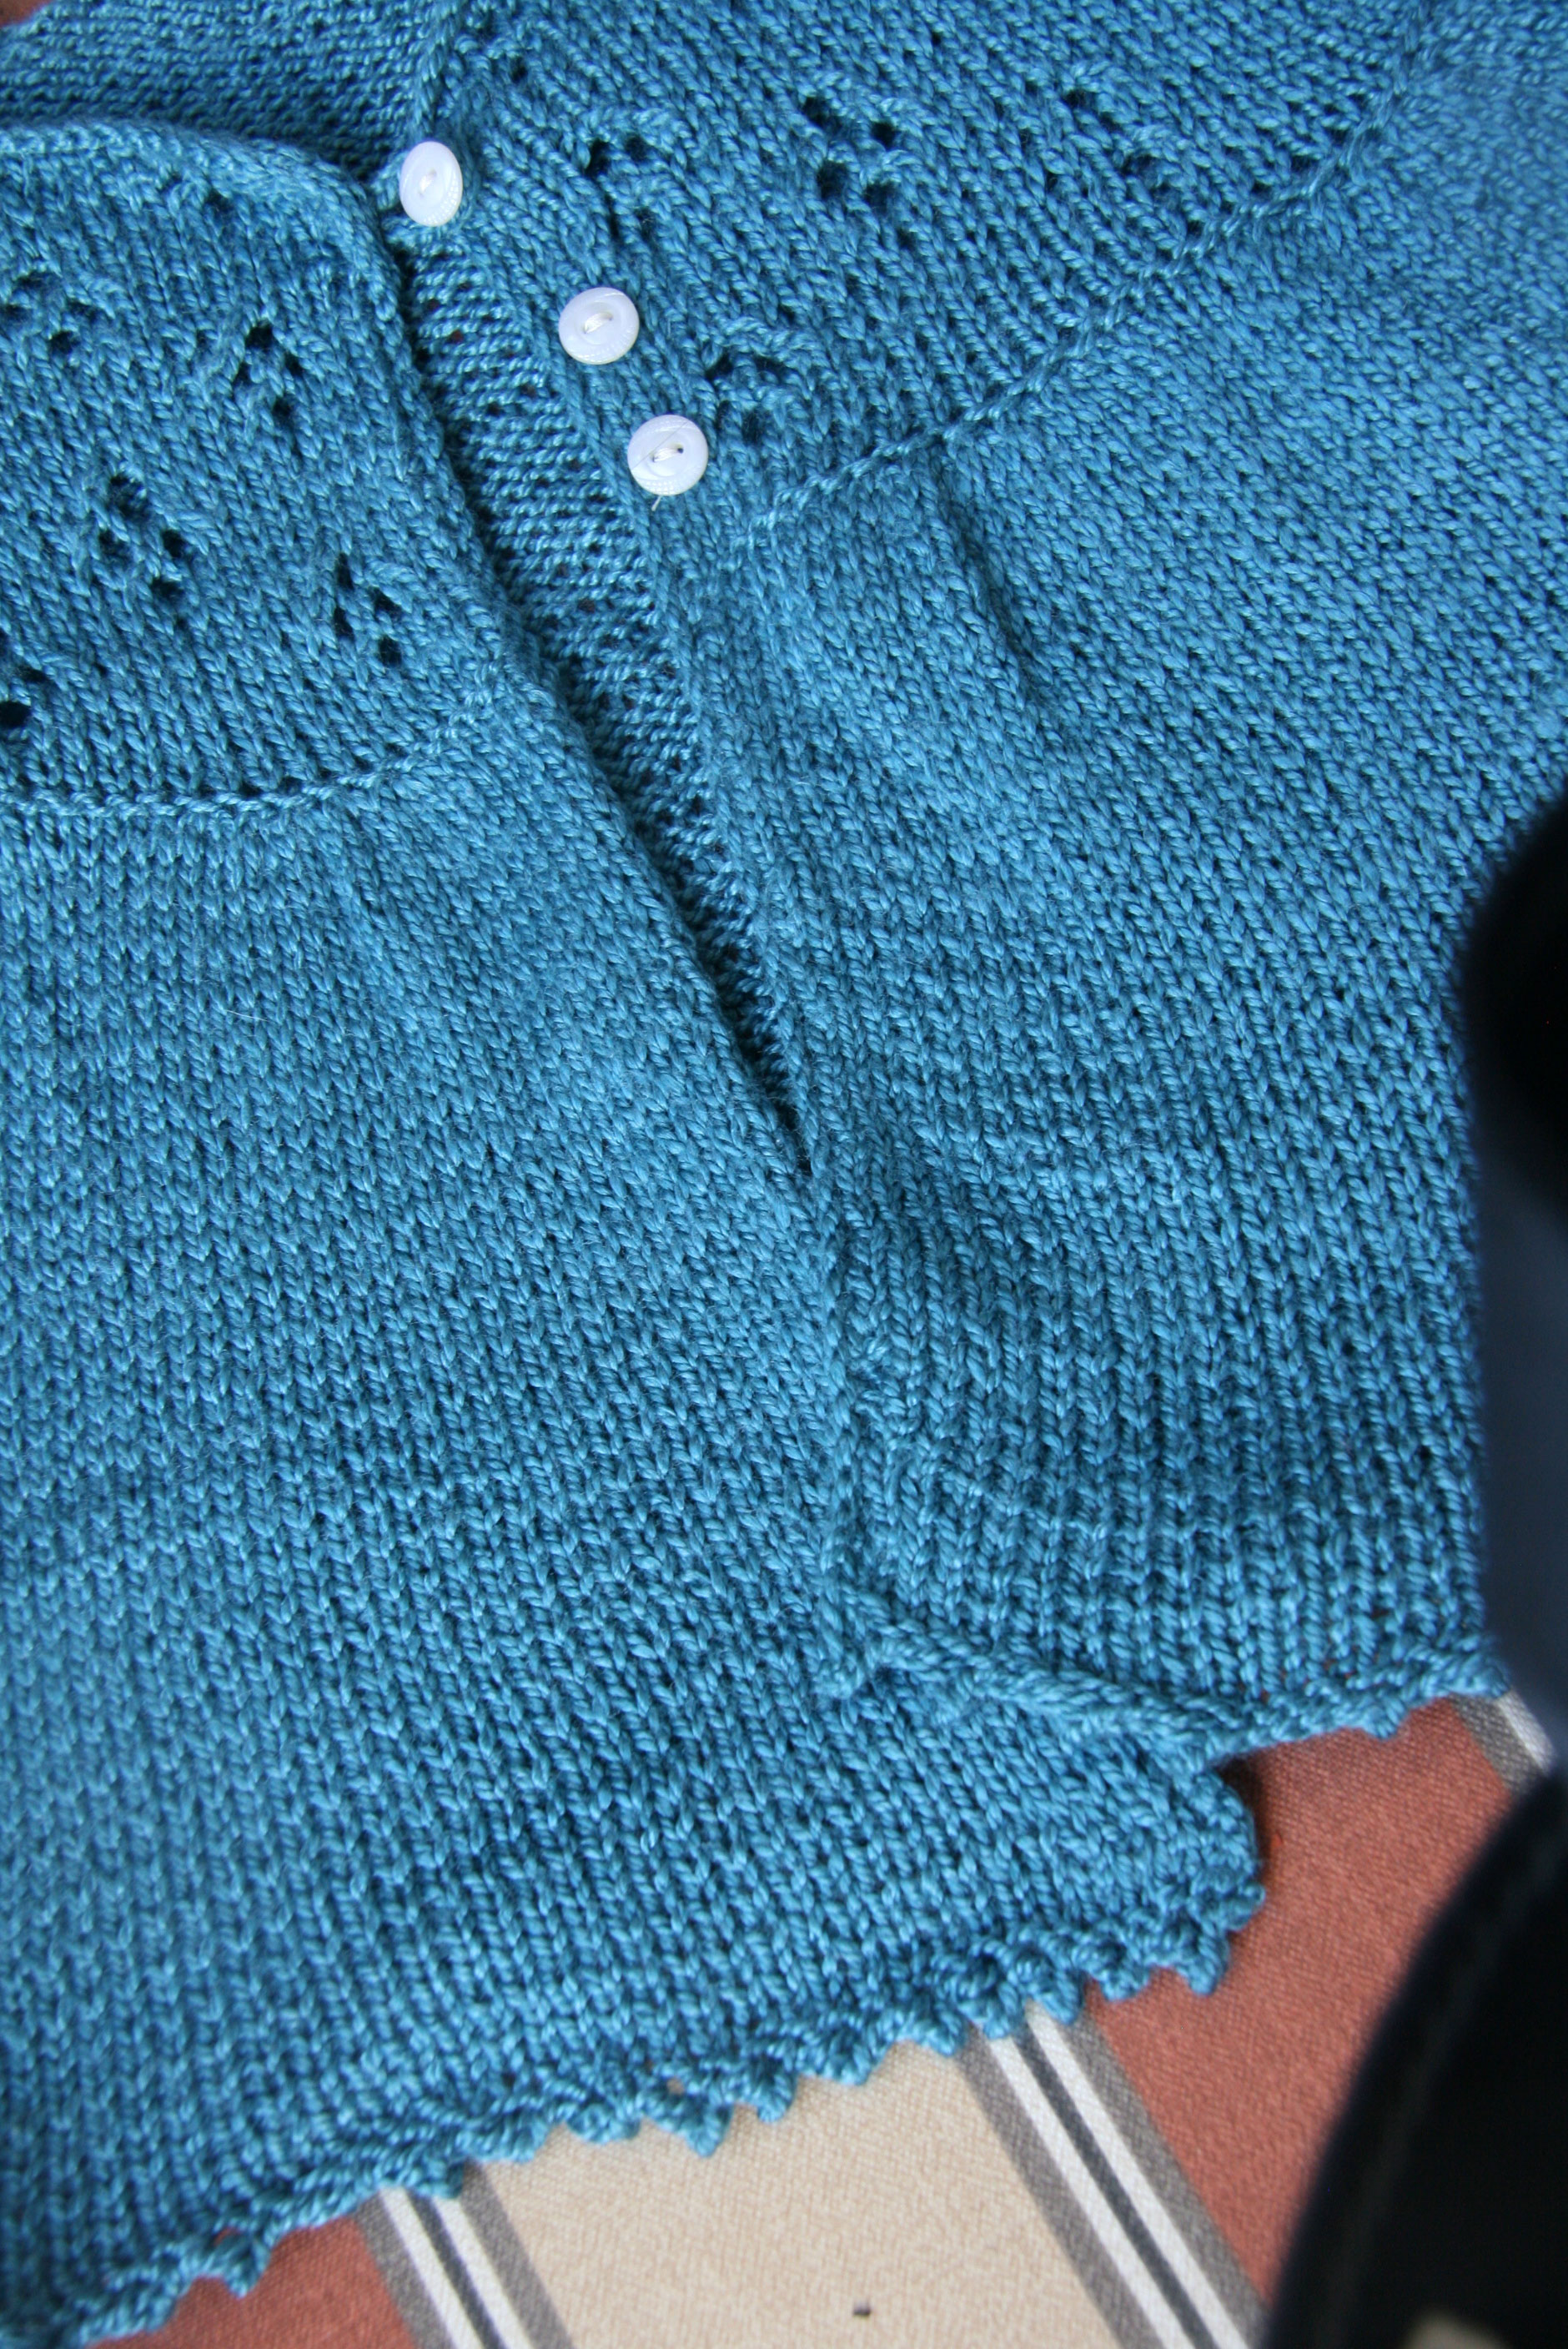
After I finished this one and declared it a “semi-disaster”, I had to make another one for my sister-in-law’s friend’s daughter. I found another pattern that I liked called “Granny’s Favourite”. I knit it with a more practical washable yarn too. It’s a cotton/acrylic blend from Kraemer.
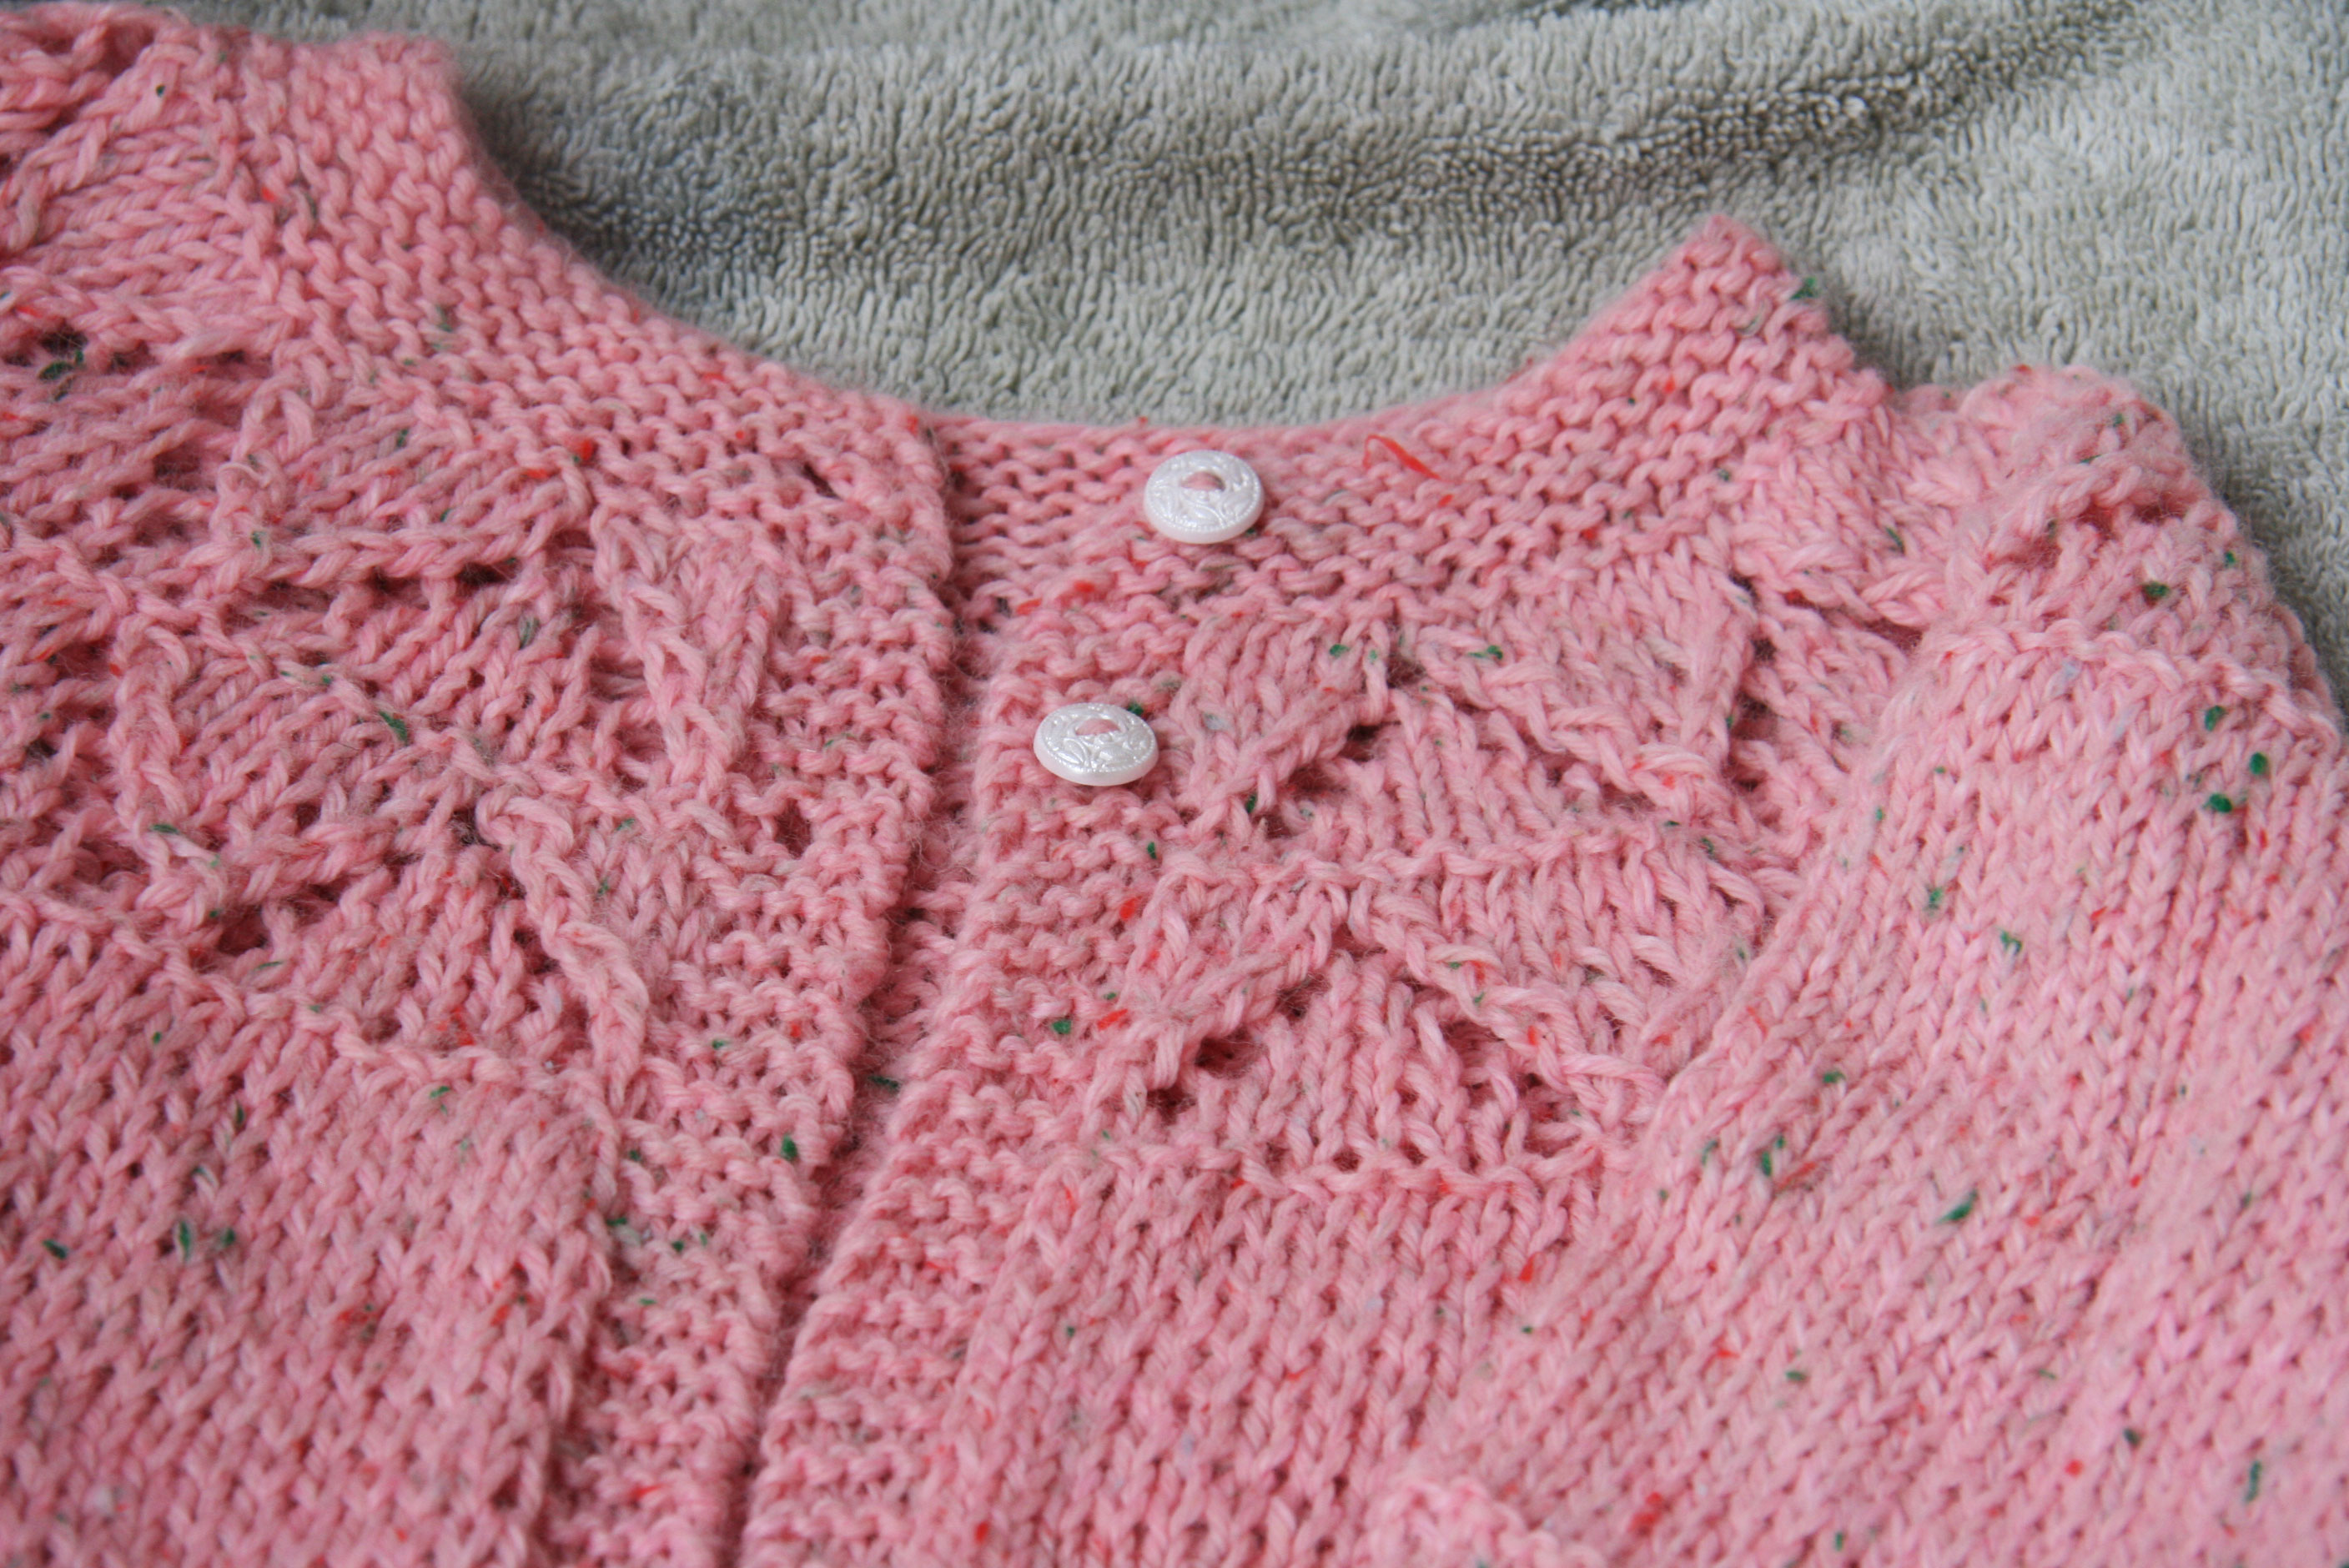
The little lace pattern at the top and on the sleeves was easy to follow. Everything about this pattern went as smoothly as the other sweater went unsmoothly. My only problem with this sweater was that I first knit a long sleeve. There is lace at the wrist, and I thought it looked too bulky and long for a sweater for an 18 month to 2 year old. So I ripped it back and made a 3/4 length sleeve. I liked this much better.
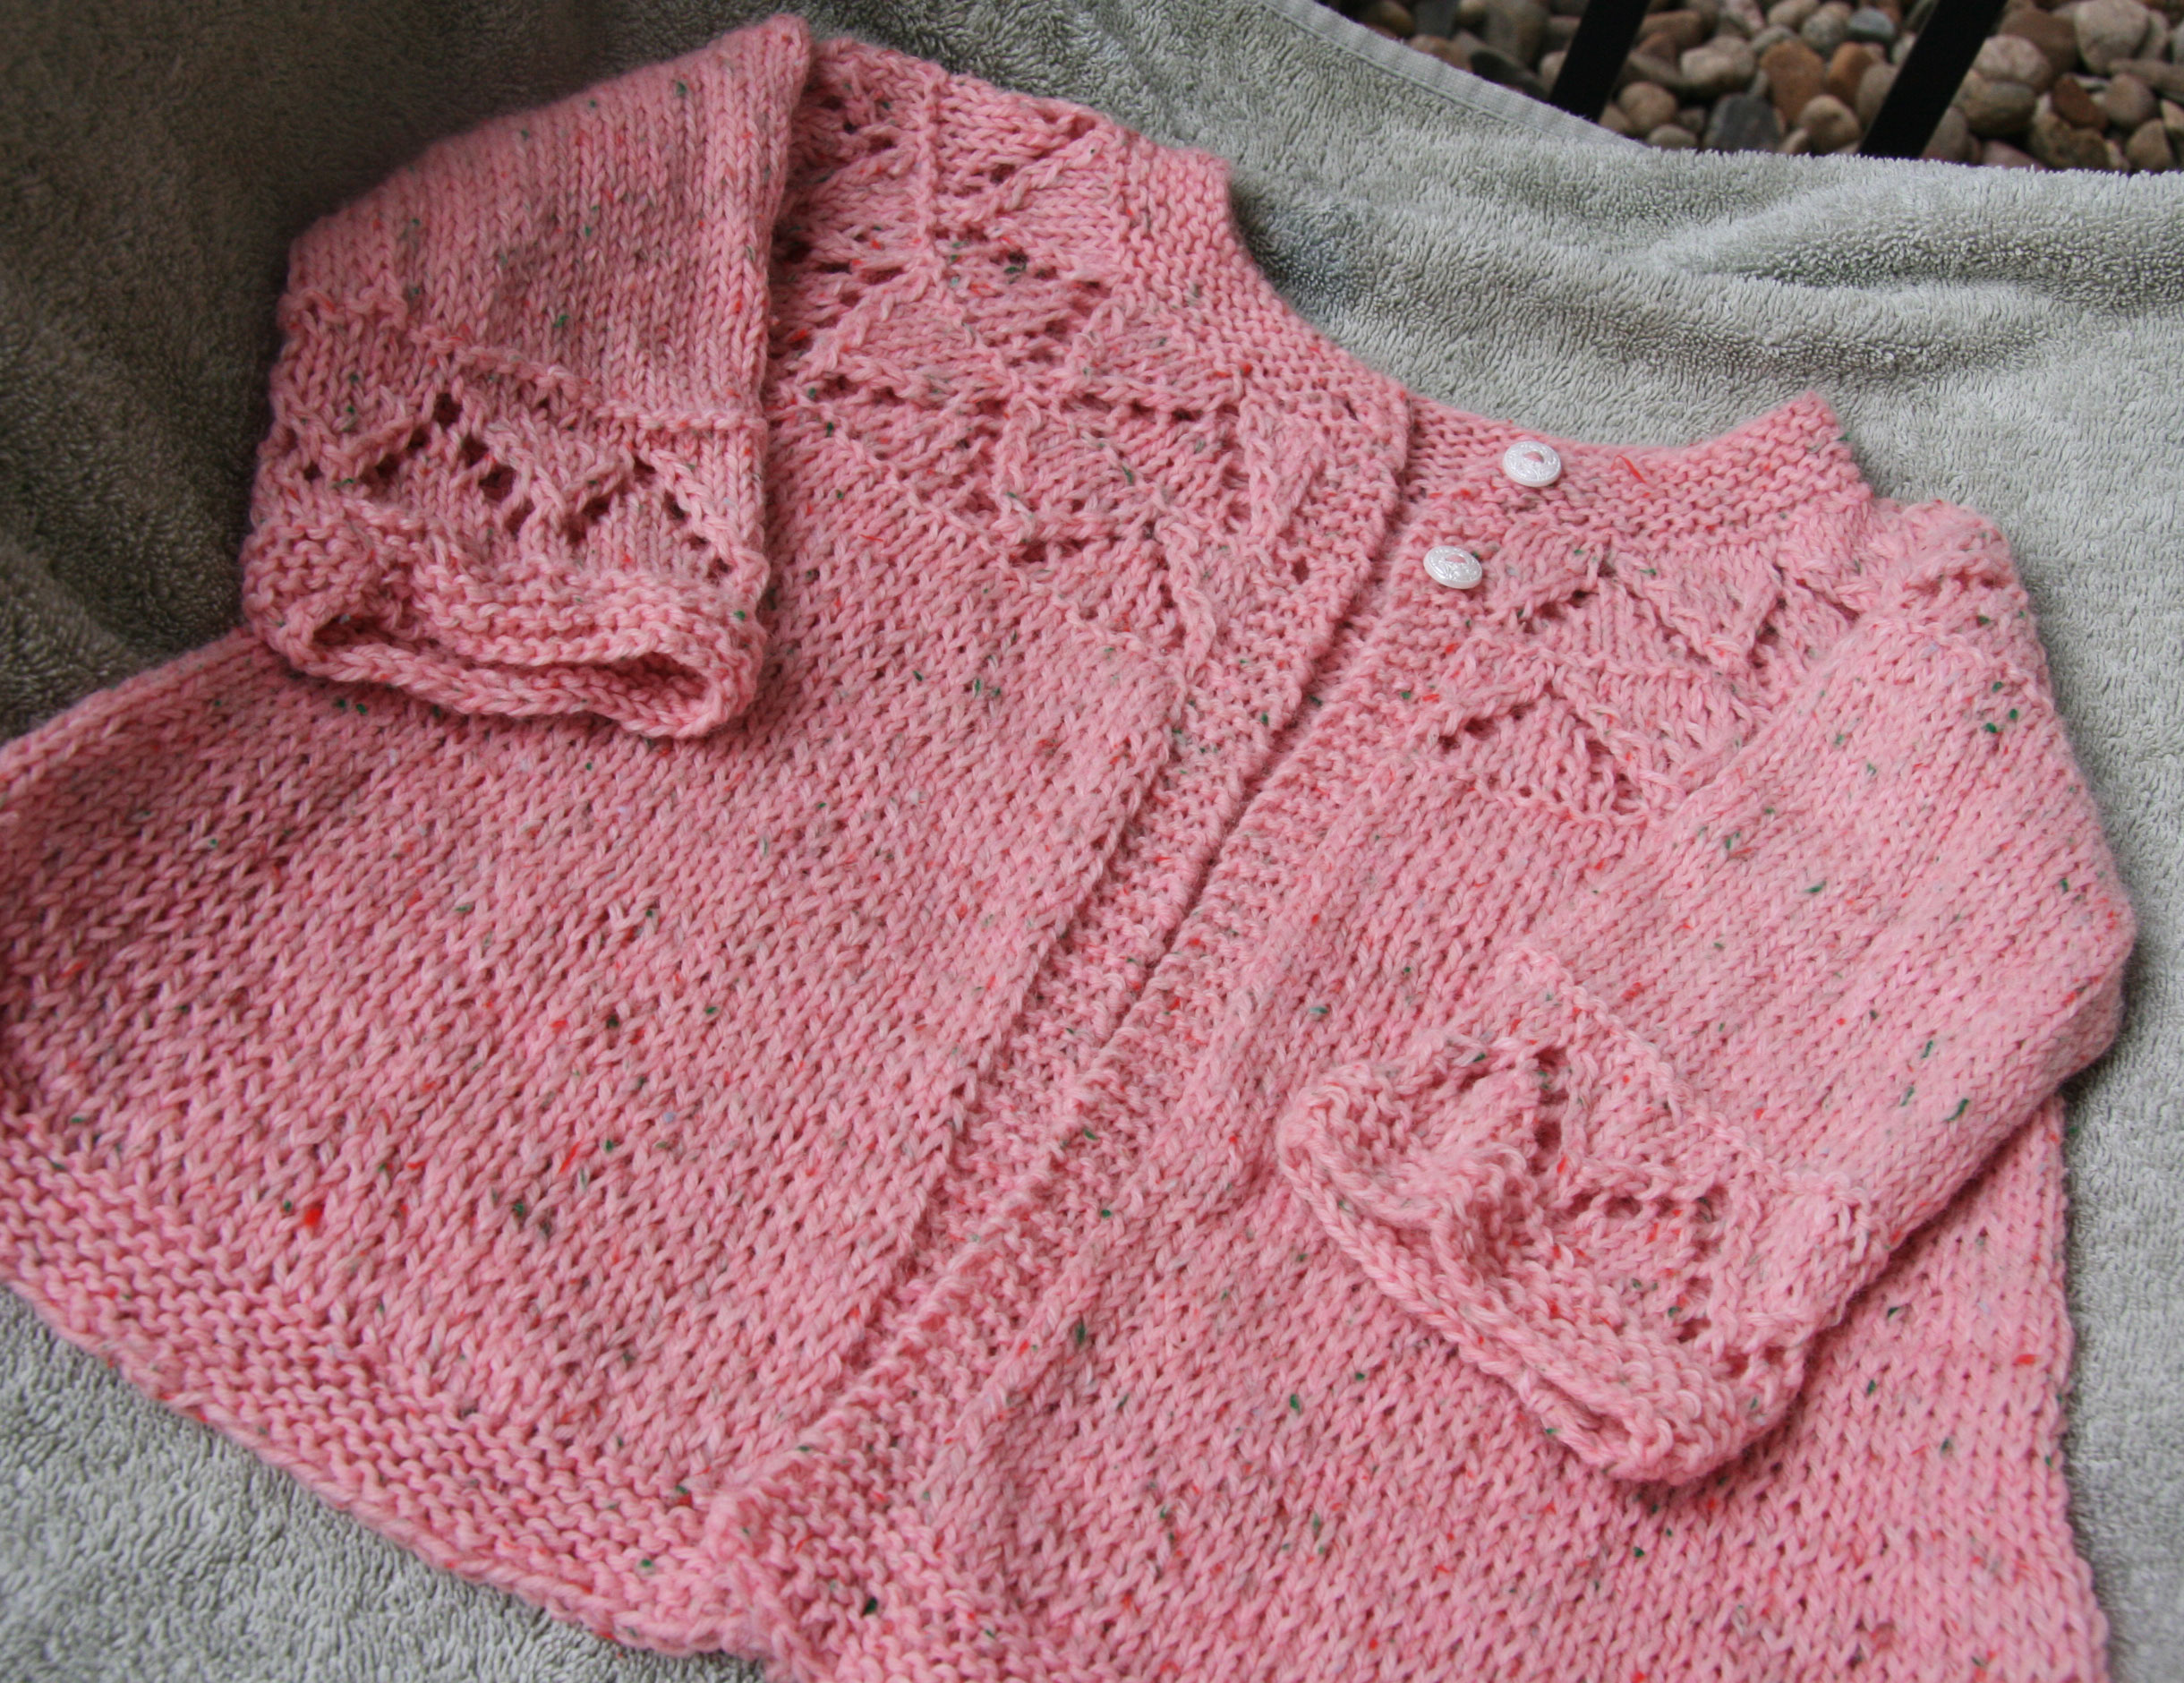
I took pictures of this while it was still on the towel I used for blocking. I meant to get some better ones, but my brain was in pre-move addled mode at that point!
Both of these patterns are good ones. The first one is more difficult in that you have to be really careful when you pick up the stitches for the edging or you will have a side that is longer than the other. I’d like to knit this second sweater again sometime, although it’s like reading a book for the second time – there is no time to do this because there are so many great patterns to knit and books to read!
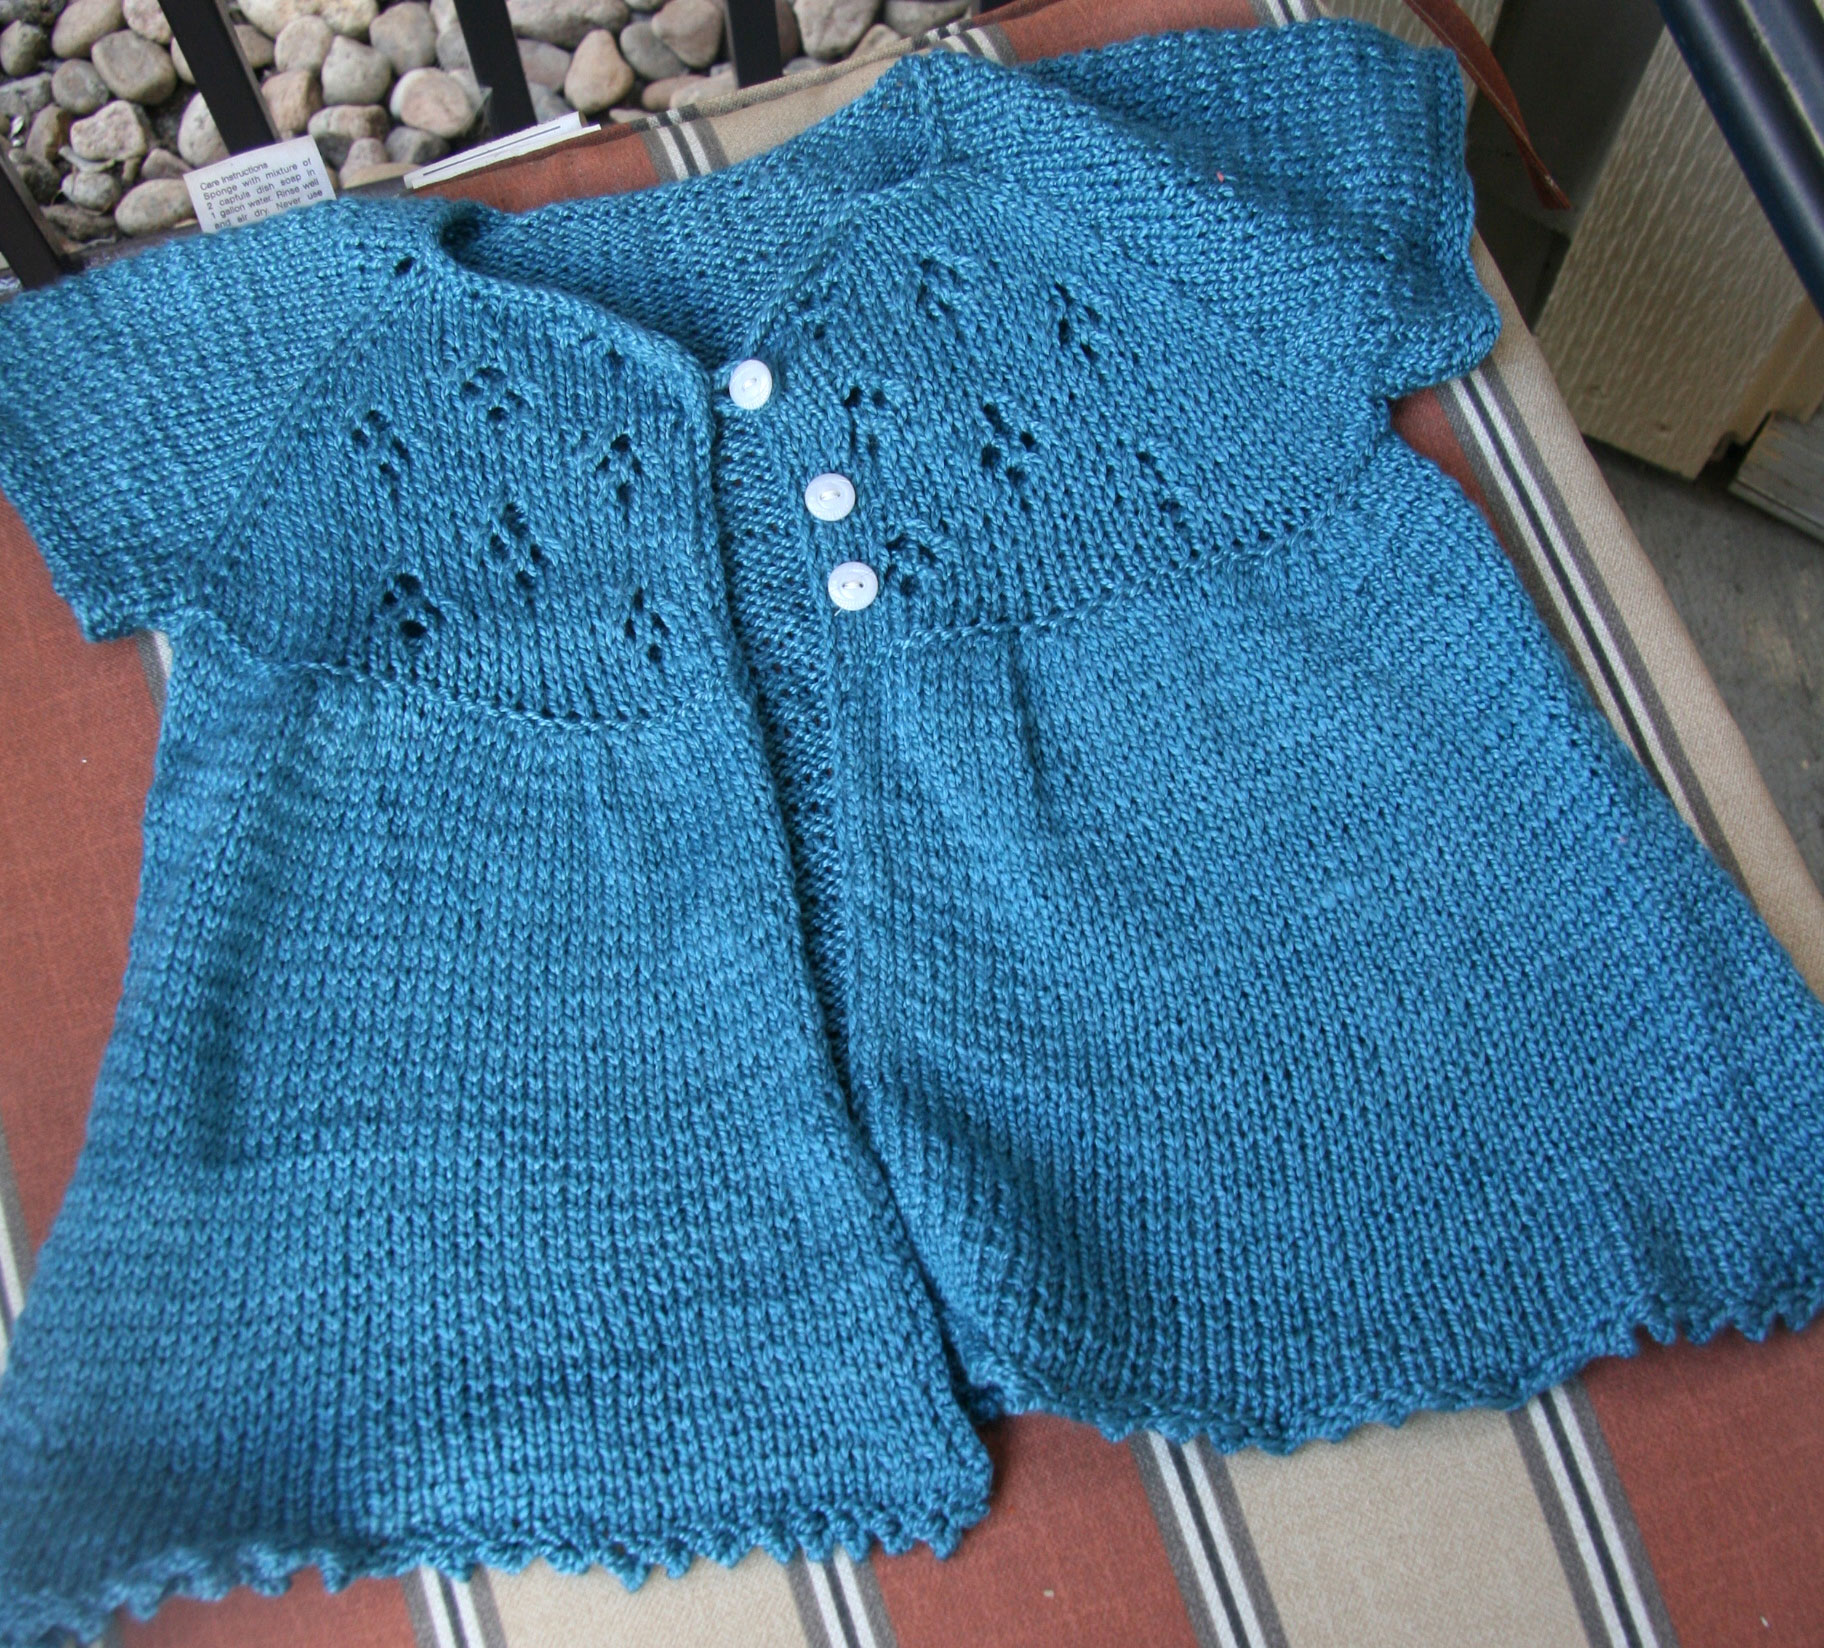
I’ve been working on a little sweater which was going to be for little girl of a friend of my sister-in-law’s (too many prepositional phrases!). It’s been a real learning experience. The pattern is Little Ancolie, and it’s been a challenge from the beginning. I blogged earlier about some problems I had initially with the lace as well.
(I just want to add that this is a really nice pattern. The knitter was the problem. Not the pattern!)
So I’ve learned a lot from this sweater.
1. I’ve learned about yarn. Bamboo is very drapey. This yarn is a bamboo/wool blend. The sweater looks pretty, but I’m thinking it is not going to hold its shape very well.
However, I also worried that it was not going to block out very smoothly, and it did actually block out really nicely.
2. I’ve learned about the possible perils of using double pointed needles in the round versus circular flat knitting. Most of the sweater was knit flat. The sleeves were to be done in the round on dpns. Well, I chose what I thought were the same size needles, but they were a different brand. They were also metal, and I had knit the flat portion with bamboo needles. The difference between the sleeves and body is just a little bit noticeable.
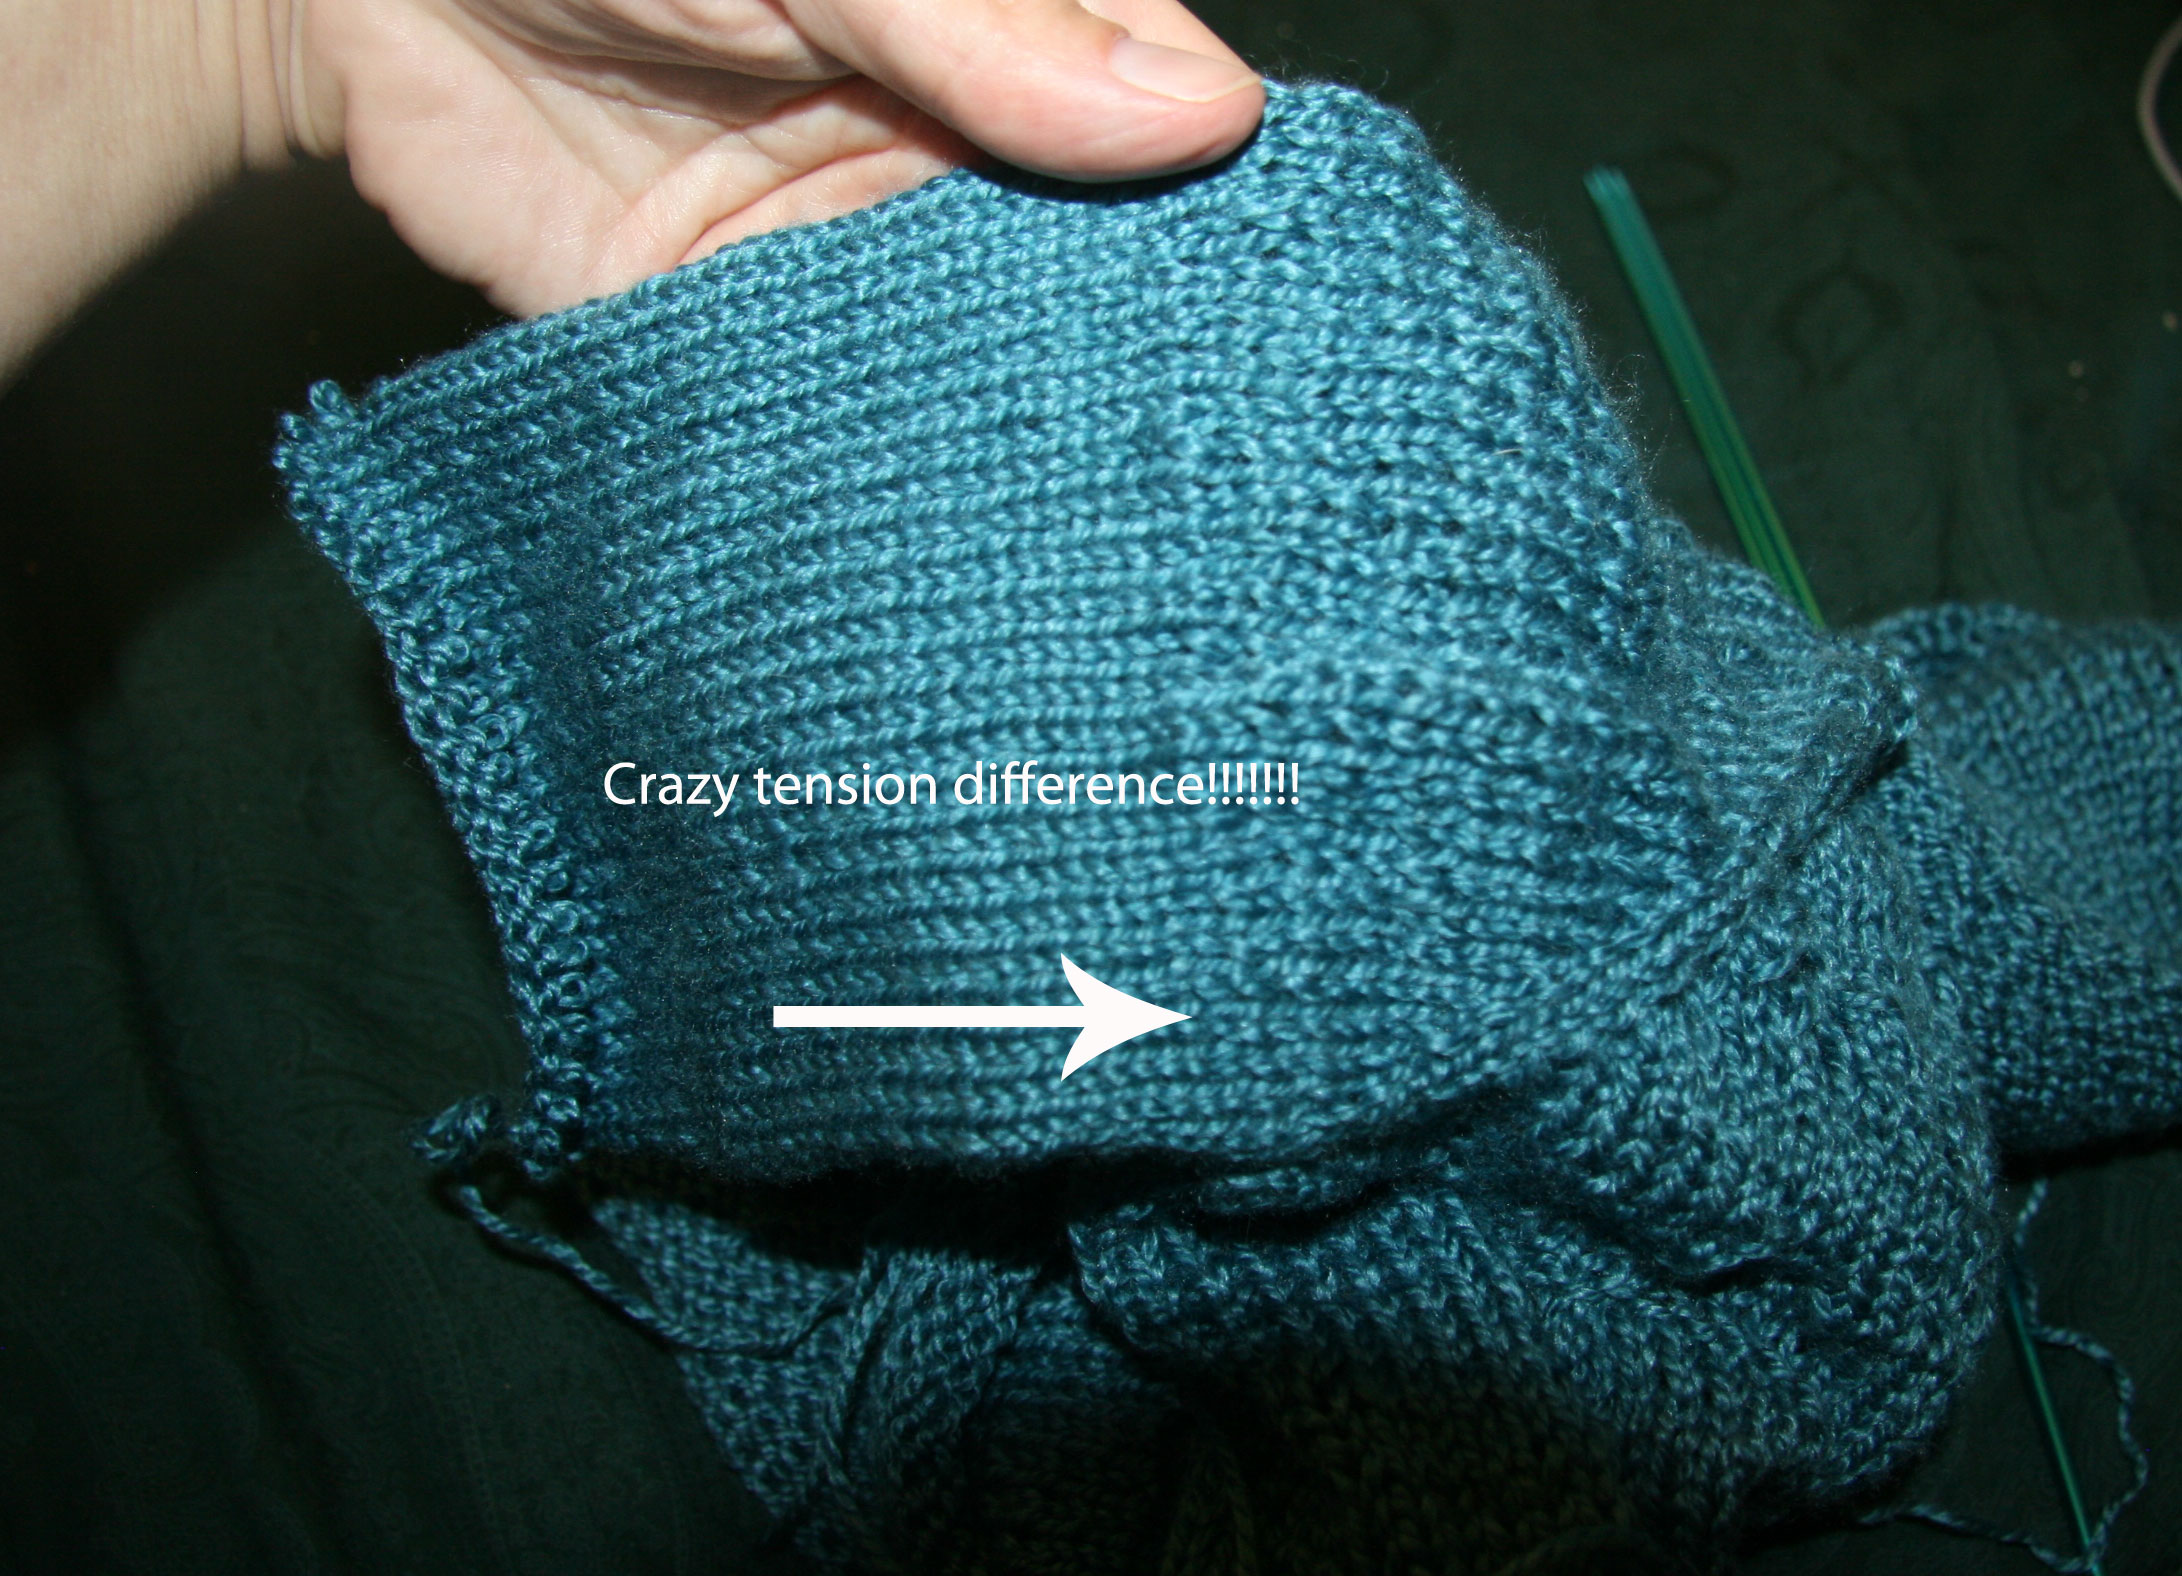
Yes. Just a little.
I ended up knitting short sleeves and I actually knit them flat and then seamed them up.
3. I put a picot edge at the bottom. It was rolling up like crazy. I did not think that blocking would fix this, but it actually did.
So at some point in the knitting of the sweater, I thought that all of these things were going to result in the ruination of my project. But it all worked out.
4. When the pattern says “carefully” pick up stitches for the edging, and it adds that you should make sure you pick up the same number on each side, you need to take heed. I thought I had picked up relatively the same number of stitches on each side. I did not.
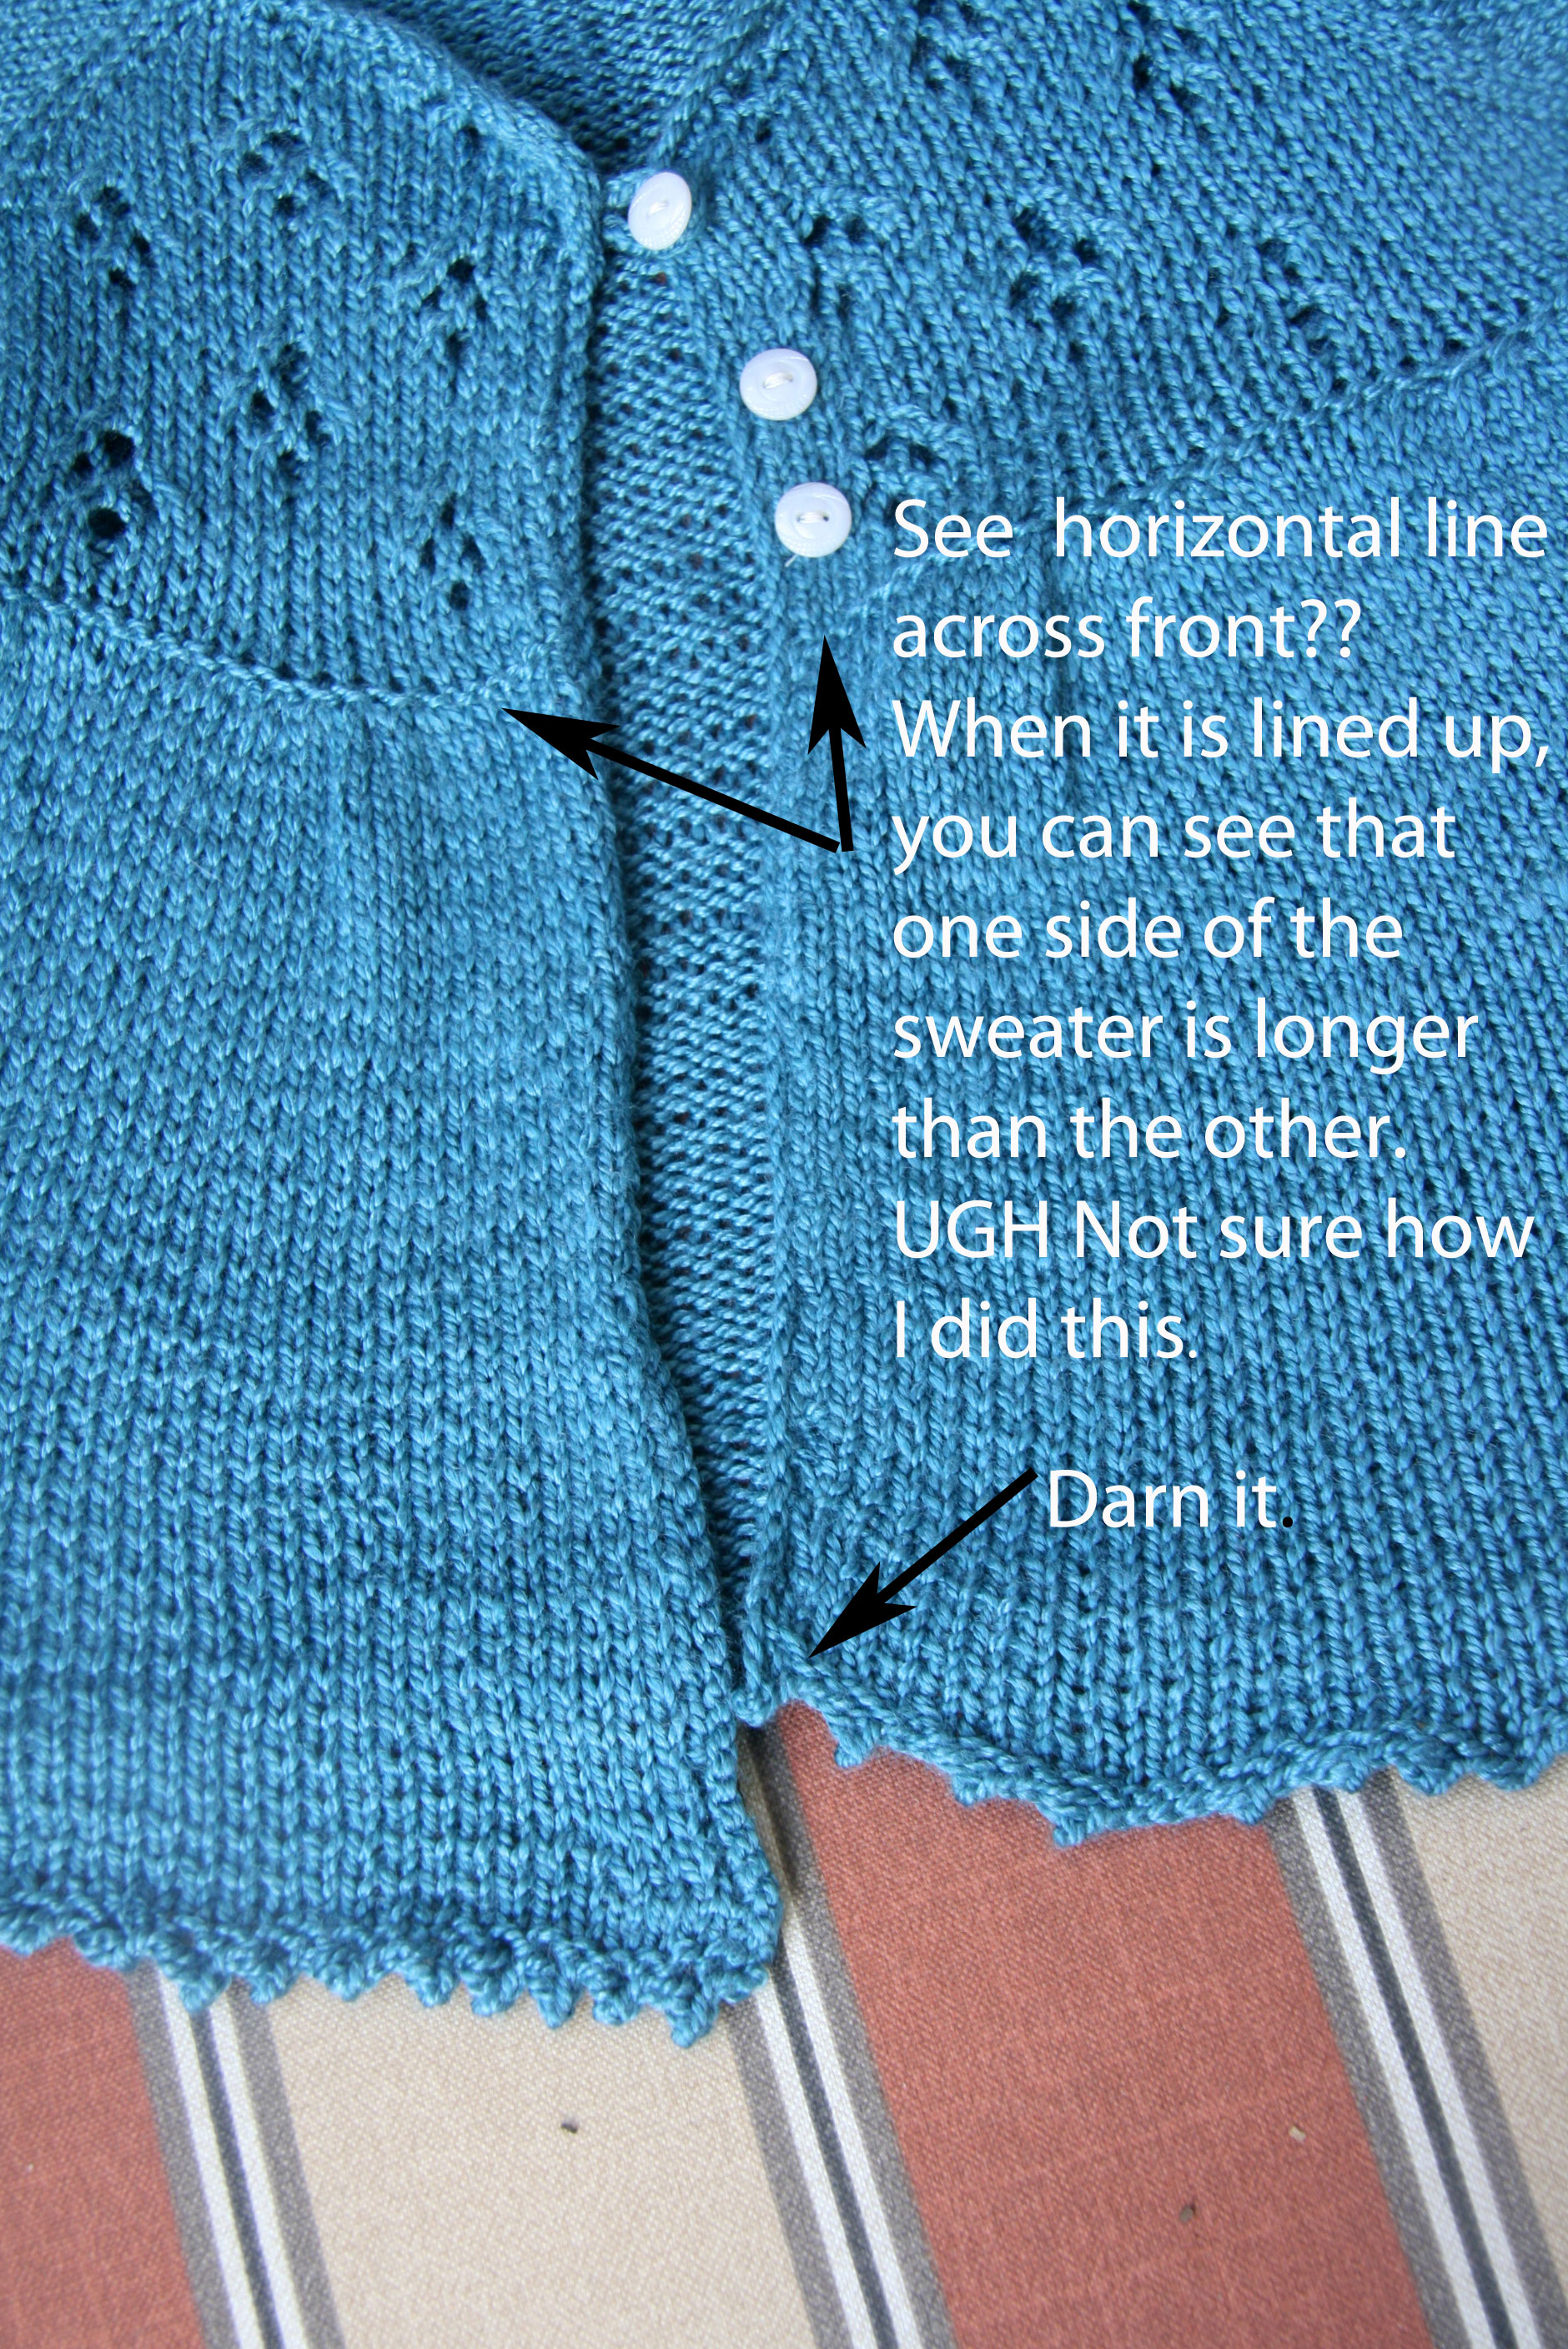
As can be seen in the above photo, one side is quite a bit shorter than the other. I declared this to be the ruination of the sweater, and I immediately began knitting another one. It’s going much more smoothly so far. I have not experienced a single bump along the way *knock on wood*.
As a possible salvage, I am going to send this sweater to my sweet niece Lila. With the drape of the bamboo and the constant motion of a wee one, she just might be able to wear it without this being too noticeable. She is also adorable, so as someone else mentioned to me – no one will be looking at the sweater anyway!
I have learned more from this project than almost any knitting project, so I really do consider this a success!
I started a new little cardigan the other day. The yarn I am using for it is Knit Picks Galileo. I can’t say enough good things about this yarn. It’s a bamboo/merino wool. It’s very soft and has such a pretty sheen.
I am knitting a pattern from a designer whose blog I have followed for a long time. The blog is in French, but I love just looking at the pictures of the beautiful things she designs and knits (fortunately, she provides the pattern in English).
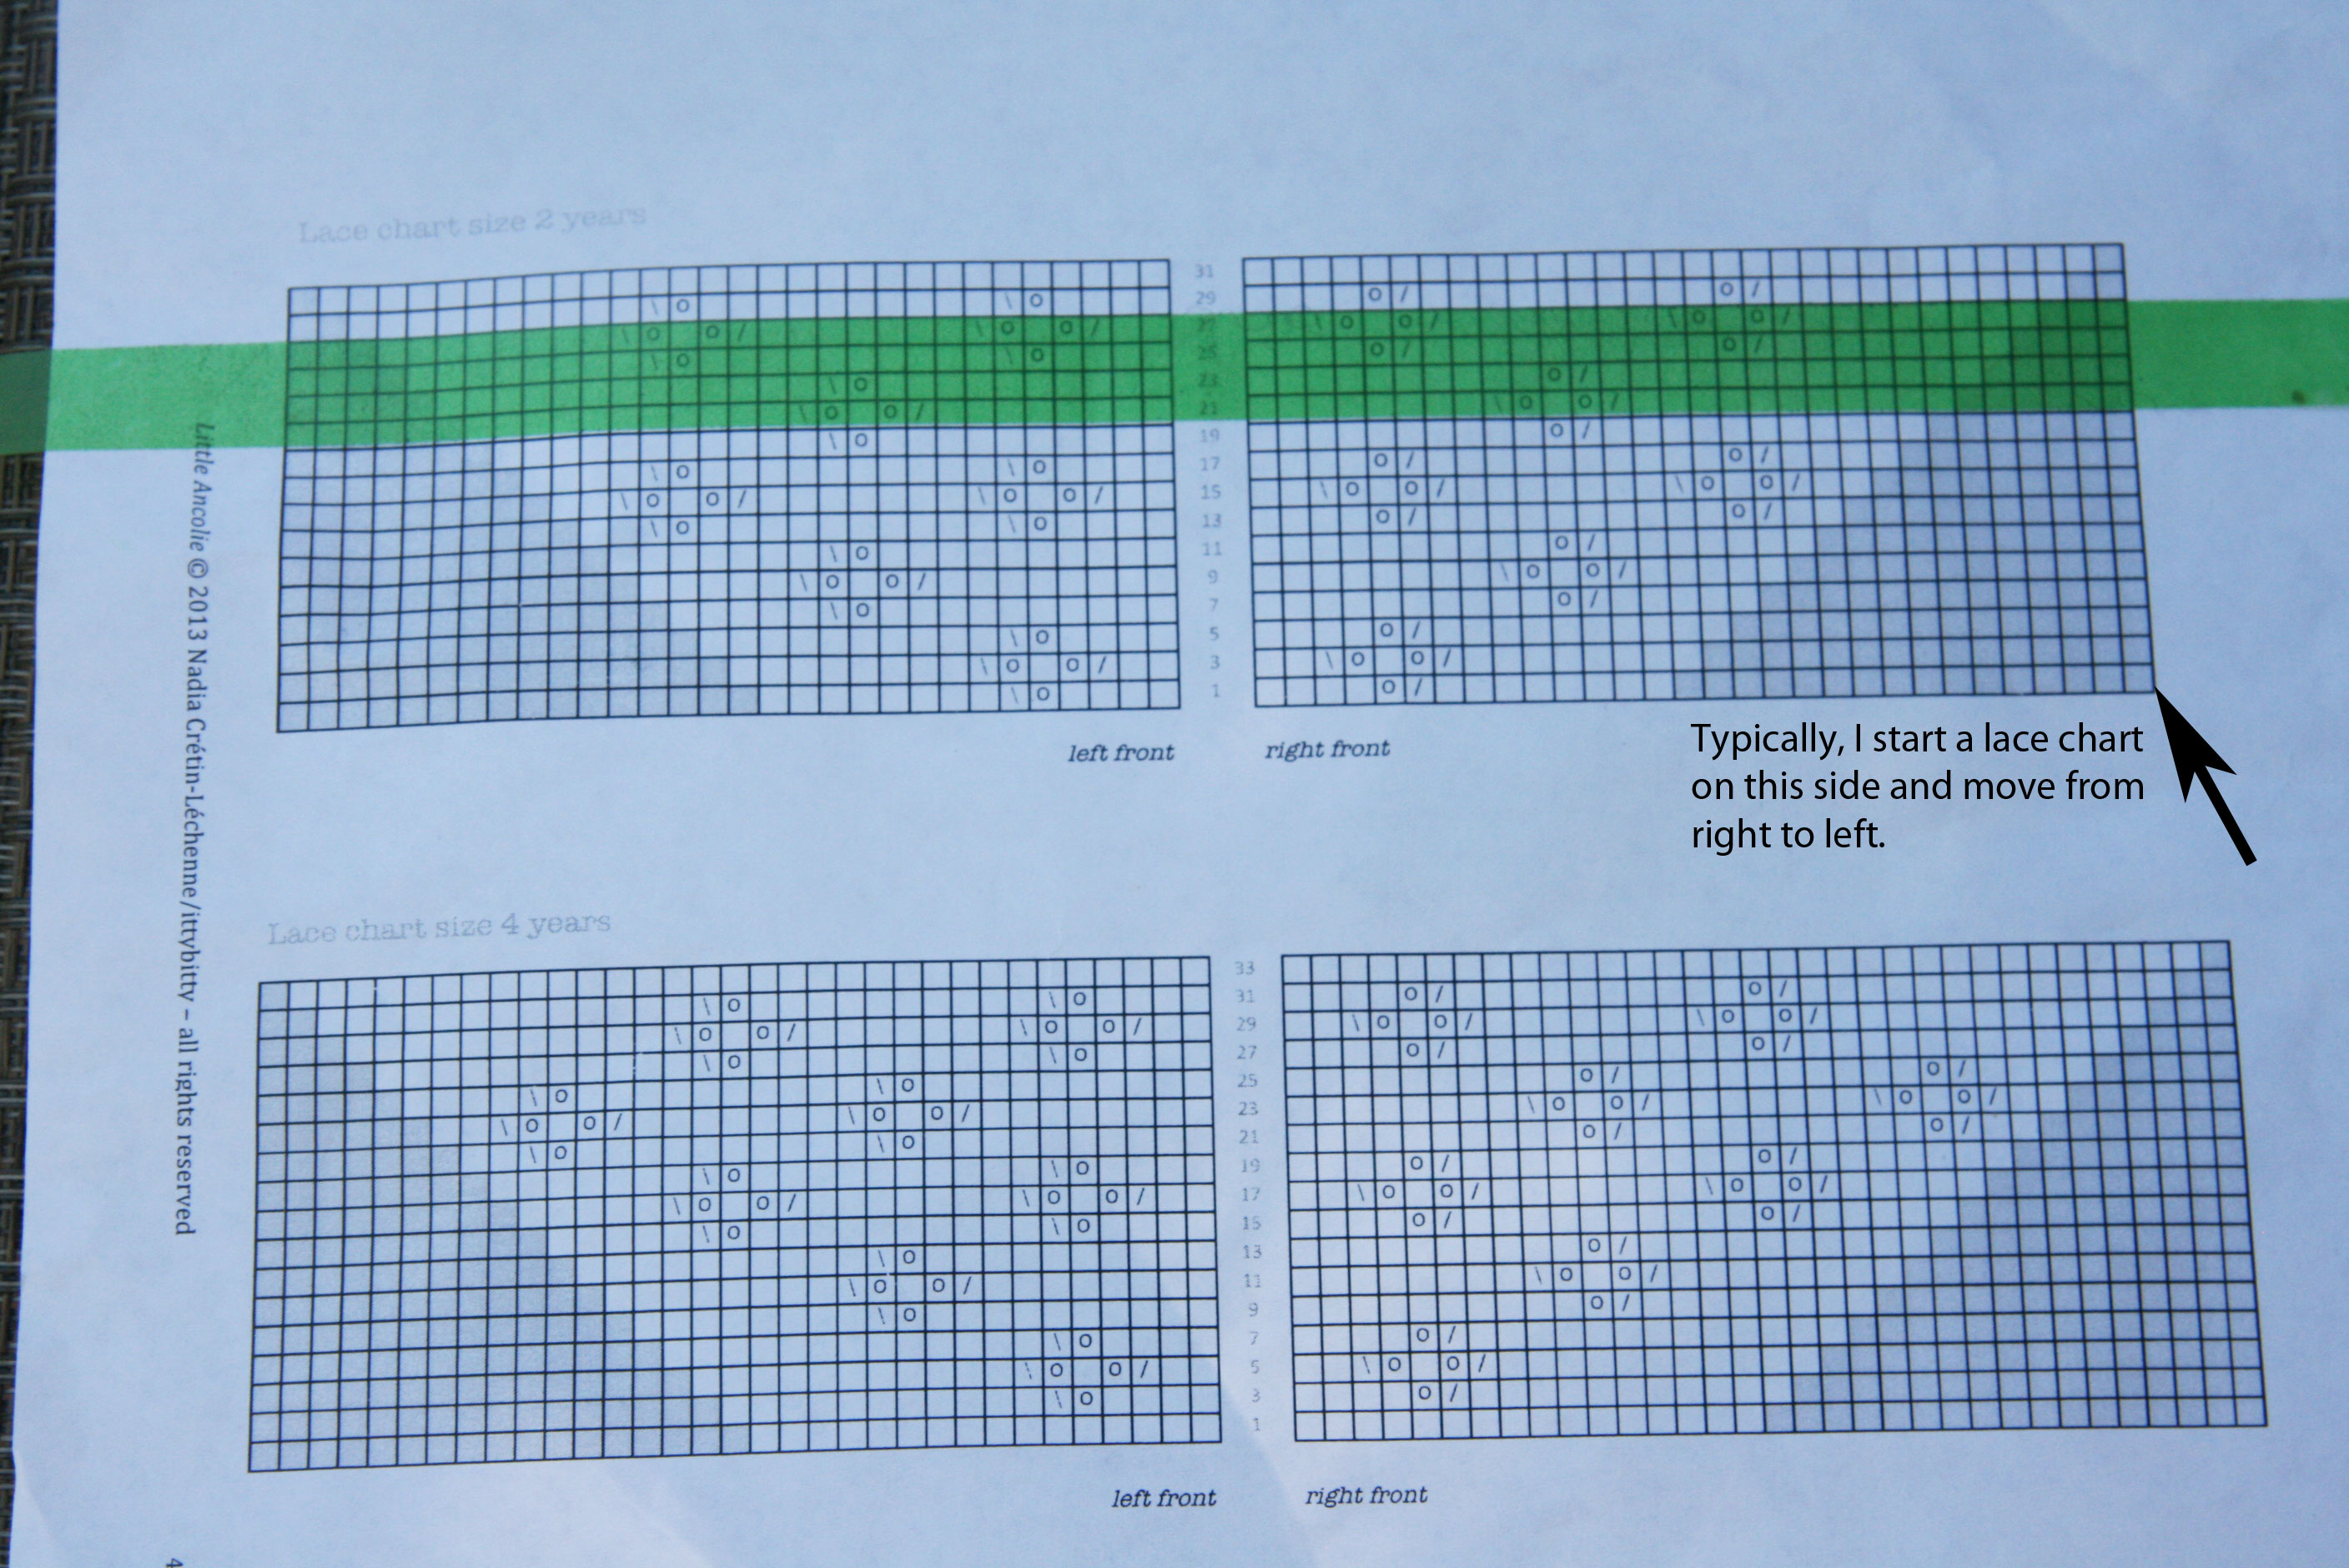
So I started this little sweater. It has lace across the front. I knitted several rows and I saw that the lace was not coming out right. So I pulled it out and started again. I thought I must have been off somewhere, but I basically did the same thing over again. Reminds me of the quote: “Insanity is doing the same thing over and over again but expecting different results.” (I thought Einstein first said this, but apparently this may not be the case.) But I like that quote. It’s apt because that is what I did.
I was getting very frustrated and mad at myself. I don’t like it when I just can’t figure something out. Fortunately, there is ravelry. I went through the project notes of several other knitters who have knitted this pattern. Thankfully, one of these knitters enlightened and saved me!
So typically when you knit a lace chart you start on the right side and go left.
 (I also figured out how to do put in arrows using Photoshop. I was proud!)
But when you have lace on the front of a cardigan this won’t necessarily work. You have to take into consideration that you are just knitting the front, and also that there is a divide between the left front and the right front.

I was very very very happy when I figured this out with the help of ravelry. Third time was a charm and it’s gone easy as pie since then.
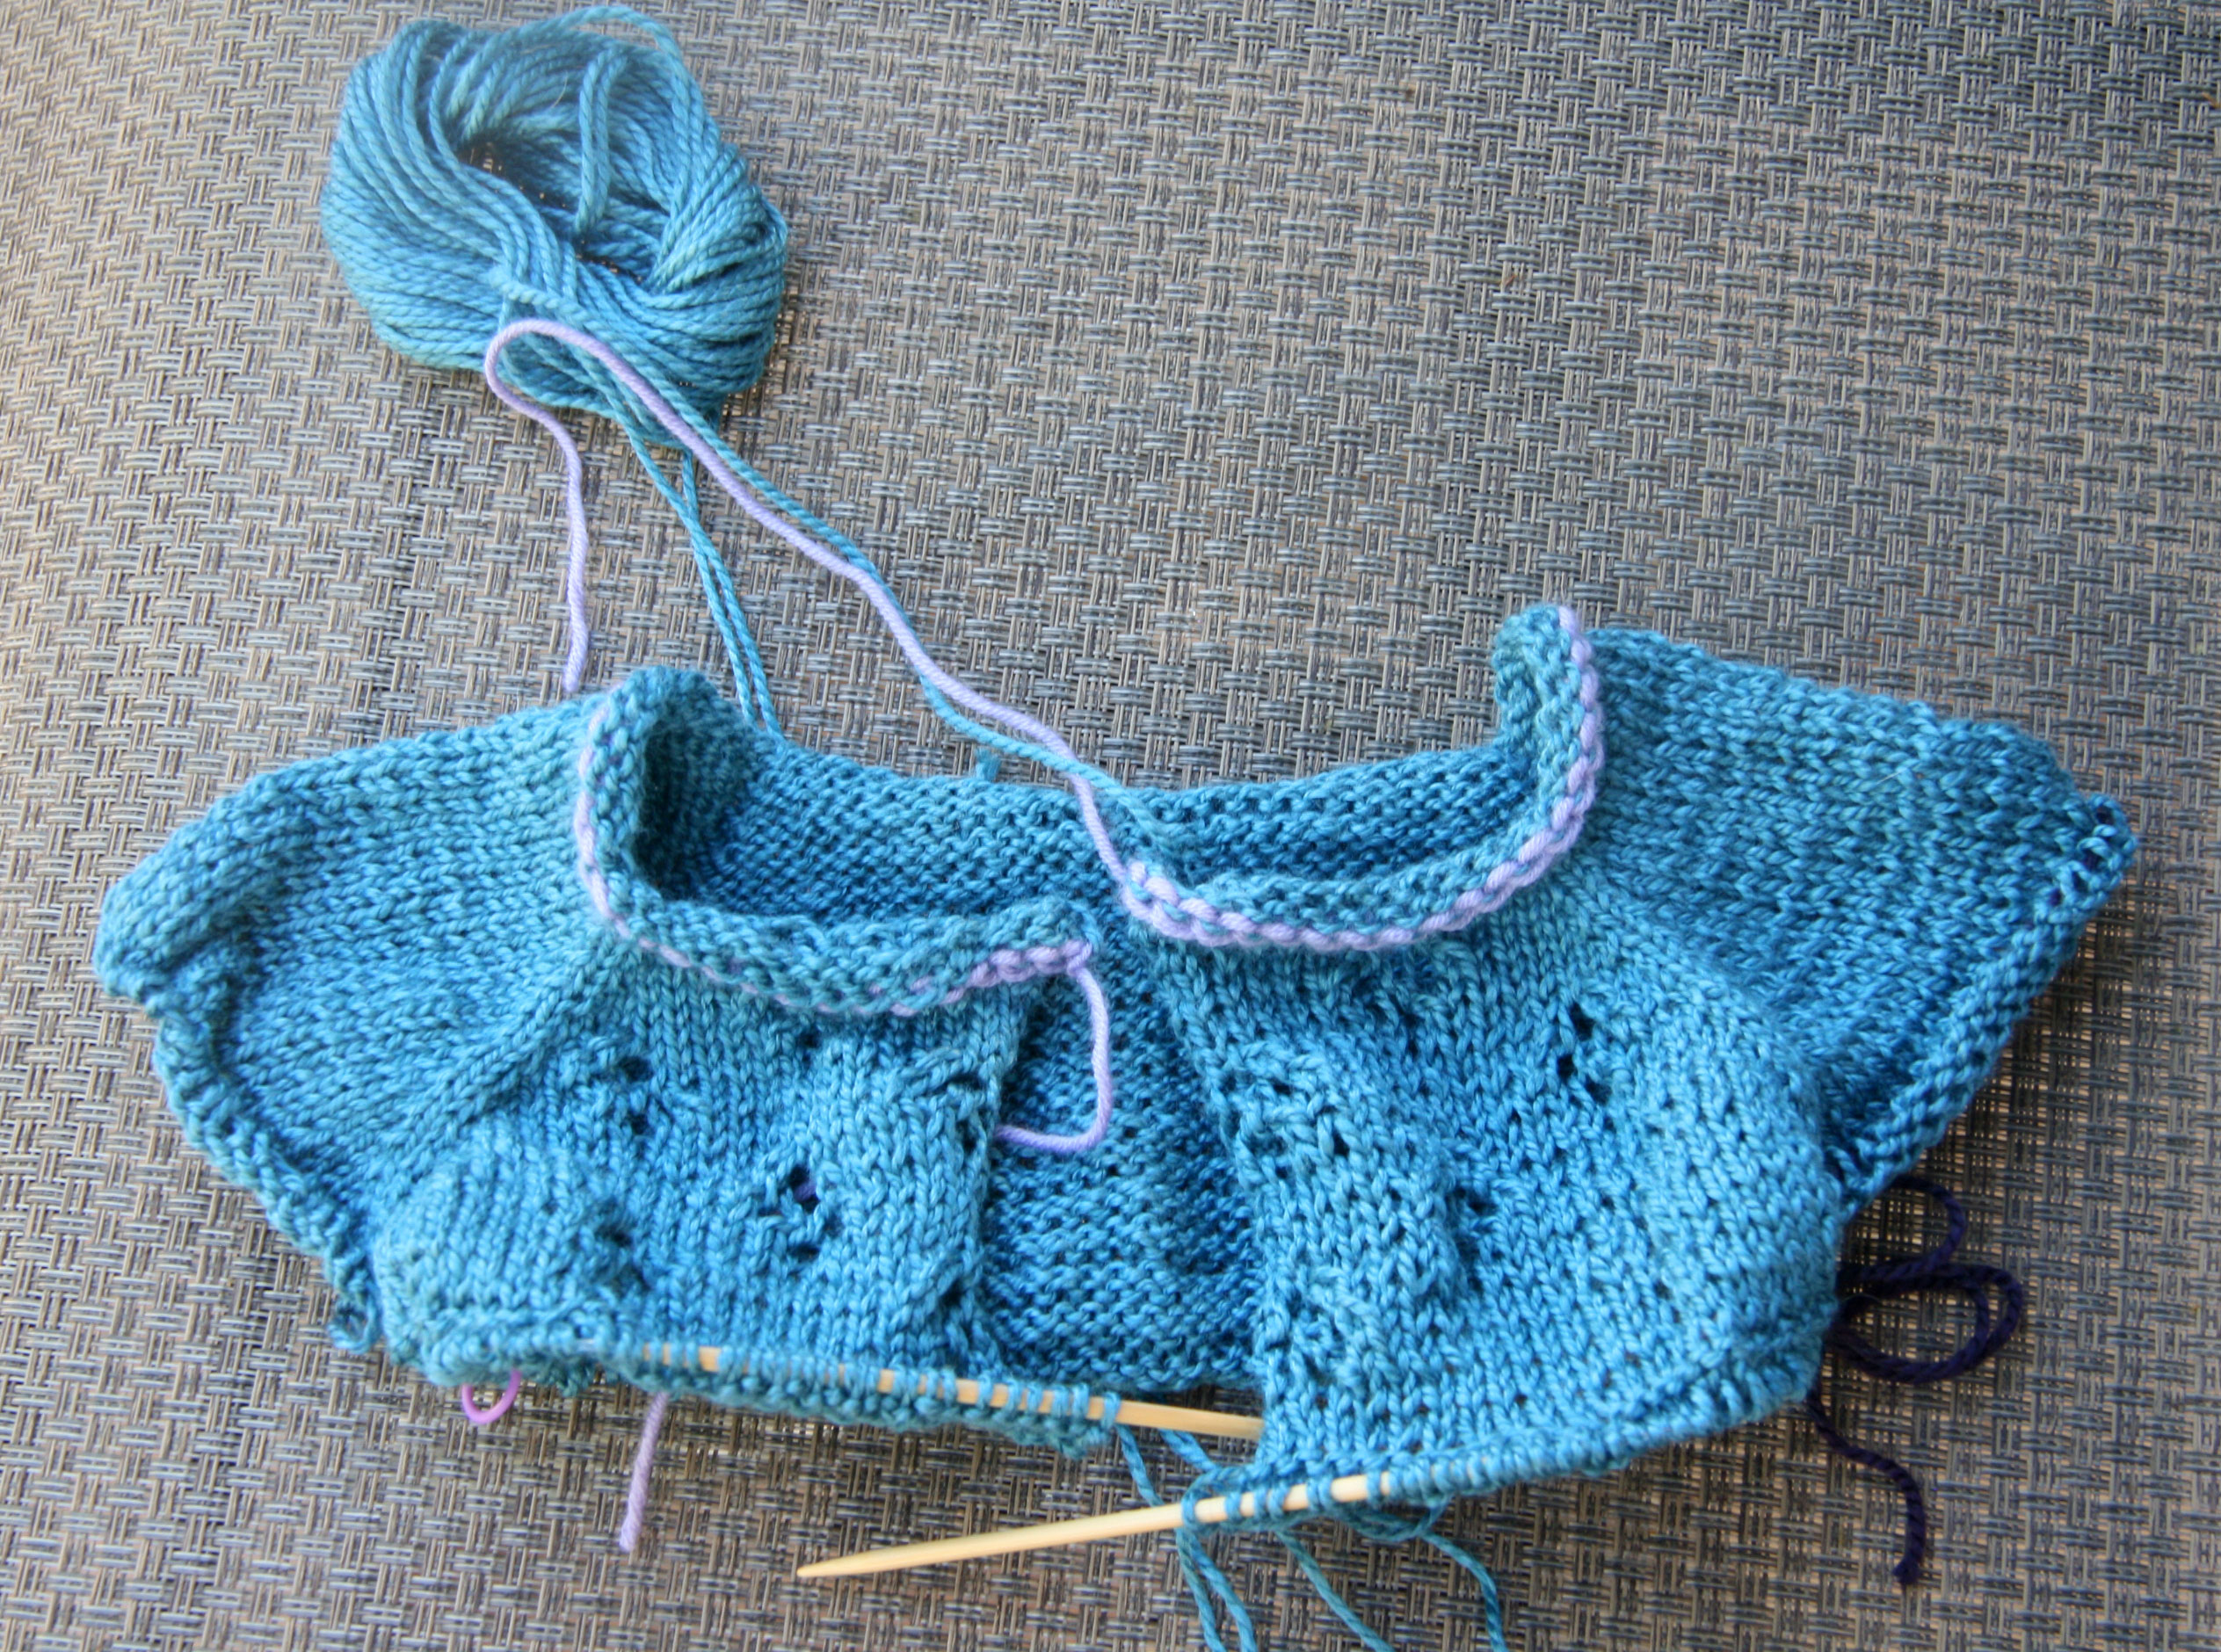
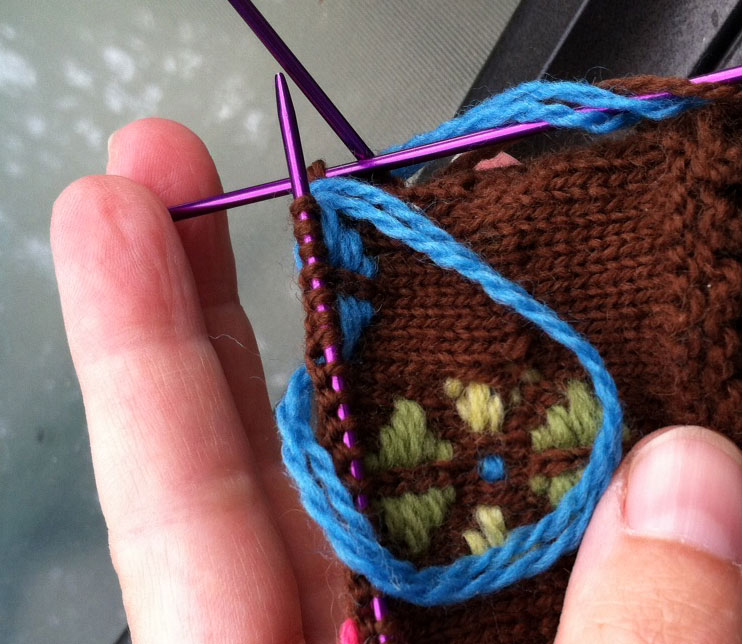
The purple yarn at the top is an indication of something else new that I learned. I did a provisional cast on (so I can add the neck border later). I’d done this type of cast on before, but not quite with this technique. I used the knitting needle and a crochet hook. The video I used made this very simple and easy to understand.
It’s going to be really pretty, and it’s a fun pattern to knit!
I follow a knitting group on facebook. The other day someone posted a picture of an iphone hoodie. I had to go find the pattern immediately. I went to my stash, picked out some yarn, and knitted this right up.

Cute cute cute. I loved it. My purse is like a bottomless cavern, so this also helps me locate my phone more easily. This is a fun easy knit.
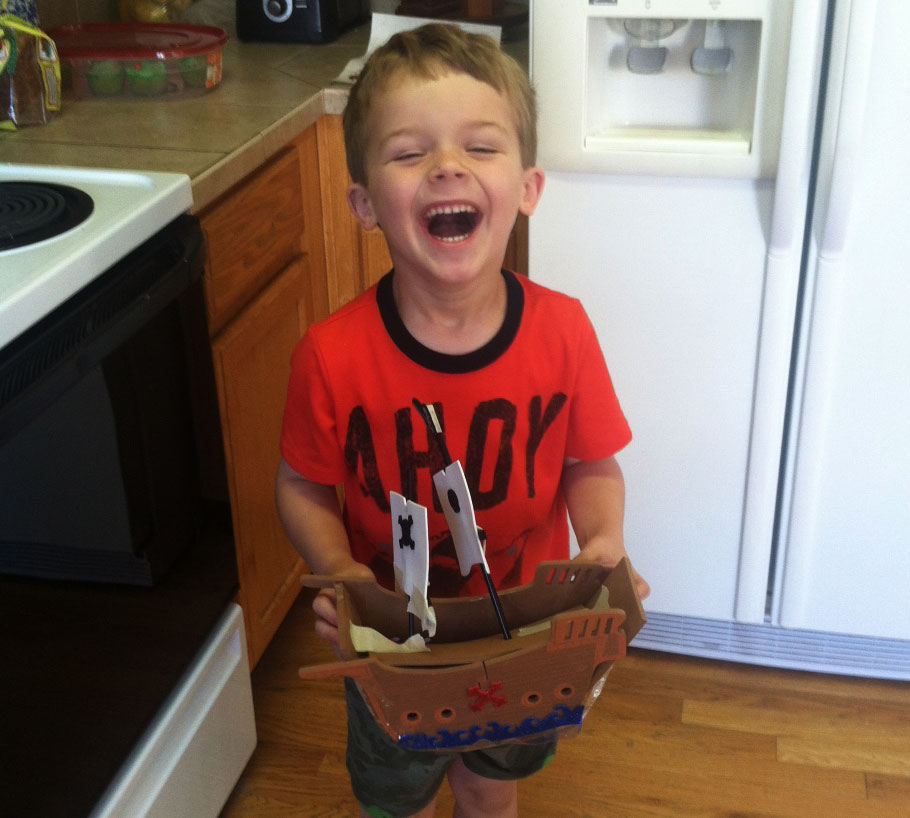
Davey, David and I have been doing several crafts this summer. Our success rate has been pretty good, but we tried a craft the other day that just didn’t work. It was one of those 3d foam projects. We were supposed to make a pirate ship.
This required glue. So the tricky thing was that we were supposed to connect the sides of the ship with a piece of foam which was also the bottom of the ship and then curved up to be the front. So we had the foam glue. We carefully applied it and then held it in place. and held it. and held it. The craft was designed for ages 6+. Two 45 year olds were holding it in place. One of them was saying “this will never work. this is not going to work.” He was right, but I couldn’t stand to just give up. We needed Super Glue to have a prayer, but Super Glue over a fairly large project seemed potentially hazardous.
So finally we gave up. I told Davey that we were just going to have fun with it. So we have lots of packing tape right now. Davey and I just taped the heck out of that ship.
It looked terrible. It’s supposed to have about six billowing sails. I love Davey’s expression as he gazes at it.

Davey and David have this funny exaggerated voice that they use to say “Gilderoy Lockhart” (as he is so pretentious and thinks he is awesome – Harry Potter – Chamber of Secrets). Davey applied this voice to the ship. It is the “Lousy Pirate Ship.”
He is developing a great sense of humor. He makes us laugh all the time.
So it was a craft fail pretty much in the sense that it looked terrible, but we had a great time, so I guess it was actually pretty successful!
Arm knitting. I’d never heard of such a thing! My friend Carol posted a link about it to my facebook the other night. This was something I had to try.
So arm knitting is what it sounds like. Your arms are the knitting needles.

I looked around a little and found a blog where there were tutorials for both an arm knitted scarf and an arm knitted blanket. Of course, I wanted to jump in and immediately knit a blanket. But then I actually stopped to think for a moment and decided that maybe I should not begin with quite such an ambitious project which would also require me to buy yarn. I realized that I had the yarn in my stash to knit a scarf. I found two skeins of chunky cotton/acrylic and a skein of worsted weight cotton.
I sat down with the videos and followed her guide. She walks through doing a long tail cast on with her arms. That was a little tough on my brain, so I had to turn off the video and visualize my arms as knitting needles. Once I did that, I was able to figure out how to “cast on”.
After that, it was pretty easy. It was a little hard at first to manage the three skeins of yarn, but then I put them on the floor so they could bounce around, and it wasn’t difficult at all.

David kindly helped me with the pictures. I tried by myself, but with yarn loops on both arms, that wasn’t happening. At all!
I’m pretty happy with my first result. It takes awhile to visualize what’s going on. For awhile, I thought I just had a long stringy mess. This is looser and more “hole-y” then I would like. It looks a little like a fishing net to me.

Davey modeled for me.

I want to do this again with more skeins of yarn. I’d like to make a blanket that looks more like the rug from the first link where I learned about arm knitting. He’s using at least 5 skeins of yarn I think, and his rug is much more solid looking. However, I am currently in a “knit from my stash” mode, so this will go on my to-do list! It’s really fun though. I’m not sure what you do when you want to take a break. I did this in about 30 minutes or so, but I had to carry my 3 balls of yarn with me and leave the scarf on my wrist. It probably wouldn’t be a big deal to run some yarn through the loops to hold them if I wanted to take a break.
It’s really relaxing though. I liked the motion of moving the yarn loops from arm to arm.
Time to google more arm knitting ideas!
Yesterday Davey went to his friend Olivia’s birthday party. Somehow they hadn’t seen each other since her last birthday party. I seriously don’t know what happens to time, but they were very happy to see each other again.
One of the games they played was called hot potato. Cool game – there was a water balloon on the inside of the potato which popped after a certain amount of time. It was too much stress for Davey although he hung in there for just a little while.

When it came time to open presents Davey waited very patiently for Olivia to get to his. Then he leaned in to watch her open it.

Then Olivia gave him such a sweet hug:

I also got my Icelandic Knitting book in the mail and had to start on a scarf pattern in it. I usually get bored with scarf patterns, but this is lace and is really fun so far. Part of it is that I am using this incredible yarn: Filatura Di Crosa Superior. It’s mostly cashmere with some silk and merino wool blended in. It is so soft and light – ethereal (there’s a word I don’t get to use every day.) It is amazing. It is a laceweight and so light that the knitting does go kinda slowly, but that’s ok. It’s so nice to work with. I actually bought it from Knit Unto Others when I was still in Arkansas. I fortunately got it on sale there, and I was always waiting for the right project for it. I think I found it. This yarn is so light and lacy that my iphone can’t focus on it properly. Really! I have tried multiple shots with no luck. I need to get the light just right. Either that or break out my regular camera!

And finally – Davey asks so many random questions. I love to hear what he is going to ask next. This morning, very first thing, I heard him ask David: “Daddy who was your best friend when you were a kid?” I don’t know why he thought of it very first thing, but I liked hearing his sweet voice asking the question!
